


V4.0
11 ft Drywall Hoist with Tilting Action
8937732
Visit www.princessauto.com for more information
7
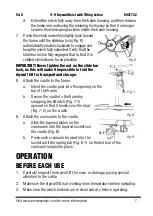
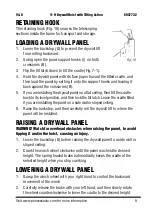
d. Extend the winch fully away from the frame housing, and then release
the brake arm and swing the retaining hook away so that it no longer
secures the telescoping sections inside the frame housing.
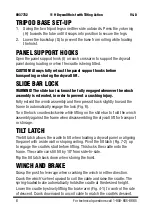
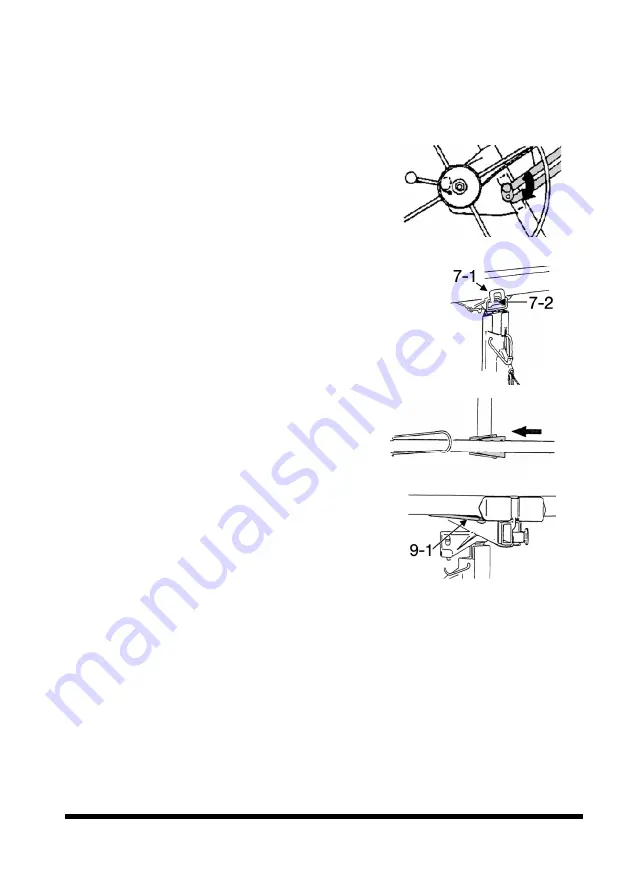
7. Press the winch assembly slightly back toward
the frame until the slide bar lock (Fig. 6)
automatically rotates clockwise to engage and
keep the winch fully extended. Verify that the
slide bar lock is fully engaged, that is, that it is
rotated clockwise as far as possible.
IMPORTANT! Never tighten the nut on the slide bar
lock, as this will make it impossible to fold the
drywall lift for transport and storage.
8. Attach the cradle to the frame.
a. Insert the cradle post into the opening on the
top of the frame.
b. Secure the cradle to the frame by
snapping the tilt latch (Fig. 7-1)
upward so that it hooks over the stud
(Fig. 7-2) on the cradle.
9. Attach the crossarms to the cradle.
a. Slide the tapered plates on the
crossarms into the tapered sockets on
the cradle (Fig. 8).
b. Press each crossarm forward into the
socket until the spring tab (Fig. 9-1) on the bottom of the
crossarm snaps into place.
OPERATION
BEFORE EACH USE
1. Carefully inspect the drywall lift for wear or damage, paying special
attention to the cable.
2. Make sure the drywall lift is at working room temperature before operating.
3. Make sure the winch brake drum is clean and dry before operating.
Fig. 6
Fig. 7
Fig. 8
Fig. 9


