


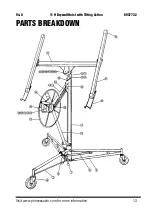
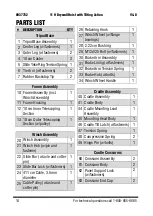


V4.0
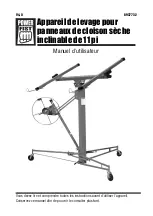
11 ft Drywall Hoist with Tilting Action
8937732
Visit www.princessauto.com for more information
9
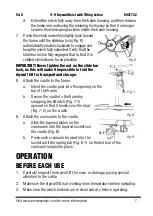
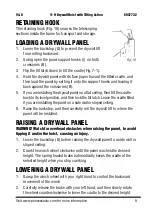
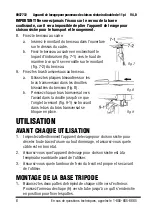
RETAINING HOOK
The retaining hook (Fig. 10) secures the telescoping
sections inside the frame for transport and storage.
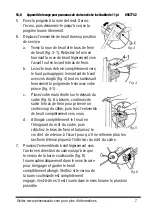
LOADING A DRYWALL PANEL
1. Lower the backstop (G) to prevent the drywall lift
from rolling backward.
2. Swing open the panel support hooks (I) on both
crossarms (B).
3. Flip the tilt latch down to tilt the cradle (Fig. 7-1).
4. Hold the drywall panel with its face paper toward the tilted cradle, and
then load the panel by setting it onto the support hooks and leaning it
back against the crossarms (B).
5. If you are installing the drywall panel on a flat ceiling, then tilt the cradle
back to its level position, and then lock the tilt latch. Leave the cradle tilted
if you are installing the panel on a side wall or sloped ceiling.
6. Raise the backstop, and then carefully roll the drywall lift to where the
panel will be installed.
RAISING A DRYWALL PANEL
WARNING! Watch for overhead obstacles when raising the panel, to avoid
tipping it and/or the hoist, causing an injury.
1. Lower the backstop (G) before raising the drywall panel to a side wall or
sloped ceiling.
2. Crank the winch wheel clockwise until the panel reaches the desired
height. The spring loaded brake automatically keeps the cradle at the
selected height when you stop cranking.
LOWERING A DRYWALL PANEL
1. Grasp the winch wheel with your right hand to control the backward
movement of the winch.
2. Carefully release the brake with your left hand, and then slowly rotate
the wheel counterclockwise to lower the cradle to the desired height.
Fig. 10


