background image


14 


Installing accessories 

– cont’d 

 
NOTES:


a) Make sure the correct collet is used for the 
accessory. If collet is too large, replace the 
collet with the next smaller size. 
b) Insert accessory at least 

3

/

4

" into the collet.  

 
5. 

Press the spindle lock button and engage it 
in the spindle. While holding the spindle 
lock button down, hand-tighten the collet by 
turning it clockwise. 

NOTE:

 Do not use pliers to tighten the 

collet nut. Use the small wrench (4) 
supplied. Over tightening will cause 
damage to the tool.  
 

6. 

Pull on the accessory to ensure it is 
securely in place.


WARNING:

 When using any new 

accessory for the first time, particularly wire 
wheels, bristle brushes and grinding stones, run 
the tool at full speed for one minute to remove 
any loose wires, bristles or stone particles. 

During this initial run-up, always wear a face 
shield and make sure you are NOT in line 
with the rotating accessory to avoid injury 
caused by flying debris. 


SELECTING PROPER SPEEDS


Different speeds are required depending upon 
the type of operation being performed. The 
following chart outlines those basic speeds:


For safety reasons, the operator must read 
the sections of this Owner’s Manual entitled 
"GENERAL SAFETY WARNINGS", "POWER 
TOOL SAFETY", "SPECIFIC SAFETY 
RULES", "EXTENSION CORD SAFETY" and 
"SYMBOLS" before using this rotary tool. 

 
Verify the following every time the rotary 
tool is used: 
 
1. 

Safety glasses, safety goggles, or face 
shield are being worn. 

2. 

Accessory is in good condition and not 
damaged in any way. 

3. 

Workpiece is properly secured.   


Failure to observe these safety rules will 
significantly increase the risk of injury. 


WARNING 

OPERATION 

SPEED 

Cutting metal 

5

–MAX 

Sanding wood 

5

–MAX 

Cutting hard metal 

5

–MAX 

Engraving metal 

4

–5 

De-burring 

4

–5 

Drilling holes 

4

–5 

Removing rust 

3

–4 

Sharpening 

3

–4 

Polishing 

1

–2 


ASSEMBLY AND OPERATING 

Fig. 4  


Summary of Contents for JD3315U

Page 1: ...Hz AC Amperes 1 2 A RPM 10 000 35 000 RPM no load Collets 3 32 1 8 Weight 1 lb 8 oz 0 67 kg Need Assistance Call us on our toll free customer support line 1 866 349 8665 Monday through Friday 9am 5pm...

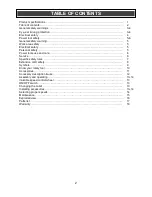
Page 2: ...sonal safety 5 Power tools use and care 6 Service 6 Specific safety rules 7 Extension cord safety 8 Symbols 9 Know your rotary tool 10 Accessories 11 Accessory description use 12 Assembly and operatin...

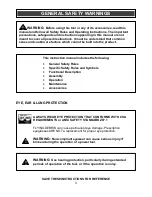
Page 3: ...t eyewear can cause serious injury if broken during the operation of a power tool WARNING Use hearing protection particularly during extended periods of operation of the tool or if the operation is no...

Page 4: ...r The level of risk from exposure to these chemicals varies according to how often this type of work is performed In order to reduce exposure to these chemicals work in a well ventilated area and use...

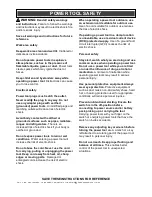
Page 5: ...en operating a power tool outdoors use an extension cord suitable for outdoor use Use of a cord suitable for outdoor use reduces the risk of electric shock If operating a power tool in a damp location...

Page 6: ...of starting the power tool accidentally Store idle power tools out of the reach of children and do not allow persons unfamiliar with the power tool or these instructions to operate the power tool Powe...

Page 7: ...faces like concrete stone etc Protruding cutting bit may cause the tool to jump Always wear safety goggles and dust mask Use only in well ventilated area Using personal safety devices and working in a...

Page 8: ...a 15A time delay fuse or circuit breaker Before connecting the power tool to the power source make sure the switch is in the OFF position and the power source is the same as indicated on the nameplat...

Page 9: ...tertight construction Protective grounding at grounding terminal Class I tools Revolutions or reciprocations per minute Diameter Off position Directional arrow Warning symbol Wear safety glasses Wear...

Page 10: ...10 KNOW YOUR ROTARY TOOL Air vents Speed control wheel Hanging loop Spindle lock button Collet nut Umbrella nut ON OFF switch Motor brushes...

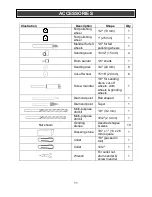
Page 11: ...3 4 20 mm 8 Cut off wheel 15 16 24 mm 6 Screw mandrel 1 8 for sanding discs cut off wheels cloth wheels grinding wheels 1 Diamond point Ball shaped 1 Diamond point Taper 1 Multi purpose drill bit 1 8...

Page 12: ...Sanding band For rough shaping and smoothing wood and fibreglass removing rust from metal surfaces shaping rubber surfaces Sanding bands are easily replaceable on drums Drum sander Ideal for rough sh...

Page 13: ...tool switch OFF and remove the plug from the power source 2 Depress the spindle lock button 1 and slowly turn the collet nut 2 until the spindle lock button locks the spindle 3 Fig 3 3 While holding t...

Page 14: ...r a face shield and make sure you are NOT in line with the rotating accessory to avoid injury caused by flying debris SELECTING PROPER SPEEDS Different speeds are required depending upon the type of o...

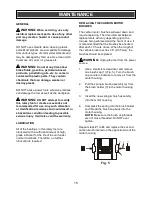
Page 15: ...bricated with a sufficient amount of high grade lubricant for the life of the unit under normal conditions Therefore no further lubrication is required REPLACING THE CARBON MOTOR BRUSHES The carbon mo...

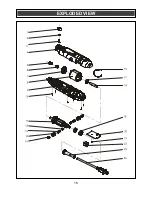
Page 16: ...16 EXPLODED VIEW...

Page 17: ...50040004 Lock pin spring 1 3 2040160105 Lock pin 1 4 3011160019 Housing upper 1 5 2040190009 Collet nut 1 6 2040280001 Collet 1 8 1 7 3150100012 Accessory collar 1 8 1020160003 Stator 1 9 3011160019 H...

Page 18: ...costs This warranty does give you specific legal rights and you may have other rights which vary from province to province Be careful tools are dangerous if improperly used or maintained Seller s empl...

Reviews: