background image

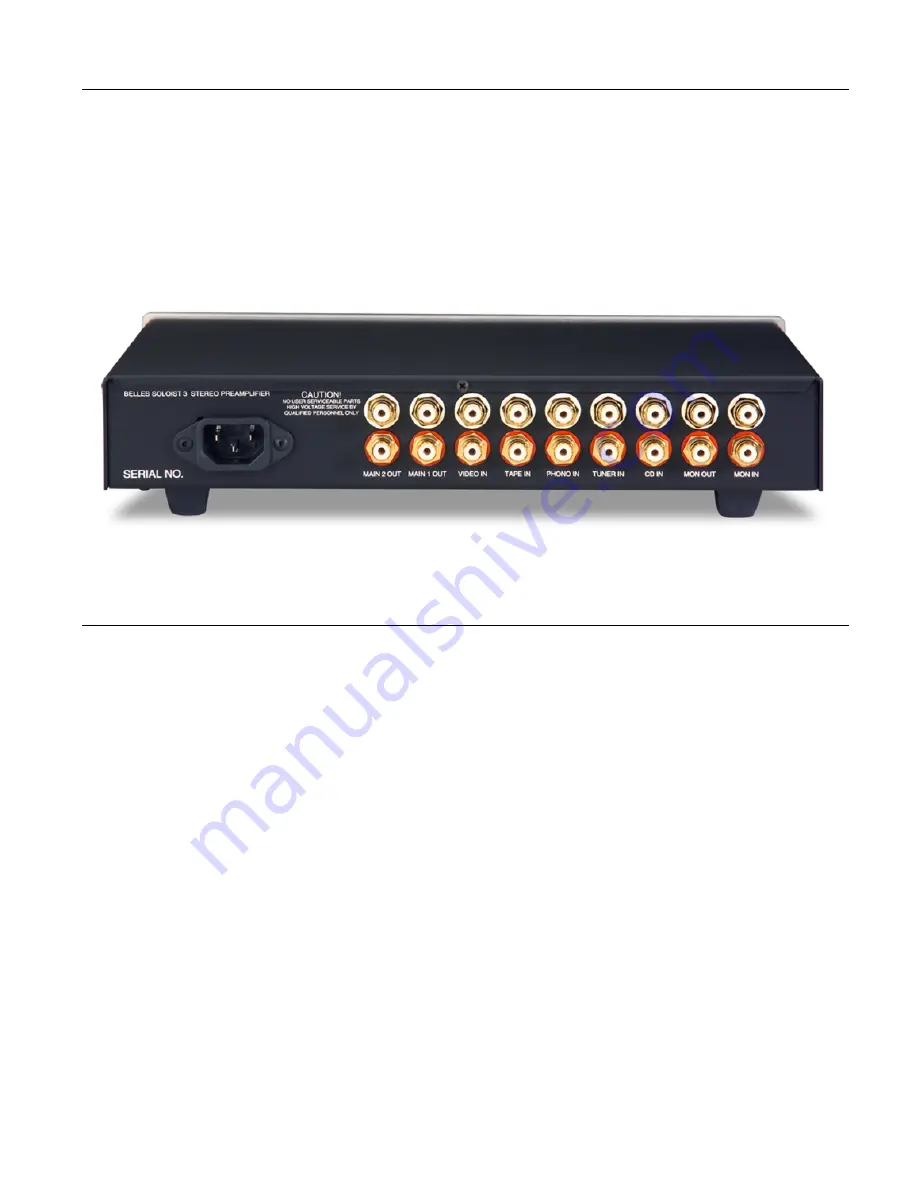
Rear Panel Inputs and Outputs

The Soloist 3 rear panel inputs and outputs include:

AC Power Cord Input

: used to connect the AC power cord.

Main Output

: unbalanced outputs used to connect the preamplifier output to your 

power amplifier input.

Various Inputs

: used to connect your various source components. The Soloist 3 

has inputs for CD, Tape, Video, Tuner, and (1) Auxiliary components. Use the Input 
selection control on the Remote Control to listen to a particular source component.

Installing the Soloist 3

Perform the following steps to install the Soloist 3 Preamplifier:

1.

Select a location for the preamplifier. Make sure the selected location is stable 
enough to support the preamplifier.

2.

Before you make any connections, make sure your power amplifier and source(s) 
are turned off and unplugged.

3.

Connect the preamplifier outputs to the inputs of your power amplifier.

4.

Connect the outputs of your source(s) to the appropriate inputs of the preamplifier.

5.

Plug in the power cords for your amplifier and source(s).

6.

Plug in the power cord for the preamplifier.

7.

Switch on the power for your amplifier and source(s). You may use the remote 
control by pressing the power button on the remote control

You are now ready to operate the preamplifier.

2

Summary of Contents for belles Soloist 3

Page 1: ...Power Modules Stereo Preamplifier Install Manual ...

Page 2: ......

Page 3: ...nit operate the unit care and maintain the unit Unpacking the Unit When you receive your unit carefully inspect the carton for any damage Any obvious dents or scuff marks should alert you to the possibility of damage to the contents If any external damage to the carton is found note the location in relation to the orientation of the pream plifier as it is removed from the carton Open the top flaps...

Page 4: ...ng steps to install the Soloist 3 Preamplifier 1 Select a location for the preamplifier Make sure the selected location is stable enough to support the preamplifier 2 Before you make any connections make sure your power amplifier and source s are turned off and unplugged 3 Connect the preamplifier outputs to the inputs of your power amplifier 4 Connect the outputs of your source s to the appropria...

Page 5: ...nnel Volume Control used to control the volume of the audio signal This control can be changed using the Remote Control unit Remote Control The Soloist 3 remote control includes 1 Power Button used to enable and disable power to the remote control logic circuitry The preamplifier can be operated with the logic circuitry disabled 2 Mute Button used to mute the audio signal to the power amplifier 3 ...

Page 6: ... Main Outputs bypassing the Soloist 3 Specifications The specifications for the Soloist 3 preamplifier are as follows Noise over 100 dB A weighted Distortion THD and IM less than 0 001 Power Requirements 100 120 VAC or 200 240 AC 50 60Hz Inputs 5 pair unbalanced stereo inputs plus 1 pair monitor input Outputs 1 pair unbalanced stereo main output Input Impedance 50 000 ohms Controls Volume and Bala...

Page 7: ...anufacturer neither assumes nor authorizes any person to assume for it any other obligation or liability in connection with the sale of this product This warranty is not transferable except by writ ten authorization from the manufacturer In order to qualify under the terms of the above warranty all items must be returned to the appropriate factory service depot with all shipping charges prepaid In...

Reviews: