Handlebar Adjustment
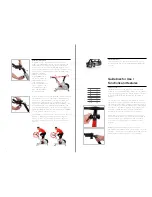
Begin with the top of the handlebar at relatively the same
height or just slightly higher than the top of the saddle (dotted
horizontal line A in the drawing below) and at a neutral fore/
aft position (see dotted vertical line B in drawing below). If your
knees touch the handlebars or if you experience back discomfort
while pedalling for extended periods of time, the height of the
handlebars should be
adjusted. First, dismount
the power
BIKE
™. Next,
turn the front adjustment
knob (located at the top
of the column which
holds the handlebar shaft)
counter clockwise, slide
the handlebar post up or
down, and then retighten
the adjustment knob.
Next, the horizontal position of the handlebar should be adjusted.
If the handlebar is too close to the saddle, your breathing may
feel restricted; if the handlebar is too far from the saddle, you
may experience back discomfort. To adjust the horizontal
position of the handlebar, first dismount the power
BIKE
. Loosen
the adjustment knob, located underneath the handlebar, and
move the handlebars back or forward to your preferred position.
Tighten the adjustment knob firmly and remount the power
BIKE
to check that the positioning is correct.
The handlebar offers a wide variety of hand positions for personal
preferences. Changing your hand position can change the
angle of your back, neck, and arms. To minimize the stress on
your muscles during your workouts, change your hand position
frequently.
Pedals adjustment
The pedals feature toe-clips on one side and SPD cleats on
the opposite side. The toe-clip straps should be snug but not
too tight.
A
B
Guidelines for Use /
Functions and features
Vibration Frequency
The vibration function can be turned on or off with the knob
located on the left of the handlebar column. To turn the vibrations
on, turn the left knob towards you - toward the back of the bike.
To turn off the vibrations, turn the knob towards the front of
the bike.
The frequency of the vibration is determined by the revolving
speed. The faster you pedal the higher the vibration frequency.
The ratio between the vibration frequency and a pedal stroke is
1:18. For example, if you pedal at 90 rotations per minute (RPM),
the frequency of the vibration will be 27 Hz (27 vibrations per
second). At 120 RPM the vibration frequency will be 36 Hz
(36 vibrations per second). See table for more examples.
Higher frequencies are not necessarily better or more intense.
We advise that you pedal at your personal preferred RPM with
variations up and down to simulate performance as much
as possible See programs chapter for examples of training
programs.
IMPORTANT: Always start and end your session on the
power
BIKE
with the vibration turned off and resistance set to low.
This helps to prepare you for your training session and also helps
to maintain the mechanical operation of the power
BIKE
.
RPM
Freq (Hz)
60
18
70
21
80
24
90
27
100
30
110
33
120
36
130
39
4
5


