background image


POWC2060 

EN


Copyright © 2021 VARO 

P a g e

 | 

5


www.varo.com 


Keep hands away from moving parts and on the top surface of the work piece. Do not 
place hands below work surface while saw is operating. 

7  ASSEMBLY 

Always check that the power supply corresponds to the voltage on the rating name plate. 
To avoid accidental start, check to make sure lock-on button is not engaged prior to plugging 
in tool and you finger is not touching the ON/OFF switch trigger (3). 

7.1 

Install or remove the saw blade (Fig 1) 


Unplug the power cord first. 


Rotate the Quick-release blade clamp (2) anticlockwise with hand. 


At the same time push blade (8) to the deepest position, then release the quick-release 
blade clamp (2). Make sure it is securely fastened. 


When removing the saw blade (8), follow the above procedure in reverse order. 

Before plugging in power cord, always pull on the blade (8) to make sure it 
is securely locked in the clamp. Failure to do so may result in serious 
injury. 

8  OPERATION 

8.1 

Switch on/off (3) 


Connect the plug to the power supply. 


Turn on or turn off the tool by squeezing or releasing the ON/OFF switch trigger (3).  


For continuous operation just press the lock-on button (4) on the left side of the handle. 
The lock-on button can be release by pressing the switch trigger again. 

8.2 

To change position of the pivot shoe assembly (Fig 2) 


Unplug your saw. 

WARNING: Failure to unplug your saw could result in accidental starting 
causing serious injury. 


Loosen the both cap screws (6) in the gear frame with hex key. 


Reposition pivot shoe (1) assembly in or out. 


Retighten both cap screws (6) securely. Do not over tighten cap screws (8). 


Remove hex key. 

WARNING: Cutting into electrical wiring in walls can cause blade, blade 
clamp, and saw bar assembly to become electrically live. Do not touch 
metal parts when cutting into a wall; grasp only the insulated gripping 
surfaces provided by the tool. Make sure hidden electrical wiring, water 
pipes, and mechanical hazards are not in the blade path when cutting into a 
wall. 


Summary of Contents for POWC2060

Page 1: ... 5 4 Power tool use and care 4 5 5 Service 4 6 MACHINE SPECIFIC SAFETY WARNINGS 4 7 ASSEMBLY 5 7 1 Install or remove the saw blade Fig 1 5 8 OPERATION 5 8 1 Switch on off 3 5 8 2 To change position of the pivot shoe assembly Fig 2 5 8 3 General cutting 6 8 4 Plunge cutting 6 8 5 Metal cutting 6 9 CLEANING AND MAINTENANCE 6 9 1 Cleaning 6 10 TECHNICAL DETAILS 7 11 NOISE 7 12 WARRANTY 8 13 ENVIRONME...

Page 2: ...witch trigger 4 Lock on button 5 Main handle 6 Cap screws 7 Grip 8 Saw blade 3 PACKAGE CONTENT LIST Remove all packaging materials Remove remaining packing and package inserts if included Check that the package contents are complete Check the appliance the power cord the power plug and all accessories for transportation damage Keep the packing materials as far as possible till the end of the warra...

Page 3: ...at the power supply corresponds to the voltage on the rating plate Power tool plugs must match the outlet Never modify the plug in any way Do not use adapter plugs with earthed power tools Unmodified plugs and matching outlets will reduce the risk of an electric shock Avoid body contact with earthed surfaces such as pipes radiators kitchen ranges and refrigerators There is an increased risk of an ...

Page 4: ... tool accidentally Store power tools when not in use out of the reach of children and do not allow people who are not familiar with the power tool or these instructions to operate it Power tools are potentially dangerous in the hands of untrained users Maintain power tools Check for misalignment or jammed moving parts breakages or any other feature that might affect the operation of the power tool...

Page 5: ...in the clamp Failure to do so may result in serious injury 8 OPERATION 8 1 Switch on off 3 Connect the plug to the power supply Turn on or turn off the tool by squeezing or releasing the ON OFF switch trigger 3 For continuous operation just press the lock on button 4 on the left side of the handle The lock on button can be release by pressing the switch trigger again 8 2 To change position of the ...

Page 6: ... that point with saw parallel to the line of cut slowing lower the saw until the bottom edge of the shoe rests on the work piece and the blade not touching the work piece Start the saw and allow it to attain full speed With the saw resting on the shoe slowly tilt the saw forward to lower the blade onto the cut line Continue this motion until the saw blade is perpendicular to the work piece 8 5 Met...

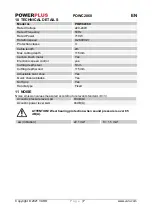
Page 7: ...pth 115mm Carbon brush motor Yes Electronic speed control yes Cutting depth steel 5mm Cutting depth wood 115mm Adjustable pivot shoe Yes Quick change blades Yes Soft grip Yes Handle type Fixed 11 NOISE Noise emission values measured according to relevant standard K 3 Acoustic pressure level LpA 83dB A Acoustic power level LwA 94dB A ATTENTION Wear hearing protection when sound pressure is over 85 ...

Page 8: ...ust penetration intentional damage on purpose or by gross carelessness inappropriate usage use for purposes for which the device is not suitable incompetent usage e g not following the instructions given in the manual inexpert assembly lightning strike erroneus net voltage This list is not exhaustive Acceptance of claims under warranty can never lead to the prolongation of the warranty period nor ...

Page 9: ...Any unauthorized modification of the apparatus voids this declaration European Directives including if applicable their amendments up to the date of signature 2011 65 EU 2006 42 EC 2014 30 EU European harmonized standards including if applicable their amendments up to the date of signature EN62841 1 2015 EN62841 2 11 2016 EN55014 1 2017 EN55014 2 2015 EN IEC 61000 3 2 2019 EN61000 3 3 2013 Keeper ...

Reviews: