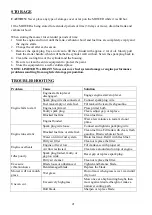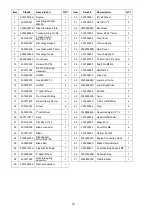
19
Change the oil according to the Recommended Maintenance Schedule. Change the oil when the
engine is warm. This will allow for complete drainage. Change oil more often if operating under
heavy load or high ambient temperatures. It is also necessary to drain the oil from the crankcase if it
has become contaminated with water or dirt. The oil capacity of the engine is 16.9 fl.oz. Add oil when
the oil level is low. For proper type and weight of oil refer to “GAS AND OIL FILL-UP” portion of
the “OPERATION” section.
To refill the crankcase with oil, follow these steps:
1.
Make sure the lawn mower is on a level surface. Tilting the lawn mower to assist in filling will
cause oil to flow into engine areas and will cause damage. Keep lawn mower level!
2.
Remove the dipstick from the engine.
3.
Using a funnel or appropriate dispenser, add the correct amount of oil (16.9 fl.oz) into the
crankcase.
4.
Reinstall dipstick.
NOTE:
Never dispose of used motor oil in the trash or down a drain. Please call a local recycling
center or auto garage to arrange oil disposal.
AIR CLEANER MAINTENANCE
Routine maintenance of the air cleaner helps maintain proper airflow to the carburetor. Occasionally
check that the air cleaner is free of excessive dirt. Refer to Recommended Maintenance Schedule. For
air cleaner detail:
1.
Open the air cleaner cover.
2.
Remove the sponge-like element from the casing.
3.
Wipe the dirt from inside the empty air cleaner casing.
4.
Wash the sponge-like element in household detergent and warm water. Small amount of oil in the
element is normal and necessary for the engine to work properly.
5.
If necessary, replace the paper element.
6.
Reinstall the sponge-like element in the air cleaner casing and reinstall the cover.
CAUTION:
running the engine with dirty, damaged or missing air cleaner element will cause the
engine to wear out prematurely.
SPARK PLUG MAINTENANCE
The spark plug is important for proper engine operation. A good spark plug should be intact, free of
deposits, and properly gapped. Refer to Recommended Maintenance Schedule. To inspect the spark
plug:
1.
Remove spark plug boot. Be careful not to tear insulation or wire.
2.
Unscrew the spark plug from the engine using the spark plug wrench provided. There is limited
space for the wrench to turn. Use both rows of holes in the spark plug wrench to gain leverage to
loosen the plug.
3.
Visually inspect the spark plug for cracks or excessive electrode wear. Replace as necessary.
4.
Measure the plug gap with a wire gauge. The gap should be 0.7 to 0.8 mm (0.028-0.031 in).
5.
If re-using the spark plug, use a wire brush to clean any dirt from around the spark plug base then
re-gap the spark plug.
6.
Screw the spark plug back into the spark plug hole using the spark plug wrench. Do not
over-tighten spark plug. Recommended tightening of spark plug is ½ to ¾ of a turn after spark
plug gasket contacts spark plug hole. Reinstall the spark plug boot.
Summary of Contents for DB2194PR
Page 2: ...2 ...
Page 22: ...22 EXPLODED VIEW AND PARTS LIST ...
Page 24: ...24 ENGINE EXPLODE VIEW AND PART LIST ...
Page 46: ...46 VUE ÉCLATÉE ET LISTE DES PIÈCES ...
Page 48: ...48 VUE ÉCLATÉE DU MOTEUR ET LISTE DES PIÈCES ...
Page 70: ...70 VISTA DETALLADA Y LISTA DE PIEZAS ...
Page 72: ...72 Vista detallada del motor y lista de piezas ...


