Admiral 38C Scrubber PB# 4100055UM Rev.* 08/10
PowerBoss, Inc. Copyright 2010
Page 83
Maintenance and Service
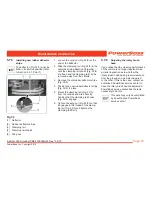
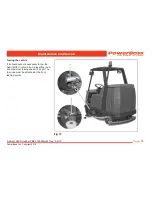
The tightening torque for the
wheel nuts (Fig. 36/1) is 140 Nm.
Changing the rear wheels
• To change the rear wheels, the Admiral
38C must be jacked up on the right or
left side.
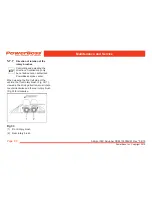
• The contact points for the jack (lifting
force: 2.0 t) are on the vehicle frame in
front of the rear wheels.
Removing the rear wheels
• Remove the wheel nuts (Fig. 36/1).
• Remove the wheel.
Mounting the rear wheels
• Install the wheel in place.
• Screw on and tighten the wheel nuts
(Fig. 36/1).
5.10
Electrical installation
5.10.1
Red control lamps
Refer to Section 3.2.2.
5.10.2
Error codes
Refer to Sections 3.5.1 and 3.2.2.
5.10.3
Fuses
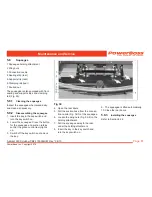
The fuses are located in the electronic
system underneath the seat console. Take
hold of the seat console by the handle and
pivot it up.
Always disconnect the battery
plug before starting any work on
the electrical installations.
All the lifting elements and brush motors in
the Admiral 38C are equipped with safety
fuses and electronic fuses.
Safety fuses are installed in:
• The suction turbines (35A high current
fuse)
• The water pump and relief valve for the
water supply (10A plug-in fuse)
• The hydraulic motor (160A current
limiter in the drive control) and
• The working lights and flashing beacon,
the key switch and horn (10 A plug-in
fuse (F51)).
When these fuses blow, the
vehicle is out of operation. This is
not indicated by an alarm signal
on the operating panel!
5.10.4
Drive control relay
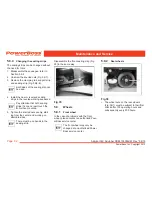
The drive control is located in the left hand
part of the driver’s cab underneath the foot
plate.
Always disconnect the battery
plug before starting any work on
the electrical installations.
• Loosen the screws in the foot plate and
remove the foot plate.
• Relay K3 (main contactor) is mounted
in front of the drive control.
• Replace a defect relay with a new one.
• Replace the foot plate and fix by means
of the screws.


