PRINTED IN TAIWAN A03-3713506-001
4 MODES OF OPERATION
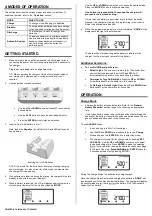
This section describes the various modes and when to use them. To
enable each mode, refer to the “
Operation
” section.
MODE
WHEN TO USE
Charge
To charge or to add energy to batteries.
Break-In
To active batteries that have been in storage
for an extended time (longer than 6 months).
Discharge
To discharge or remove all energy from
batteries.
Refresh & Analyze
To analyze battery for its available capacity.
Used to determine the health of the battery
based on the actual amount of capacity it
can hold. Also used for batteries not
performing well.
GETTING STARTED
1.
Make sure there are no batteries inserted into the charger prior to
connecting the power. Connect the power adapter DC connector to
the charger.
Plug the power adapter into a compatible outlet.
TIP: When operating the charger outside of its intended region of
use, simply use a plug-adapter. A voltage transformer is not
required.
2.
Use the buttons to make selections.
Use the
UP
and
DOWN
arrow buttons
▲▼ to choose the
desired Mode.
Use the
SLOT
button to go to the desired battery slot.
Press the
ENTER
button to make a selection.
3.
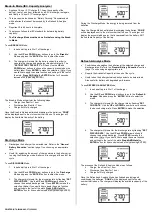
Insert a AA or AAA battery in Slot 1.
Note: Insert the
Negative (-)
end first for AA and AAA batteries as
shown below.
Inserting AA / AAA Batteries
NOTE: It is normal for the batteries to become hot during charging
and discharging. It is also normal for a faint noise to emanate from
the charger during operation.
4.
If no batteries are inserted during the startup, the charger will go into
standby mode with the screen turned off.
5.
When a battery is inserted, the LCD will display an arrow below the
slot
number and prompt for the mode by flashing “
MODE
.
”
Use the
UP
and
DOWN
arrow buttons to choose the desired mode.
Press the
“
ENTER
” button to make the selection.
If no button is pressed within 10 seconds, the charger will
proceed to the last used setting.
If more than one battery is inserted at a time (without the button
pressed), the charger will prompt for programming in the order in
which the batteries were inserted.
6.
When the programmed mode for a slot is completed,
“
DONE
” will be
displayed to the right of the slot number.
The data will be stored as long as the battery is inserted in the
charger. It will be lost upon removal of the battery.
Additional Selections:
To Turn On/Off Backlight Screen:
Default Light:
The screen will remain lit for 15 seconds from
your last button press and then it will
Turn Off
. It will
automatically turn back On once any button is pressed.
Permanently Turn On Backlight:
Press the
UP
and
DOWN
Arrow Buttons
▲▼ at the same time for 2 seconds.
To Go Back to Default Light:
Press the
UP
and
DOWN
Arrow
Buttons
▲▼ at the same time for 2 seconds.
OPERATION
Charge Mode
Charges the battery at the selected rate.
Refer to the “
General
Battery Education
” section (
page 1
) on choosing an appropriate
rate.
Useful when battery needs to be recharged without determining the
capacity of the battery. It should be used on batteries known to be in
good condition and have been in continuous use.
To use
CHARGE
Mode:
1.
Insert a battery into Slot 1 of the charger.
2.
Use the
UP
and
DOWN
arrow buttons to go to the ‘
Charge
’
Mode and press the “
ENTER
” button to select the mode.
3.
The charger will prompt for the charge
rate by flashing “
SET
CHG RATE
.” Use the
UP
and
DOWN
arrow buttons to select
the desired charge rate. Press
ENTER
to make the selection.
(
Note
: If you would like to apply the same function and settings
to the rest of the slots,
Press AND Hold
the
ENTER
button for
2 seconds instead of only pressing ENTER).
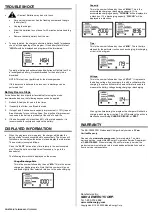
During the Charge Mode, the batteries are being charged.
Once the Charge Mode has finished charging the batteries,
“
DONE
” will
be displayed next to the slot number that is done. The charger will display
the accumulated energy that is put into the battery, NOT the Available
Capacity of the battery.


