background image

Use the chain adjustment screw on the chain 

saw to adjust the chain tension.

9

1

5

CABLE INSTALLATION

1. Using a gloved hand, firmly press the clutch handle then turn counter-clockwise to disengage 

    the clutch. This will let the spool free wheel. Fully unwind the cable.
2. Pass the end of the cable through the fair lead then the hole in the spool. Wind the cable 

    manually. 


TIP :

 For added safety, wrap a few coils of cable around the spool with duct-tape.

3. Turn the clutch handle clockwise to re connect the clutch.


TIP :

 Make sure the clutch shaft is connected and fully engaged to the drive sprocket.

4. Turn on the chainsaw to wind up the remaining cable back to the spool.


TIP :

 Attach a fairly heavy weight at the other end of the cable to keep it taut. This 

                  is to make sure the cable winds tightly on the spool.
5. To prevent the cable from creating a “bird’s nest” when unspooling, use a bungee cord to 

    maintain a constant pressure on the brake.

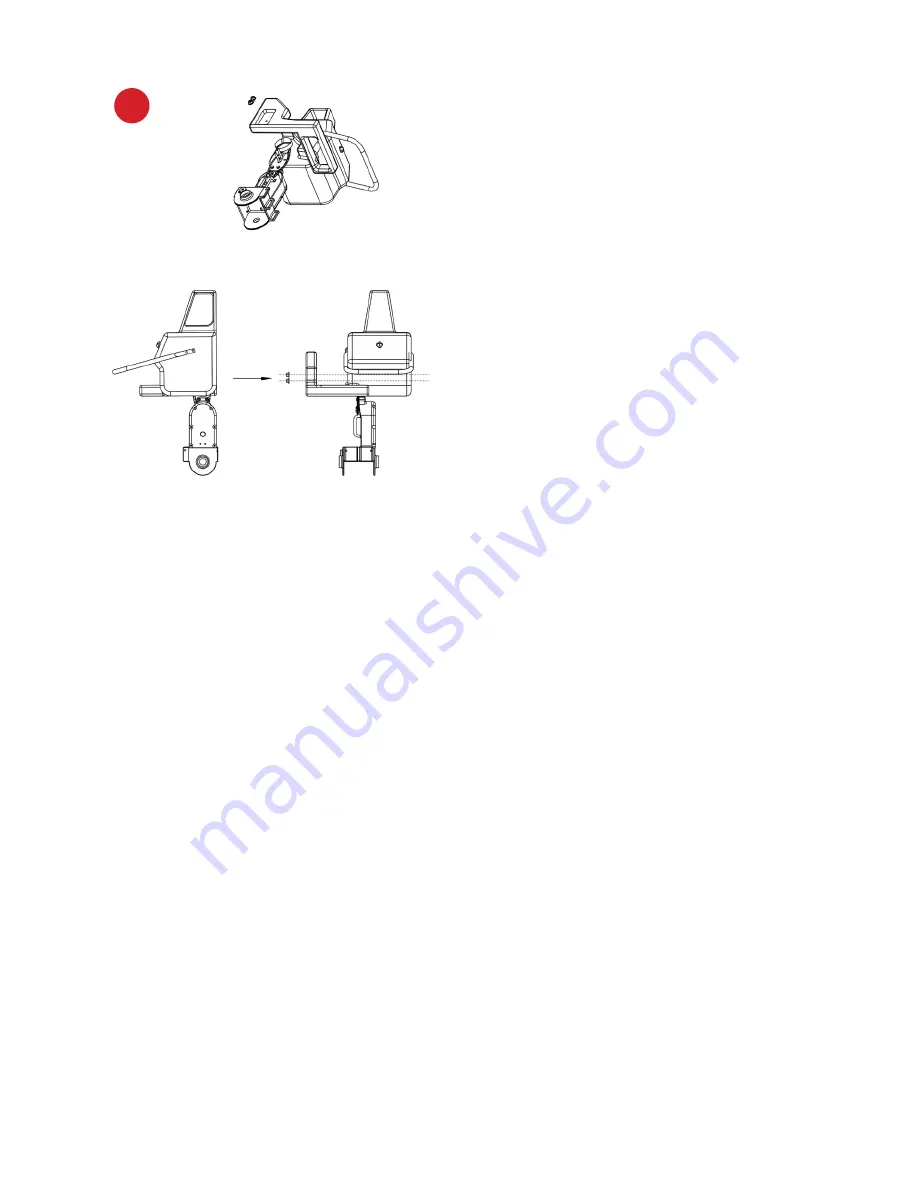
BRAKE HANDLE INSTALLATION

•   Level the brake handle attachment bolt with the brake handle by pulling it back using a 

    5/16” Hex key.

•   Slip the brake handle on top of the brake drum. Align the attachment bolt with the 

    threaded hole on the Powerhouse Chainsaw Winch. Tighten the bolt with a hex key while 

    tightly holding the brake-handle.


TIP : 

To avoid having a stiff brake handle, do not over tighten the attachment bolt. 

Summary of Contents for xm-100

Page 1: ...OWNER S MANUAL...

Page 2: ...larly Consult your chain saw owners manual or check with your local chainsaw dealer for the best way to care for your chainsaw Servicing maintaining your Powerhouse Winch For optimal performance and y...

Page 3: ...your chainsaw This prevents sudden jerking on the cable that could break the shear pins of your Powerhouse Chainsaw Winch This can cause the spool to free wheel If your load comes up against an obsta...

Page 4: ...n binder in your anchor set up This will let you to release the cable tension easily WARNING Always engage the hand brake before releasing the clutch under load Use a bungee cord on the brake handle t...

Page 5: ...Chainsaw Winch the load will generate an increase in tension on the cable and will result in a stronger anchoring of the Peavey Hook on the stump You can also use a tree saver belt to anchor the Powe...

Page 6: ...hain saw using the supplied 3 screws TIP To make sure the screws stay tight we recommend using Loctite Slip the assembled adaptor onto the input shaft of the Powerhouse Chainsaw Winch Make sure that t...

Page 7: ...ws and washers attach the universal adaptor to the Powerhouse Chainsaw Winch Slip the rim sprocket onto the output shaft of the Powerhouse Chainsaw Winch Do not remove the orange cup washer Using the...

Page 8: ...the supplied cutter less chain around the sprocket of the chainsaw and the winch Attach the chain using the supplied connect ing link Hammer pins or attach spring clips to securely install side plate...

Page 9: ...o the drive sprocket 4 Turn on the chainsaw to wind up the remaining cable back to the spool TIP Attach a fairly heavy weight at the other end of the cable to keep it taut This is to make sure the cab...

Page 10: ...use it to break The amount of pressure is based on test results made using standard testing machine The testing machine applies direct tension to the product at a constant rate of speed The products u...

Page 11: ...ety Risks to life and property During coiling or winding of the cable onto the spool make sure that tightness of the layers is consistent all throughout the coiling or winding Do not coil a tight laye...

Page 12: ...12 POWERHOUSE XM 100 WINCH PARTS LIST 1 2 3 4 5 6 7 8 9 10 11 12 13 14 15 16 17 18 19 20 21 22 23 24 25 26 27 28 29 30 31 32 34 33 35 36 9 37 38 39 40 41...

Page 13: ...402 Bearing 2 10 B403A Main Handle 11 B403 Drum Housing c w Gearbox 1 casting 12 B404A Retainer Pins 2 13 B404 Cable Drum 14 E506 Bearing 15 E507 Bearing 16 E508 Bearing 17 E506A Oil Seal for Input Sh...

Page 14: ...ces such as power fluctuation and weather d Repair or attempted repair and alteration by unauthorized parties e Any damage to product due to shipment f Removal or installation of product g Use of part...

Page 15: ...imitation is not allowed by some states and so this limitation may not apply to you This warranty gives you specific legal right You may also have other rights that vary by state Sales outside the U S...

Page 16: ......

Reviews: