background image


www.powermaxfitness.net 

TABLE OF CONTENTS 

WARRANTY 

PRODUCT BRIEF 

SECURITY PRECAUTIONS AND WARNING 

INSTALLATION INSTRUCTIONS 

USING INSTRUCTIONS 

ROUTINE MAINTENANCE AND INSTRUCTIONS 

14 


1 YEAR LIMITED WARRANTY 

PowerMax Fitness warrants to the original purchaser that this product is free from defects in material 
and workmanship when used for the purpose intended, under the conditions that it has been 
installed and operated in accordance with PowerMax Fitness's Owner's Manual. PowerMax Fitness's 
obligation under this warranty is limited to replacing or repairing, free of charge, any parts which 
may prove to be defective under normal home use. This warranty does not include any damage 
caused by improper operation, misuse or commercial application. From the date of purchase, the 
frame is warranted to be free from defects for 1(one) year*. 

 
Customer Care 
Phone: 

+91-8080-206-206 

Email:

 support@powermaxfitness.net 

Support / Complaint Generation:

 support.powermaxfitness.net 


This warranty is extended only to the original owner and is not transferable.  When ordering 
replacement parts please have the following information ready: 


1.


Owner's Manual 

2.


Model Number 

3.


Description of Parts 

4.


Part Number 

5.


Date of Purchase 


* Terms and Conditions Apply. For T&C visit 

www.powermaxfitness.net


Summary of Contents for TAC-585

Page 1: ...ser Manual OWNER S MANUAL IMPORTANT Read all instructions carefully before using this product Retain this owner s manual for future reference The specifications of this product may vary from this phot...

Page 2: ...limited to replacing or repairing free of charge any parts which may prove to be defective under normal home use This warranty does not include any damage caused by improper operation misuse or comme...

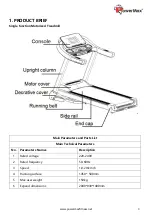
Page 3: ...ized Treadmill Main Parameters and Parts List Main Technical Parameters No Parameters Names Description 1 Rated voltage 220 240V 2 Rated frequency 50 60Hz 3 Speed 1 0 20 km h 4 Running surface 1450 58...

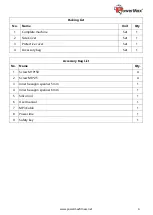
Page 4: ...2 Screw M8 25 4 3 Inner hexagon spanner 5mm 1 4 Inner hexagon spanner 6mm 1 5 Silicon oil 1 6 User manual 1 7 MP3 Cable 1 8 Power line 1 9 Safety key 1 Packing List No Name Unit Qty 1 Complete machin...

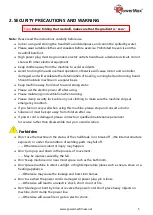
Page 5: ...eel not very well when using this machine please stop and consult a doctor Silicone oil must be kept away from children after use If power cord is damaged please contact our qualified maintenance pers...

Page 6: ...ds when not in use pull out the power plug from the socket The dust and moisture can age the insulation and result in leakage fire This appliance is not intended for use by persons including children...

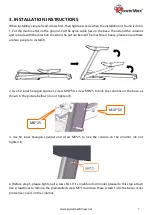
Page 7: ...please ensure there are two people to install it 2 Use 6 inner hexagon spanner screw M10 50 screw M8 25 to lock the columns on the base as shown in the picture bellow do not tighten it 3 Use 6 inner h...

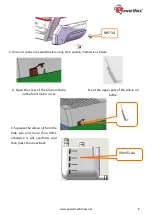
Page 8: ...admill method is as follow A Open the cover of the silicon oil tube on the front motor cover B Cut the upper part of the silicon oil bottle 90ml Scale C Squeeze the silicon oil from the hole site not...

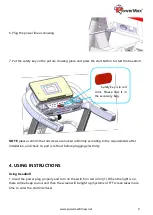
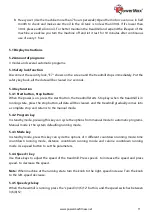
Page 9: ...tallation and check no part is left out before plugging electricity 4 USING INSTRUCTIONS Using treadmill 1 Insert the power plug properly and turn on the switch in red color 1 When the light is on the...

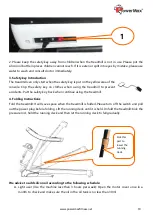
Page 10: ...vent accidents Put the safety key back when continue using the treadmill 4 Folding Instructions Fold the treadmill It will save space when the treadmill is folded Please turn off the switch and pull o...

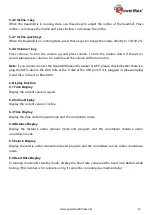
Page 11: ...mill starts Stop key when the treadmill is in running state press the stop button all data will be cleared and the treadmill gradually comes into a complete stop and returns to the manual mode 5 4 2 P...

Page 12: ...eck whether there is a plug the MP3 cable in the AUX hole or the U disk at the USB port If it is plugged in please unplug it and then connect to Bluetooth 6 Display function 6 1 Time Display Display t...

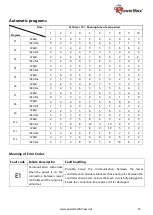
Page 13: ...1 1 0 P8 SPEED 2 4 4 4 5 6 8 8 6 2 INCLINE 1 1 4 4 4 5 5 4 3 2 P9 SPEED 2 4 5 5 6 5 6 3 3 2 INCLINE 3 5 3 4 2 3 4 2 3 2 P10 SPEED 2 5 7 5 8 6 5 2 4 3 INCLINE 1 5 6 8 12 9 10 9 5 3 P11 SPEED 2 5 6 7 8...

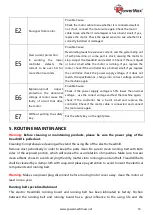
Page 14: ...upply voltage is 50 lower than normal voltage use the correct voltage and test the machine again check if the controller has a burnt smell and replace the controller Check if the motor cable is connec...

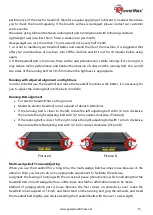
Page 15: ...ter it is necessary for you to adjust the running belt into the best condition Running Belt alignment Put electric treadmill flat on the ground Make the electric treadmill run at a speed of about 6 8k...

Page 16: ...lip the multi wedge belt by 80 after adjustment Please adjust the tightness of the multi wedge belt into the state that it could be flipped by 80 Step 3 Finally lock the motor base and install the fro...

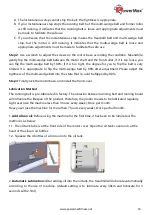
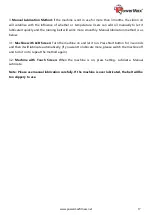
Page 17: ...anual lubrication method is as below 3 1 Machine with LCD Screen Turn the machine on and let it run Press Start button for 3 seconds and then it will lubricate automatically If you want to lubricate m...

Reviews: