Figure 3
5
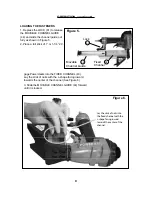
CONNECTING THE TOOL TO AN AIR SUPPLY
Your air tool is fully assembled when you receive
it. Before using it, attach the air line and desired
air system accessories. Be sure the air hose
is depressurized when installing or removing
adapters to the air line. To prevent misfi re, do not
connect air to a loaded nailer.
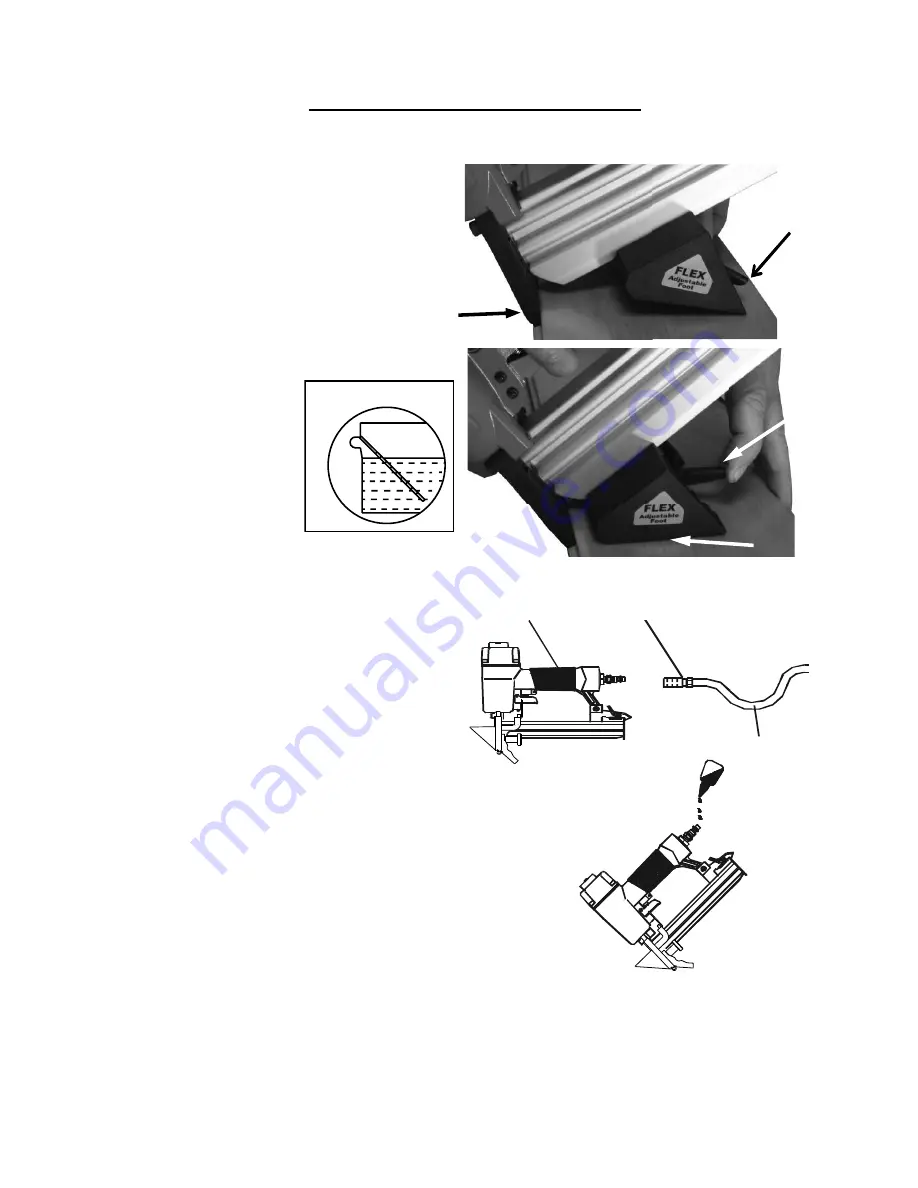
Figure 2
AIR HOSE
1. An automatic airline oilier is recommended but
oil may be added manually before every operation
or after about 8 hours of continuous use.
2. Place two (2) drops of air-tool oil in the air plug
as shown (Figure 3). If you are using an automatic
in-line oiler, check and add oil if necessary.
3. Turn your compressor on and set the
compressors pressure regulator to the proper
pressure. Normal operating pressure should be
adjusted between 70-110 psi based on fastener
and wood being used.
4. Connect the tool to the air supply (Figure 2).
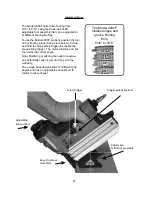
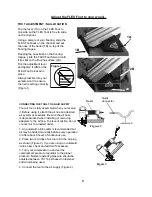
FOOT ADJUSTMENT / NAIL LOCATION
Flip the lever (1A) on the FLEX Foot to
one side so the FLEX Foot is free to slide
on the channel.
Using a sample of your fl ooring, slide the
FLEX Foot back on the channel and set
the nose of the nailer (1B) on top of the
fl ooring tongue.
Keeping the nose fl ush on the fl ooring
tongue, slide the FLEX Foot forward until
it lies fl at on the fl ooring surface (2A).
Flip the adjustment lever
and tighten it (2B) so the
FLEX Foot is locked in
place.
Always test fi re into your
sample wood to ensure
the nail is setting correctly
(Figure 1).
Adjust the FLEX Foot to your wood...
Nailer
Quick
Connector
1A
1B
2A
2B
Figure 1.
Summary of Contents for Powernailer 2000F
Page 11: ...11 MODEL 2000F SCHEMATIC A...


