Attention
Some
of
the
above
parts
have
already
been
assembled
to
the
main
body.
These
are
not
delivered
separately!
ASSEMBLY
In
order
to
familiarise
yourself
with
the
parts
of
the
device,
we
advise
you
to
study
the
overview
picture
and
the
parts
list
carefully
before
you
start
assembly.
Place
all
the
parts
on
the
floor
and
remove
all
packaging
materials.
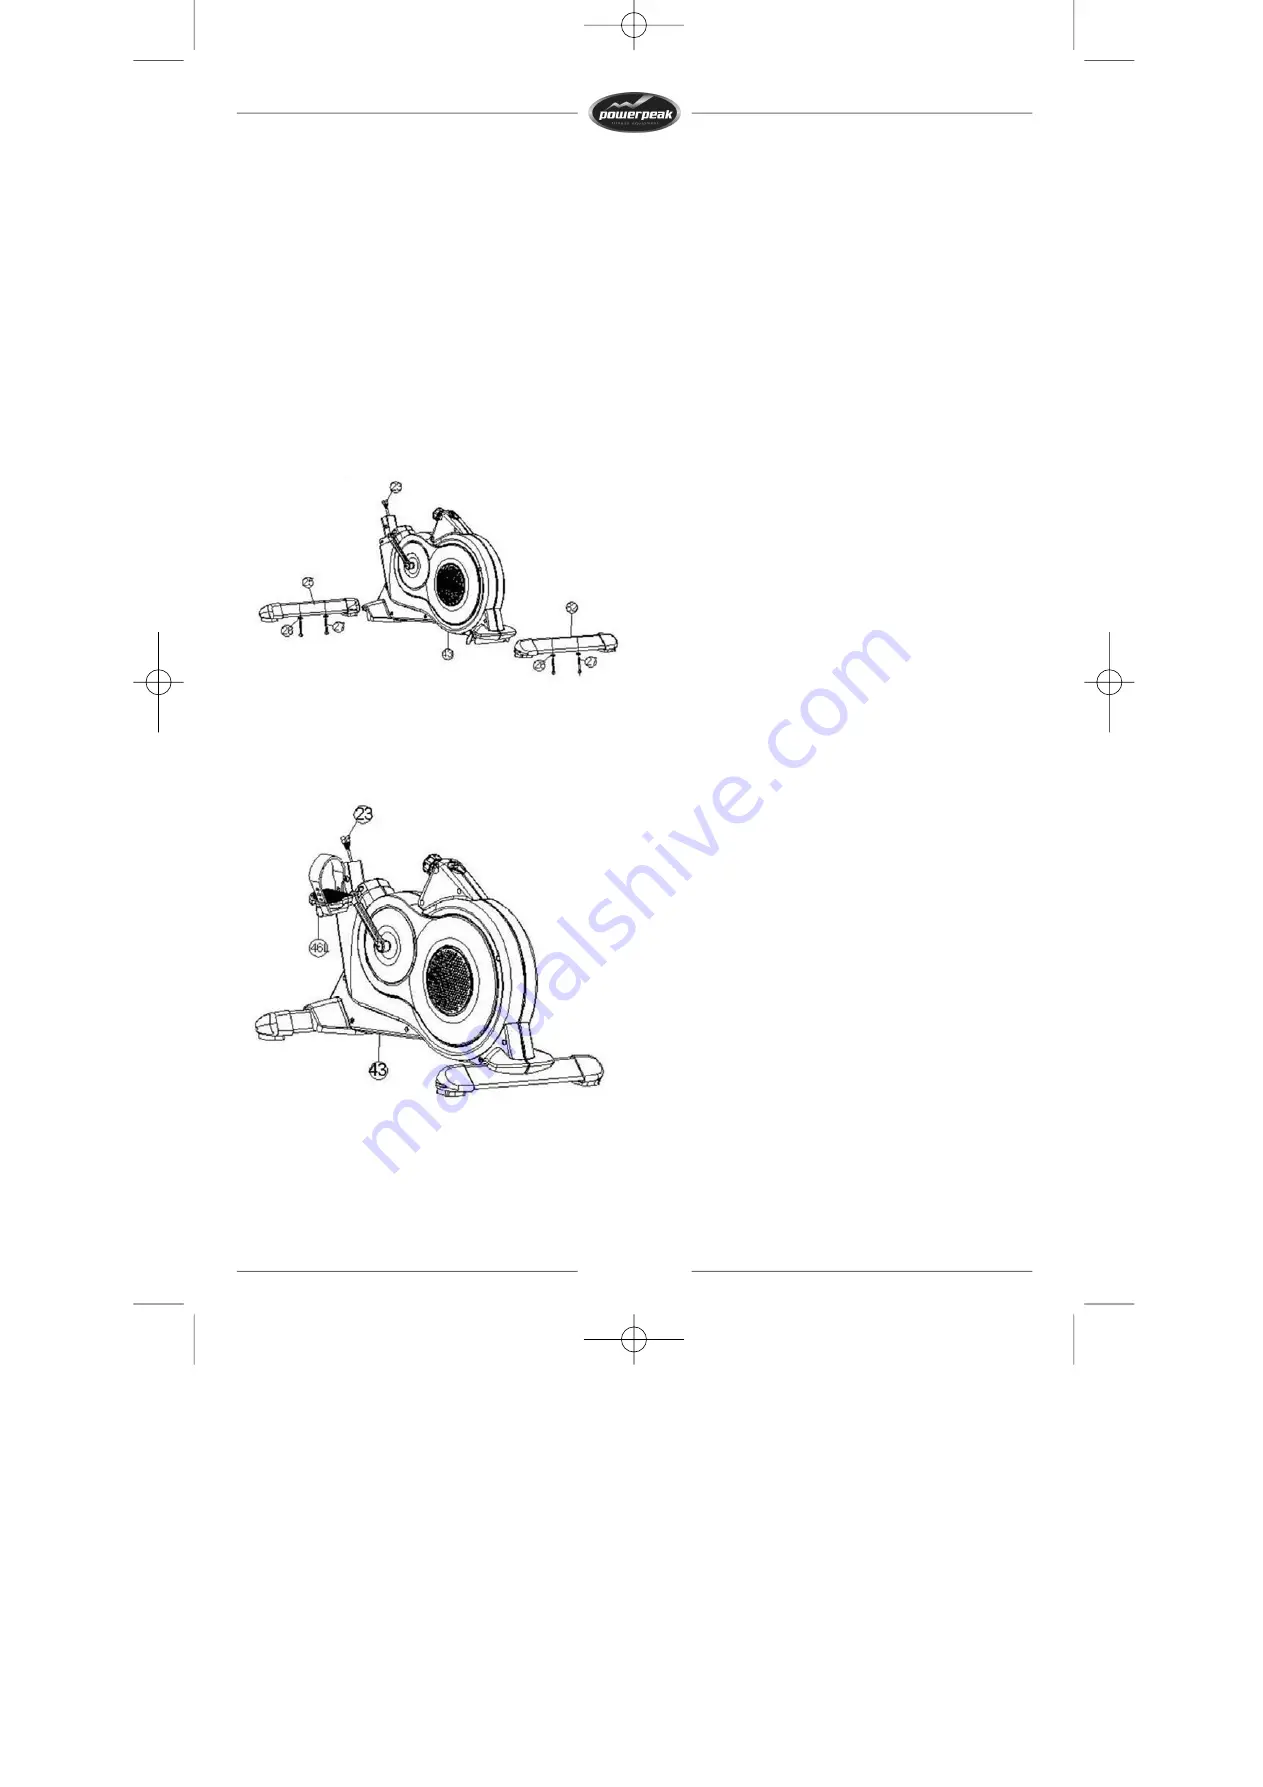
Step
1:
assembling
the
front
and
rear
stabiliser
Attach
the
front
stabiliser
(25)
to
the
main
frame
(43)
with
two
carriage
bolts
(27)
and
two
washers
(26).
Attach
the
rear
stabiliser
(82)
to
the
main
frame
(43)
with
two
carriage
bolts
(27)
and
two
washers
(26).
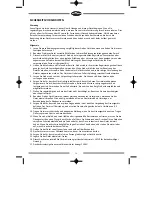
Step
2:
assembling
the
pedals
Attach
the
left
pedal
strap
(L)
to
the
left
pedal
(46L).
Attach
the
left
pedal
(46L)
to
the
left
crank
(49L).
Attach
the
right
pedal
strap
(R)
to
the
right
pedal
(46R).
Attach
the
right
pedal
(46R)
to
the
right
crank
(49R).
23
Summary of Contents for FHT8325P
Page 5: ...HET PRODUCT 5...
Page 19: ...19...
Page 21: ...THE PRODUCT 21...
Page 35: ...35...
Page 37: ...DAS PRODUKT 37...
Page 51: ...51...
Page 53: ...LE PRODUIT 53...
Page 67: ...67...
Page 69: ...PRODUKT 69...


