TO SET UP
NOTE:
For clarity the assembled router is not shown in
the illustrations.
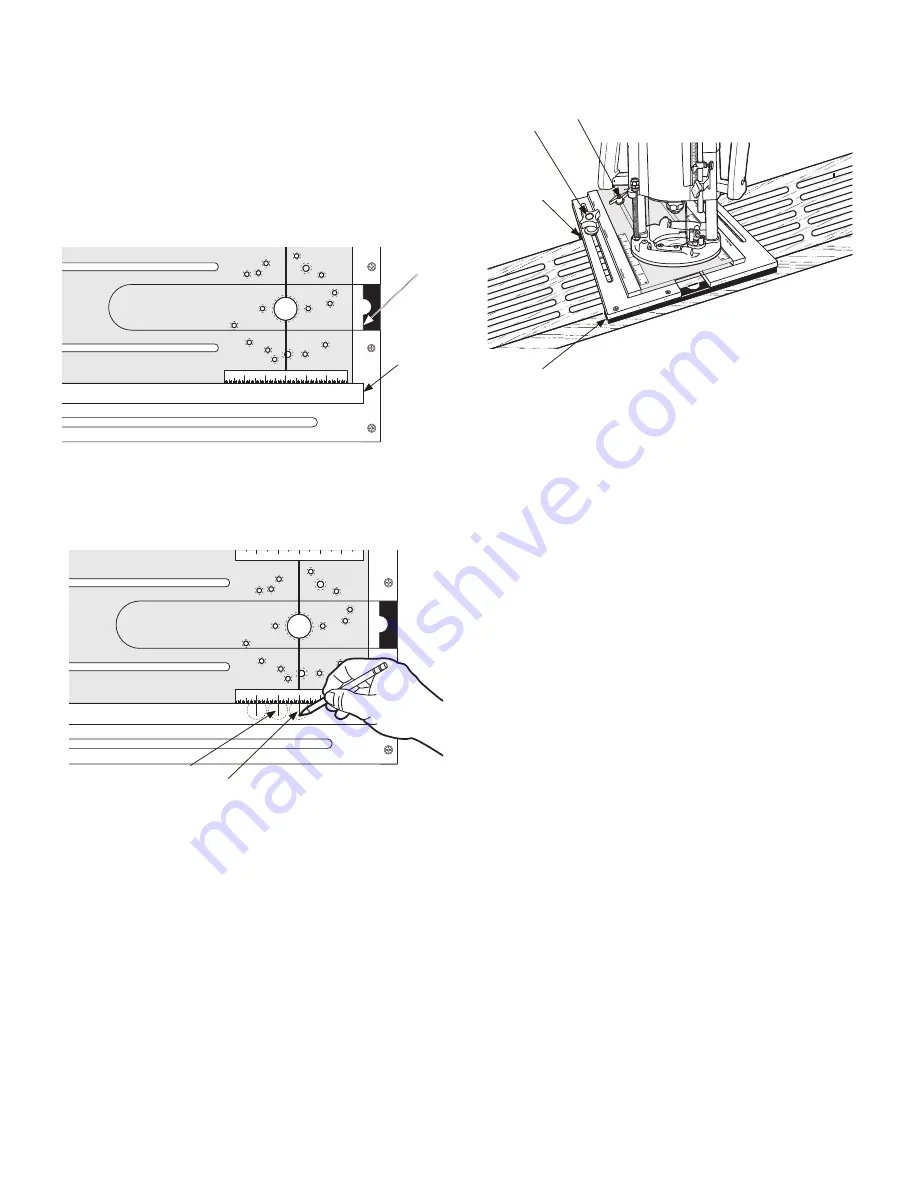
1. The end of the yellow plate guide with write/erase surface
will line up with the inside edge of the fixed fence. The
inside edge of the fixed fence will rest on the edge of the
workpiece.
NOTE:
If the end of the yellow plate guide with
write/erase surface DOES NOT line up with the inside edge
of the fixed fence, make a mark on the write/erase surface
to indicate the inside edge of the fixed fence.
Write/Erase
Indexing Surface
Use #2 Pencil
2
3
1
0
1
2
3
Figure 5
Edge of
Yellow
Write Erase
Surface
Edge of
Fixed Fence
2. Identify the distance from the center of the first flute to the
edge of the workpiece. Then adjust the acrylic router plate
so this measurement lines up with the mark you made on
the yellow plate guide with write/erase surface in Step 1.
Write/Erase
Indexing Surface
Use #2 Pencil
2
3
1
0
1
2
3
2
3
1
0
1
2
3
Mark for second flute
Figure 6
Mark for first flute
3. Using a pencil, mark the yellow plate guide with write/erase
surface at the "0" mark for the first flute.
4. To mark the second flute, measure to the left of "0" on the
scale the distance equal to the spacing between flutes and
make a mark.
5. Move the acrylic router plate so the "0" mark lines up with
the second mark, and measure to the left of "0" on the scale
the distance equal to the spacing between flutes and make
a mark.
6. Repeat step 4 until all flutes are marked on the yellow plate
guide with write/erase surface.
7. Place the jig over your workpiece with the fixed
fence against one side of the workpiece. Slide the
adjustable fence in or out to fit the width of your stock.
Tighten the adjustable fence locking knobs, making
sure the jig slides easily but is not loose or sloppy.
Figure 7
Router Plate Locking Knob
Adjustable
Fence
Locking
Knob
Adjustable
Fence against
Workpiece
Fixed Fence against Workpiece
8. Before routing the flutes, set the router bit to the desired
depth of cut. Move the acrylic router plate to align the "0"
on the scale with the first mark on the write/erase surface,
tighten the router plate locking knobs.
9. To route the remaining flutes, loosen the router locking
knobs and move the router plate to align the "0" on the scale
with the other marks on the write/erase surface, tighten the
router plate locking knobs and proceed.
IMPORTANT:
To prevent burning, move the router in and
out of the cuts quickly.
MAINTENANCE
• Carnauba wax may be applied to the router plate to
reduce scratching and make it slide easier. If scratching
does occur, carefully polish with plastic polish until the
scratches are removed.


