background image

GENERAL SAFETY RULES

1

     WARNING

For your own safety, read and understand all warnings 
and operating instructions before using any tool or 
equipment.

     WARNING

Some dust created by operation of power tool contains 
chemicals known to the State of California to cause  
cancer, birth defects or other reproductive harm. To 
reduce your exposure to these chemicals, work in a well 
ventilated area and work with approved safety equipment. 
Always wear OSHA/NIOSH approved, properly fitting face 
mask or respirator when using such tools. 

     WARNING

Failure to follow these rules may result in serious personal 
injury. Remember that being careless for even a fraction 
of a second can result in severe personal injury.

WORK PREPARATION 

•  Wear proper apparel. Do not wear loose clothing, 

gloves, neckties, rings, bracelets or other jewelry which 
may get caught in moving parts of the tool. 

•  Nonslip protective footwear is recommended. Wear 

protective hair covering to contain long hair.  

•  Wear eye and hearing protection. Always use safety 

glasses. Eye protection equipment should comply with 
ANSI Z87.1 standards. Hearing equipment should 
comply with ANSI S3.19 standards. 

•  Wear face mask or dust mask if operation is dusty. 
•  Be alert and think clearly. Never operate power tools 

when tired, intoxicated or when taking medications that 
cause drowsiness. 

WORK AREA PREPARATION 

•  Keep work area clean. Cluttered work areas and 

benches invite accidents. 

•  Work area should be properly lighted. 
•  Do not use the machine in a dangerous environment. 

The use of power tools in damp or wet locations or in 
rain can cause shock or electrocution.

•  Three-prong plug should be plugged directly into 

properly grounded, three-prong receptacle. 

•  Use the proper extension cord. Make sure your 

extension cord is in good condition. It should have 
grounding prong and should be of the correct gauge. 

•  Keep children and visitors away. Your shop is a 

potentially dangerous environment. Children and visitors 
can be injured. 

•  Make your workshop childproof with padlocks, master 

switches or remove switch keys to prevent any 
unintentional use of power tools.

1

SAFETY RULES

•  It should have a grounding prong and should be of the 

correct gauge. 

TOOL MAINTENANCE 

•  Turn the machine "OFF", and disconnect the machine 

from the power source prior to inspection. 

•  Maintain all tools and machines in peak condition. Keep 

tools sharp and clean for best and safest performance.

•  Follow instructions for lubricating and changing 

accessories. 

•  Check for damaged parts. Check for alignment of 

moving parts, binding, breakage, mounting and any 
other condition that may affect tool's operation. 

•  Poorly maintained tools and machines can further 

damage the tool or machine and/or cause injury. 

•  A guard or any other part that is damaged should be 

repaired or replaced. Do not perform makeshift repairs. 

TOOL OPERATION 

•  Avoid accidental start-up. Make sure that the tool is in 

the “OFF” position before plugging in.

•  Use the right tool for your job. Do not force your tool or 

attachment to do a job for which it was not designed. 

•  Disconnect tool when changing parts.
•  Don't force the workpiece on the machine. Damage to  

the machine and/or injury may result.  

•  Never leave tool running unattended. Turn the power off 

and do not leave tool until it comes to a complete stop. 

•  Do not overreach. Loss of balance can make you fall 

into a working machine, causing injury.  

•  Never stand on tool. Injury could occur if the tool tips, or 

if you accidentally contact the cutting tool. 

•  Know your tool. Learn the tool’s operation, application 

and specific limitations before using it. 

•  Use a proper extension cord of the correct gauge. Your 

extension cord should have a grounding prong, and 
should be in good condition.  

•  Handle workpiece correctly. Keep hands away from 

moving parts.

•  Turn tool off if it jams.
•  Always feed workpiece against the direction of the 

sanding rotation. To maintain control, properly support 
long or wide work-pieces.

     CAUTION

Think safety! Safety is a combination of operator common 
sense and alertness at all times when tool is being used.

     WARNING

Do not attempt to operate tool until it is completely 
assembled according to the instructions.

SAvE ALL WARNINGS AND INSTRUCTIONS  

FOR FUTURE REFERENCE

Summary of Contents for BD1500

Page 1: ...325 You will need this manual for safety instructions operating procedures and warranty Put it and the original sales invoice in a safe dry place for future reference Visit us on the web at www southerntechllc com 1 x 5 Belt Disc SANDER ...

Page 2: ...Preparation ASSEMBLY 2 Unpackaging Tool Needed Mount the Dust Chute Mount the Sanding Disc Table Mount the Sanding Belt Table Replacing the Sanding Belt Replacing the Sanding Disc Sanding Belt Tracking Adjustment Backstop Dust Port Options Mounting the Sander to Work Surface Power Source Grounding Instructions Extension Cords Motor Electrical Connections OPERATION 7 ON OFF Switch Surface Sanding O...

Page 3: ...padlocks master switches or remove switch keys to prevent any unintentional use of power tools 1 SAFETY RULES It should have a grounding prong and should be of the correct gauge TOOL MAINTENANCE Turn the machine OFF and disconnect the machine from the power source prior to inspection Maintain all tools and machines in peak condition Keep tools sharp and clean for best and safest performance Follow...

Page 4: ... until it is completely assembled and you have read and understood the entire operating manual TOOLS NEEDED The following tools not included are needed to assemble and adjust the belt disc sander Combination square Phillips screwdriver Standard screwdriver 4 mm Hex Wrench MOUNT THE DUST CHUTE Refer to Figure 2 Secure the dust chute to the sander with screws flat washers and spring washers supplied...

Page 5: ...cking lever assembly square headed bolt star washer splined shaft lever and screw with spring Figure 5 Screw and Spring Lever Star Washer Splined Shaft Square Headed Bolt The screws to attach the lower belt guard are assembled to the frame for shipping purposes remove these screws and attach the lower belt guard as shown Slide the square headed bolt throught the frame and place the star washer on ...

Page 6: ...OTE This sander disc uses 5 self adhesive sanding disc Turn the machine OFF and disconnect the machine from the power source before assembling the sanding disc Remove the sanding disc locking levers and slide the sanding disc table from the sander See Figure 3 Remove the screws and washers securing the dust chute and remove the dust chute from the sander See Figure 2 Peel the old sanding disc from...

Page 7: ... work surface with flat washers lock washers and hex nuts A rubber washer should be placed between the sander and the workbench Figure 11 Bolt Workbench Rubber Washer Flat Washer Hex Nut Flat Washer Sander POWER SOURCE WARNING Do not connect to the power source until the machine is completely assembled The machine is wired for 120 volts 60 HZ alternating current Before connecting the machine to th...

Page 8: ...ly grounded To ensure proper ground grounding means must be tested by a qualified electrician EXTENSION CORDS Use proper extension cords Make sure the extension cord is in good condition Use only 3 wire extension cords have 3 prong grounding type plugs and 3 pole receptacles which accept the tool plug When using an extension cord make sure to use one heavy enough to carry the current of the machin...

Page 9: ...void personal injury and or damage to the workpiece become familiar with the rotation of the sanding belt and disc surfaces The sanding belt rotates counterclockwise or downward toward the table or backstop The sanding disc rotates counterclockwise downward toward the work table on the left side of the sanding disc and upward from the work table on the right side of the sanding disc Always use the...

Page 10: ...ther conditions that may affect the sander operation Should any of these conditions exist do not use the belt disc sander until properly repaired or parts are replaced Frequently blow or vacuum dust from all sanding parts and motor housing MAINTENANCE 8 WARNING Any attempt to repair or replace electrical parts on this tool may be hazardous Repairs should be done by a qualified service technician L...

Page 11: ...nals and or worn insulation 3 Install correct fuses or circuit breakers or switch tool to an appropriately size circuit Motor overheats 1 Motor overloaded 2 Extension cord too long and of insufficient gauge weight 1 Reduce load on motor pressure on object being sanded 2 Utilize an extension cord of appropriate gauge and length or plug tool directly into outlet Motor stalls resulting in blown fuses...

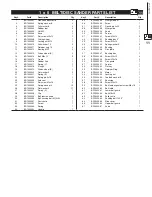
Page 12: ...1 X 5 BELT DISC SANDER PARTS ILLUSTRATION 10 PARTS LIST 10 ...

Page 13: ...BD1500016 Rubber Pad 1 50 BD1500050 Disc guard 1 17 BD1500017 Spring C 1 51 BD1500051 Pointer 1 18 BD1500018 E ring 4 1 52 BD1500052 Flat key 1 19 BD1500019 Driven wheel B 1 53 BD1500053 Retainer Ring 1 20 BD1500020 Flat washer 5 5 54 BD1500054 Motor 1 21 BD1500021 Spring B 1 55 BD1500055 Locking nut 1 22 BD1500022 Spring pin 3 18 1 56 BD1500056 Toothed washer 8 1 23 BD1500023 Axle seat 1 57 BD150...

Page 14: ...warranty covers all defects in workmanship or materials in this POWERTEC tool for a one year period from the date of purchase This warranty is specific to this tool Southern Technologies LLC reserves the right to repair or replace the defective tool at its discretion HOW TO OBTAIN SERVICE To obtain service for this POWERTEC tool you must return it freight prepaid to POWERTEC You may call toll free...

Page 15: ...cidental or consequential damages Some states do not allow limitations on how long an implied warranty lasts and or do not allow the exclusion or limitation of incidental or consequential damages so the above limitations may not apply to you This warranty gives you specific legal rights and you may also have other rights which vary from state to state Southern Technologies LLC makes no warranties ...

Page 16: ...Southern Technologies LLC 206 Terrace Drive Mundelein Illinois 60060 ...

Reviews: