background image

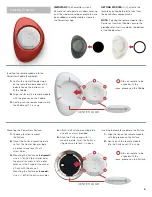
Getting Started

2

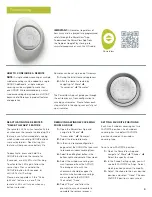
IMPORTANT: 

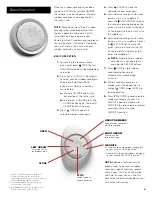
The PowerView

®

 Gen 3 

Remote will not operate a window covering 
until the window covering and remote have 
been added and configured to a Home in 
the PowerView App.

GETTING STARTED: 

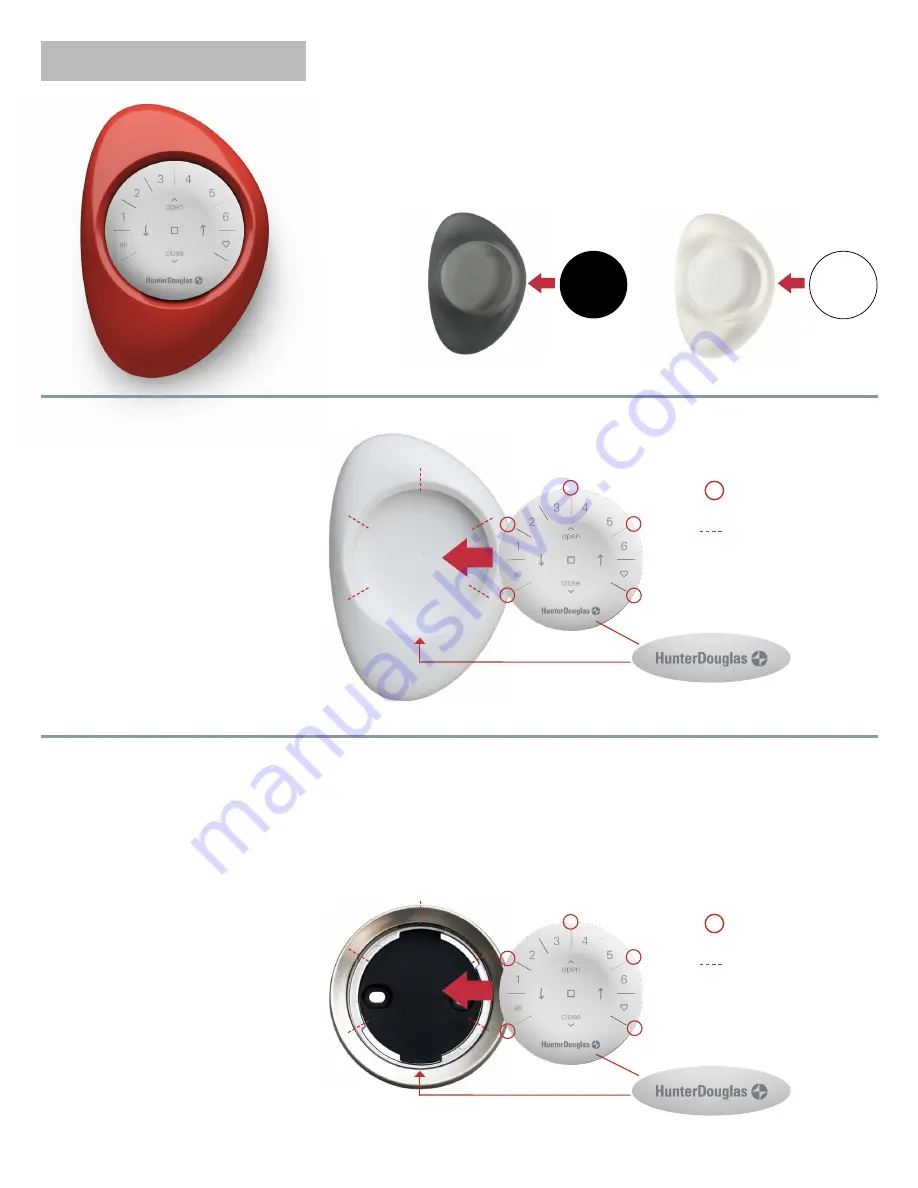
First, activate the 

remote by pulling both plastic tabs from  
the back battery compartment.

NOTE:

 If placing the remote module into a 

Pewter or Clear Frost Pebble

®

, ensure the 

provided color insert is seated at the bottom 
of the Pebble cutout.

Inserting the remote module into the  
PowerView Pebble (hand-held):


1.

  Center the Hunter Douglas logo  

on the remote module above the  
indentation on the bottom rim  
of the Pebble.


2.

  Align the ribs on the remote module 

with the grooves on the Pebble.


3.

  Gently push the remote module into 

the Pebble until it is snug.


Ribs on remote to be 
aligned with the


grooves on the Pebble.

CENTER LOGO

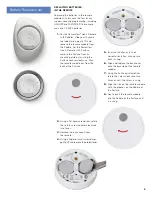
Mounting the PowerView Surface:


1.

  Choose a location to mount  

the Surface. 


2.

  Orient the Surface mounting plate 

so that the Hunter Douglas logo  
is horizontal and level. Mark  
screw holes.


3.

   Mounting the Surface onto 

drywall

Use a 

7

32

" drill bit to drill pilot holes. 

Tap drywall anchors into the pilot 
holes until the flange of the anchor 
is flush with the drywall. 
Mounting the Surface onto 

wood

Use a 

3

32

" drill bit to drill screw holes.


Ribs on remote to be 
aligned with the


grooves on the Surface.

CENTER LOGO


4.

  Attach the Surface mounting plate 

using the screws provided.


5.

  Align the Surface ring with its  

mounting plate. Twist the Surface 
ring clockwise to lock it in place.

Inserting the remote module in the Surface:


1.

  Align the ribs on the remote module 

with the grooves on the Surface. 


2.

  Gently push the remote module  

into the Surface until it is snug.

Summary of Contents for Gen 3 Automation

Page 1: ...le and Surface Precisely control your Gen 3 window coverings throughout your home with the touch of a button The following pages provide all the details on how to set up and operate both remote styles Table of Contents Key Components 1 Getting Started 2 Programming 3 Basic Operation 4 Battery Replacement 5 Troubleshooting 6 Key Components GEN 3 REMOTE MODULE INCLUDED 1 OR ...

Page 2: ...ntil it is snug Ribs on remote to be aligned with the grooves on the Pebble CENTER LOGO Mounting the PowerView Surface 1 Choose a location to mount the Surface 2 Orient the Surface mounting plate so that the Hunter Douglas logo is horizontal and level Mark screw holes 3 Mounting the Surface onto drywall Use a 7 32 drill bit to drill pilot holes Tap drywall anchors into the pilot holes until the fl...

Page 3: ...RING FROM A GROUP 1 Open the PowerView App and navigate to More Accessories Remotes 2 Select the desired remote 3 In the virtual remote configuration page select the GROUP that you want to remove a window covering from 4 Select the editing tool button in the bottom right hand corner of the screen 5 Select the window covering you want removed from the GROUP The orange circle with the checkmark shou...

Page 4: ...iddle rail press the LEFT ARROW to close the vanes rotate the vanes to the left tilt the louvers slats down or fully lower the middle rail a NOTE Single function window coverings will not operate by pressing the ARROW buttons 7 Press STOP to stop window covering vane louver slat movement anywhere along its travel 8 While a window covering is in motion press the opposite of its motion OPEN or CLOSE...

Page 5: ...er clockwise Push the remote module out from the back of the Surface 2 Using a flat head screwdriver rotate the safety screw counter clockwise two times 3 Remove the back cover from the remote 4 Using a finger or small screwdriver gently lift and remove the old batteries 5 Insert new batteries in their correct orientation making sure each is snug 6 Align and replace the back cover onto the backsid...

Page 6: ... interference that may cause undesired operation NMB 003 Cet appareil numérique de la classe B est conforme à la norme NMB 003 du Canada L utilisation de ce dispositif est autorisée seulement aux conditions suivantes 1 il ne doit pas produire de brouillage et 2 l utilisateur du dispositif doit être prêt à accepter tout brouillage radioélectrique reçu même si ce brouillage est susceptible de compro...

Reviews: