background image

8

9

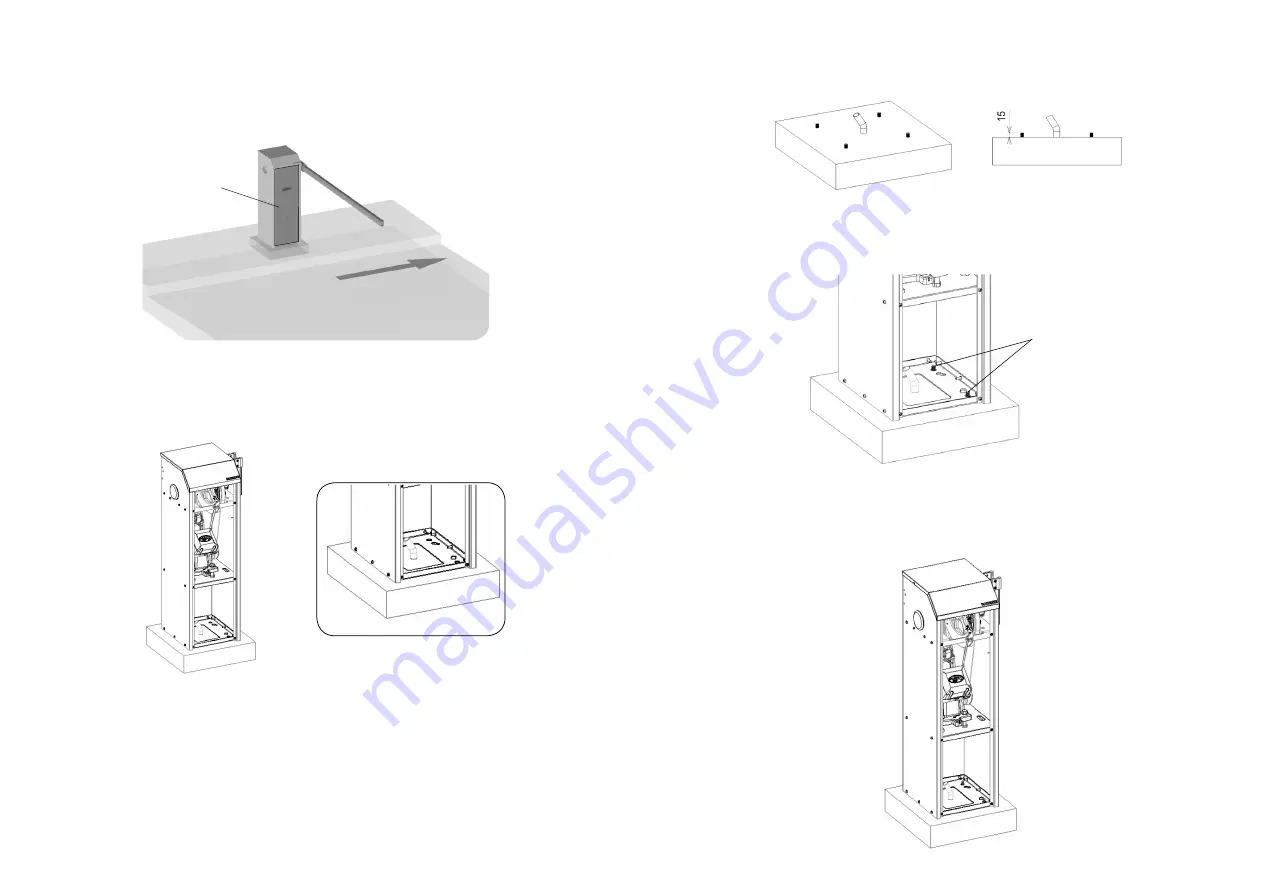
INSTALLING THE AUTOMATIC BARRIER

1. 

When anchoring the cubicle, note that its inspection door must face the 

side of the track or traffic lane.

2.  Position / align the cubicle on the concrete plinth and mark the places 

where the holes will be drilled, so that the front of the automatic barrier 

(inspection door side) is located towards the curb (street, traffic lane).

3.  Remove the cubicle from the plinth and drill the holes in the previously 

marked locations.

Note:

 Drill 04 holes with a Ø10mm drill and at least 80mm (3.2 in) deep.

4.  Insert the anchor bolts into the holes in the concrete plinth, as indicated 

below.

Note:

 The anchor bolts must not be inserted completely, they must remain 

about 15mm (0.6 in) out of the concrete plinth.

5. 

Position the cubicle on the concrete plinth, fitting the holes of the cubicle 

in the anchor bolts.

6.  Check the cubicle alignment again. If necessary, move it in a circular 

manner as desired.

INSPECTION DOOR

ANCHOR BOLTS

VEHICLE FL

OW DIREC

TION

Summary of Contents for BARRIER BRC

Page 1: ...ARRIER BRC JETFLEX BRUSHLESS Technical Manual P09754 09 2021 Rev 0 Made by Motoppar Ind stria e Com rcio de Automatizadores Ltda Av Dr Labieno da Costa Machado 3526 Distrito Industrial Gar a SP CEP 17...

Page 2: ...ng of the beam If so the installation of the equipment will be impaired making it necessary to repair the infrastructure of the site Carefully choose the model of the automatic barrier according to it...

Page 3: ...will be fixed close to the automatic barrier cubicle GENERAL FEATURES Universal cubicle the beam can be installed on either side of the cubicle Release system for manual unlocking up to 4 5m 14 8 ft E...

Page 4: ...el this provides the product with a better performance operation FRONT INSPECTION DOOR MINIMUM 3 4 CONDUIT FOR WIRING PLACED IN THE CENTER OF THE CONCRETE PLINTH Ceiling Ceiling Base of the barrier Ba...

Page 5: ...e from the plinth and drill the holes in the previously marked locations Note Drill 04 holes with a 10mm drill and at least 80mm 3 2 in deep 4 Insert the anchor bolts into the holes in the concrete pl...

Page 6: ...V Note Use 2 50mm cables Use a dedicated circuit breaker i e a circuit breaker to which only the barrier will be connected 11 Check define the alignment of the bean opening and closing Use mechanical...

Page 7: ...tched and ready for operation With your thumb apply an even pressure on the chain If it does not bend it is properly stretched If the chain is loose adjust it using the belt tensioning bolts using a w...

Page 8: ...whose function is to start the three phase induction motor from a single phase AC network and a logic controller to perform the Variable frequency drive operations For more information refer to the T...

Reviews:

Related manuals for BARRIER BRC