


10
11
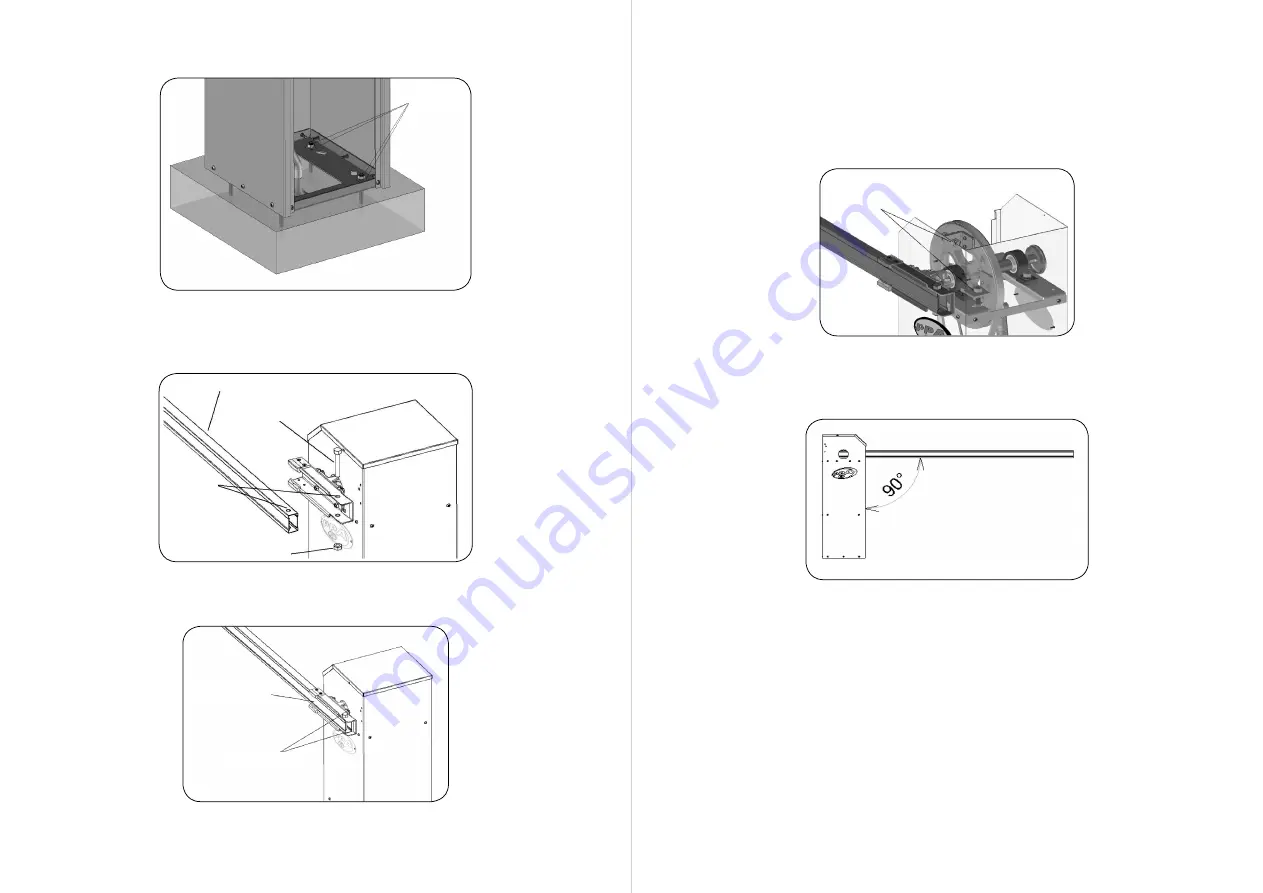
7. Insert the washers and nuts to fix the cabinet.
8. Insert the barrier/arm into the fixing assembly housing, and align the
mounting holes.
9. After positioned, tighten the nut and the screw.
10. Power/energize the barrier according to the purchased product voltage
(127V or 220V).
OBS:
Use 2.50mm² wires. Use a dedicated circuit breaker, that is, a circuit
breaker where only the barrier will be connected.
11. Check/set the barrier alignment (opening and closing). Use mechanical
stops for this situation and move them as necessary.
12. The barrier will be in good working conditions when closing when
the barrier/arm follows the requirements shown below in the image.
WASHERS
AND NUTS
OPENING AND CLOSING
ADJUSTMENT STOPS
BARRIER / ARM
ASSEMBLED BARRIER
/ LANCE
TIGHTENING NUT
AND SCREW
SCREW
MOUNTING
HOLES
NUT


