17
III.4 Running an Automatic Cycle
1.
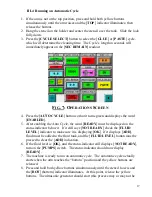
If the arm is not at the top position, press and hold both yellow buttons
simultaneously until the arm raises and the [
TOP
] indicator illuminates; then
release the buttons.
2.
Hang the stencil on the holder and center the stencil over the tank. Slide the lock
fully down.
3.
Press the
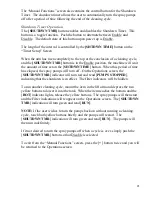
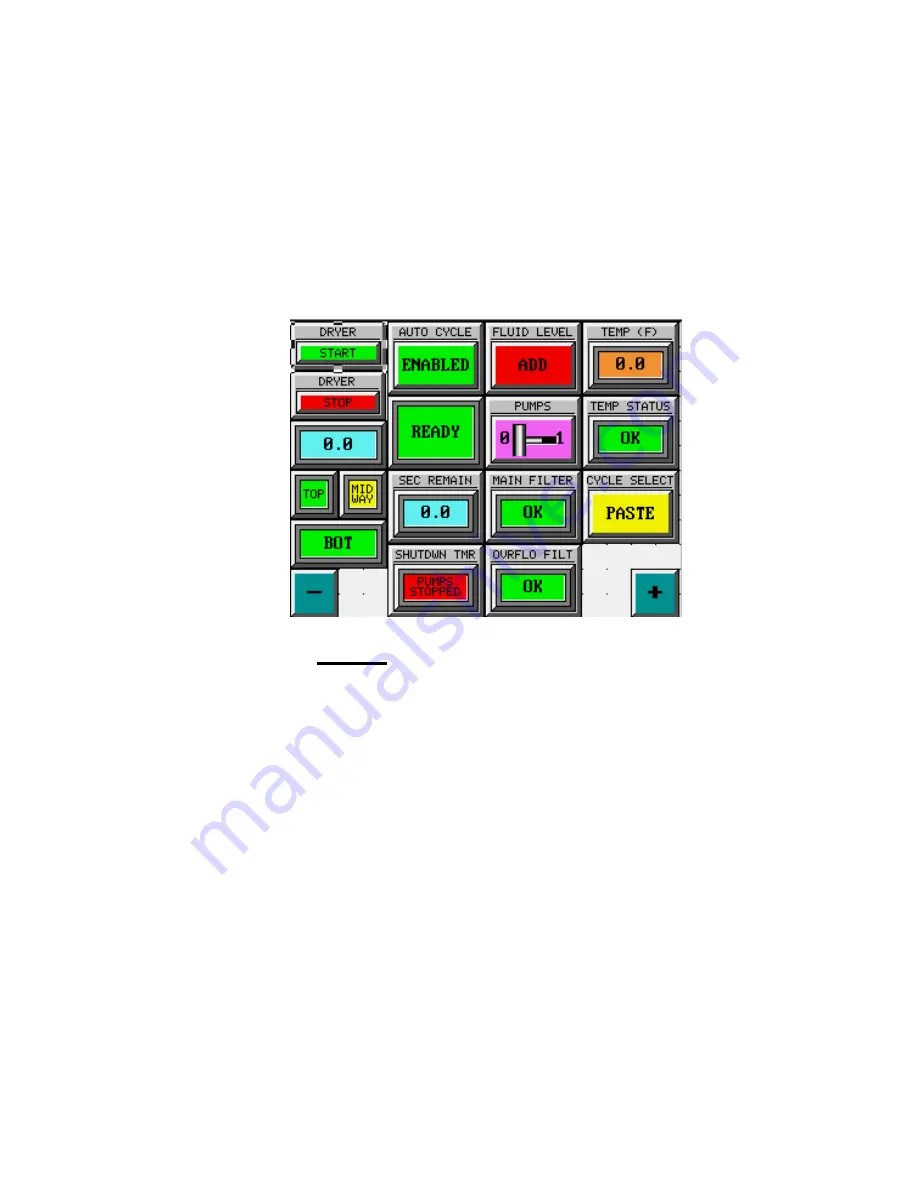
[CYCLE SELECT]
button to select the [
GLUE
] or [
PASTE
] cycle,
which will determine the cleaning time. The Cycle’s length in seconds will
immediately appear on the [
SEC REMAIN
] readout.
F
IG
.
7:
O
PERATIONS
S
CREEN
4.
Press the [
AUTO
CYCLE
] button so that it turns green and displays the word
[
ENABLED
].
5.
After enabling the Auto Cycle, the word [
READY
] must be displayed on the
status indicator below it. If it still says [
NOT READY
] check the [
FLUID
LEVEL
] indicator to make sure it is displaying [
OK
]. If it displays [
ADD
],
fluid must be added to the front tank, and the [
FLUID LEVEL
] button must be
pressed to clear the [
ADD
] indication.
6.
If the fluid level is [
OK
], and the status indicator still displays [
NOT READY
],
turn on the [
PUMPS
] switch. The status indicator should now display
[
READY
].
7.
The machine is ready to run an automatic cycle. The automatic cycle actually
starts when the arm reaches the “bottom” position and the yellow buttons are
released.
8.
Press and hold both yellow buttons simultaneously until the stencil lowers and
the [
BOT
] (bottom) indicator illuminates. At this point, release the yellow
buttons. The ultrasonic generator should start (this process may or may not be


