Ceiling Mount with a 7 Axis Extendable Arm and a 75-100mm VESA Screen Pan and Tilt Head
PN 80104-MICROS, PN 80104-20-MICROS, PN 80104-26-MICROS
6
info@practicalqualitysystems.com
WWW.PRACTICALQUALITYSYSTEMS.COM
(818) 993-1022
ALL PRODUCTS PATENT PENDING
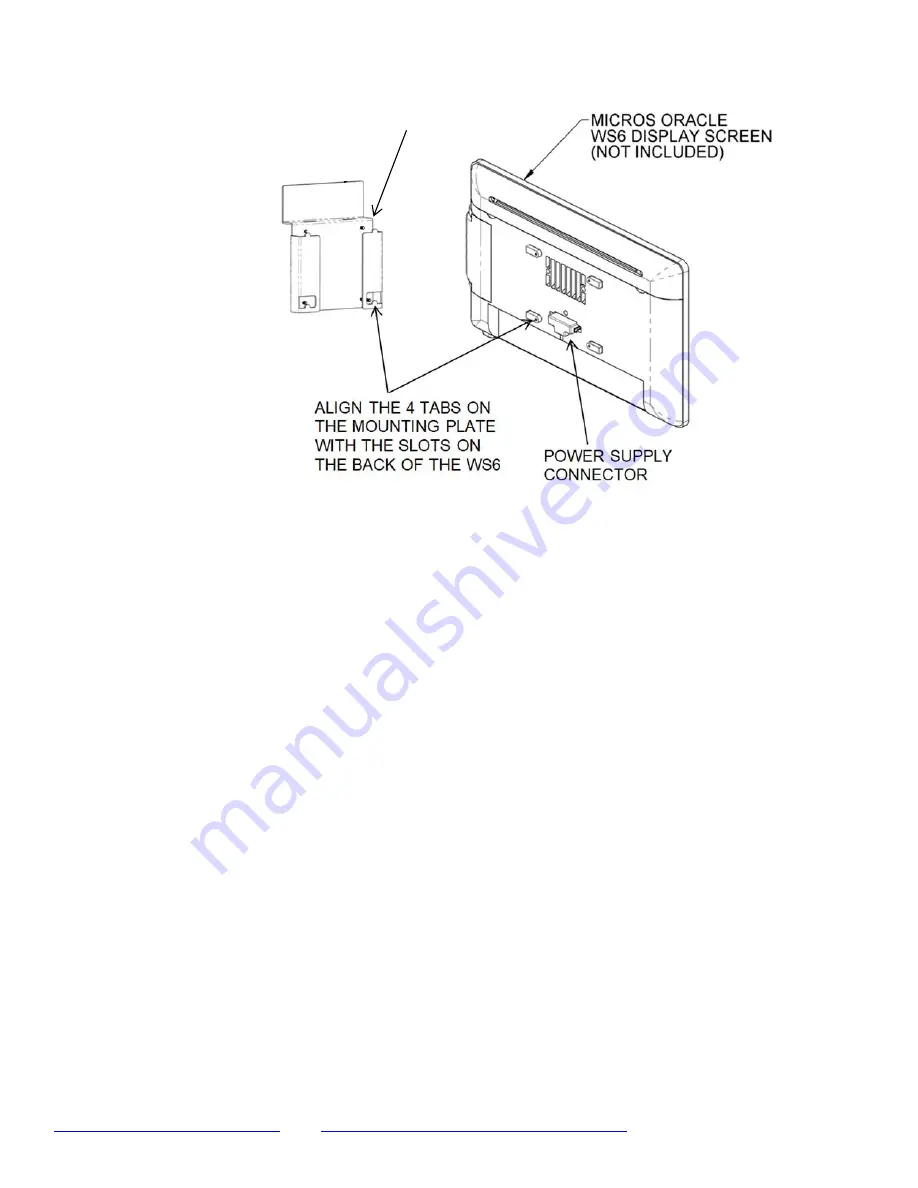
Installation Tips - How to Attach the Oracle MICROS compatible Quick Disconnect Adapter Pan and Tilt
Head assembly to the back of a screen:
1. Lay the terminal face down on a flat, smooth surface.
2. Hold the Pan and Tilt Head with the MICROS compatible quick connect adapter assembly
securely, remove
the five- point hand knob from the underside of the end of the arm, lift off the Pan and Tilt Head with the
MICROS quick connect adapter assembly, then remove the rubber clutch washer from the top of the end of the
arm.
3. Orient the flat bottom of the panning base of the Pan and Tilt Head with the MICROS quick connect adapter
assembly
with the bottom of the terminal.
4. Set the Pan and Tilt Head with the MICROS quick connect adapter assembly
with the plate
facing down on
the back of the terminal.
5. Align the square pattern of four tabs on the adapter plate with the pattern slots on the undersides of the four
raised stand -offs on the back of the terminal; and then guide the two together until the tabs are fully inserted
into the slots.
6. Carefully tighten the RED headed M4 screw through the plate and into the stand - off on the back of the
terminal, then carefully test that the terminal is now securely locked to the adapter plate.
7. Place the rubber clutch washer on the top of the end of the arm.
8. Carefully lift the terminal with the attached Pan and Tilt Head with the MICROS quick connect adapter
assembly, align the tapped hole in the panning base with hole in the rubber clutch washer on the top of the end
of the arm, reinstall the shaft of the five-point hand knob up through the underside of the arm, through the
rubber clutch washer and then carefully thread it into the panning base.
MICROS STANDARD QUICK CONNECT
TABS AND SLOTS ADAPTER PLATE


