6/16
SETUP OPTIONS-PROJECTOR CONFIGURATION
Projector configuration can be set conveniently via push-button switch and LED display.
Launch the projector and press button FUNC for more than 3 seconds to unlock the panel, the LED will show the
function menu of the projector, each main menu has its submenus and each submenu has a specific function. For
details, please see the “OPERATION MENU” section.
Press button FUNC if you want to browse through the various Setup Options.
Press button FUNC to save your settings or enter the next menu. Press button UP or DOWN to shift.
Press button FUNC, it will return to the main menu or browse through the main menu.
Without any operations after 3minutes, the LED display will be locked.
TO SET THE DMX START ADDRESS
Each projector must be given a DMX start address so that the correct projector responds to the correct control signals.
This DMX start address is the channel number from which the projector starts to “listen” to the digital control information
being sent out from the controller. The projector has 1 DMX channel, so set the No. 1 projector’s address 001, No. 2
projector’s address 002, No. 3 projector’s address 003, and so on.
Launch the projector. Press button FUNC for more than 3 seconds to unlock the panel.
Press button FUNC to find “AddR” menu.
Then press FUNC to show DMX address and press UP or DOWN to set DMX address.
At this time, DMX address will flash continuously. Press button FUNC to confirm and it means the setting has been
enabled. (Note:
Re- Power the fixture more than 3 seconds after it is switched off.)
Press button FUNC, it will return to the main menu.
Summary of Contents for LED Studio 3300D
Page 11: ...11 16 SIZES ...
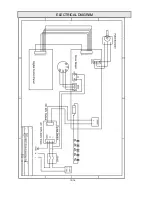
Page 12: ...12 16 ELECTRICAL DIAGRAM ...
Page 13: ...13 16 ...
Page 15: ...15 16 ...


