19
STEP 2 |
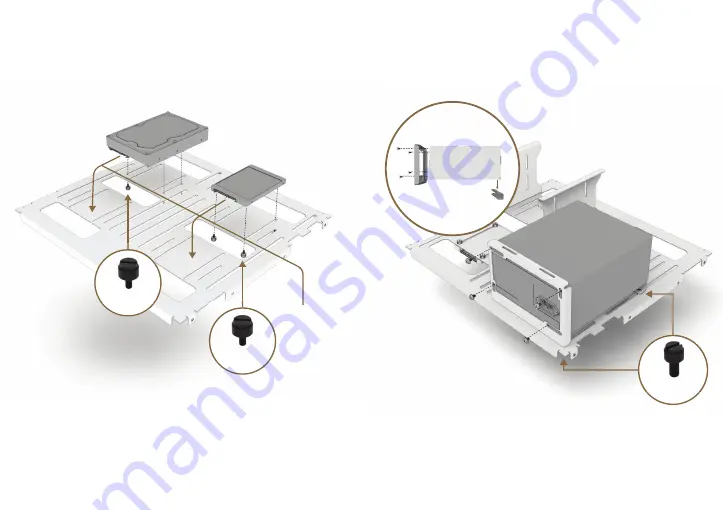
INSTALL HDD/SDD TO TRAY
FLAT VARIATION
STEP 2.1 |
INSTALL POWER SUPPLY
FLAT VARIATION
M4X8
FIGURE 2.2
REAR VIEW
Install any HDD or SDD on top of the mid tray. These drives can
be oriented on either front or back depending on your prefer-
ence (Figure 2.1). If you bought the optional bottom bracket go
to page 8 for instructions. SSD’s use
M3x5 nylon screws (part
4)
and HDD’s utilize
6/32” .25 nylon screws (part 7)
.
After your drives are installed you can screw in the back PSU
bracket to your PSU (Figure 2.2).
Note:
If you purchased the bottom HDD bracket go to page 8
for further instructions.
FIGURE 2.1
M3X5
6/32”


