905E, 9.1, 9.10 Treadmills
Page 23
THEN . . .
OTHERWISE . . .
Continue with the next step.
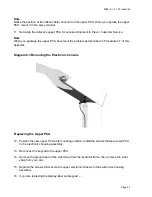
Carefully connect the keypad (f) to the
upper PCA; then skip to Step 24.
Removing the Display Label and Keypad
The keypad and display label are attached to the electronics housing assembly with adhesive. If
the display label is removed, a new display label and keypad must be pressed to the electronics
housing assembly. If the electronics housing assembly must be replaced, press a new keypad
and display label onto the new electronics housing assembly.
17. Remove the window spacer, display label and keypad from the electronics housing
assembly.
18. Remove as much of the old adhesive as possible. Ensure that any remaining adhesive is
firmly bonded to the mounting location.
19. Clean the electronics housing assembly with a mild detergent. Remove the detergent with a
damp cloth.
Replacing the Display Label and Keypad
20. Remove the adhesive cover from the back of the new keypad, then carefully position the
keypad on the electronics housing assembly. Press the keypad firmly.
21. Remove the adhesive cover from the back of the new display label. Carefully position the
display label on the electronics housing assembly, then press the label firmly.
Note:
The window spacer separates the upper PCA from the adhesive side of the display label.
22. Turn over the electronics housing assembly, then position the window spacer on the open
area of the electronics housing assembly.
23. Carefully connect the keypad to the upper PCA.
Replacing the Electronic Console
24. Connect the ribbon cable to the upper PCA.
25. Position the electronic console at its mounting position.
26. Replace the bolts and washers that secure the electronic console to the upper handrail
clamp.
27. Position the crank handle at its mounting position. Use the 1/8” allen wrench to tighten the
set screws that secure the crank handle to the top of the lift jack.
28. Check the operation of the treadmill as described in Section Three of this appendix.
Summary of Contents for 9.10
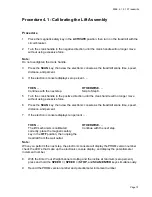
Page 5: ...905E 9 1 9 10 Treadmills Page 5 9 1 Electronic Console 9 10 Electronic Console...
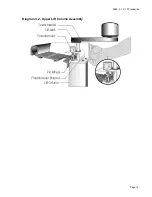
Page 15: ...905E 9 1 9 10 Treadmills Page 15 Diagram 4 2 Upper Lift Column Assembly...
Page 44: ...905E 9 1 9 10 Treadmills Page 44 Diagram 7 1 Wiring Diagram 905e 9 1 9 10...
Page 45: ...905E 9 1 9 10 Treadmills Page 45 Diagram 7 2 Block Diagram 905e 9 1 9 10 Treadmills...

