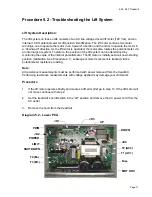
9.23, 9.27 Treadmill
Page 25
Procedure 5.6 - Troubleshooting the Drive Motor System
Note:
The drive motor controller is a PWM (pulse width modulated) system. The system
incorporates current limit (set at 28 amps of drive motor current). The lower PCA has several
LED indicators to depict lower PCA status. Refer to Procedure 2.1.
1.
If the
MOT DRV
LED is illuminated, replace the lower PCA per Procedure 6.3. The
MOT DRV
LED typically indicates a component failure on the lower PCA.
1.
If the drive motor starts briefly then stops and an
LS
error is displayed, troubleshoot the
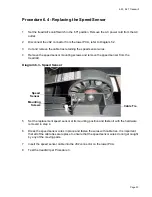
speed sensor per Procedure 5.3. If the drive motor does not start and an
LS
error is
displayed, continue with step 2.
2.
Remove the treadmill hood.
Warning:
The treadmill will be operated with the hood removed in this procedure. The service
provider will be exposed to both electrical shock hazards and mechanical hazards. Extreme
caution must be exercised to avoid contact with exposed electrical connections and moving
parts.
3.
Insert the AC power cord in an 120 VAC outlet and set the on/off switch in the “on” position.
4.
Set the treadmill to operate in the manual program (at 1 mph).
5.
With a DC voltmeter, measure between the T3 (M+) terminal and the T4 (M-) terminal on the
lower PCA. The reading should be approximately 12 Vdc. If the voltage is absent or
significantly low and/or the
PWM
LED does not illuminate, skip to step 10.
6.
If the
PWM
LED does illuminate and the reading in step 2 is approximately 95 VDC the drive
motor is open (
∞
). The most probable reason for the motor to be open is a badly worn motor
brush.
7.
Set the on/off switch in the “off” position. Remove the drive motor wires from the lower PCA
(red, T3-M+ and black, T4-M-). With an ohmmeter, measure between the two wires, the
reading should be approximately 4.6
Ω
. If the reading is open (
∞
) or significantly high, check
both motor brushes for adequate length, for solid contact with the motor commutator and for
a good electrical connection at the brush holder.
8.
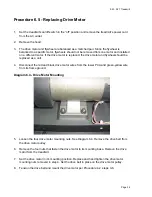
If necessary replace the brushes per Procedure 6.8.
9.
If the brushes and brush contact is good and the reading in step 7 is still open (
∞
) or
significantly high, replace the drive motor per Procedure 6.3.
10. If either the
MOT DRV
or
SHUTDOWN
LED is illuminated on the lower PCA, replace the
lower PCA per Procedure 6.3.

