9.23, 9.27 Treadmill
Page 45
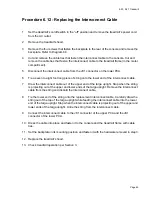
Procedure 6.12 - Replacing the Interconnect Cable
1.
Set the treadmill’s on/off switch in the “off” position and remove the treadmill’s power cord
from the AC outlet.
2.
Remove the treadmill’s hood.
3.
Remove the four screws that fasten the backplate to the rear of the console and remove the
backplate. Refer to Diagram 6.9.
4.
Cut and remove the cable ties that fasten the interconnect cable to the console. Cut and
remove the cable ties that fasten the interconnect cable to the treadmill frame (in the motor
compartment).
5.
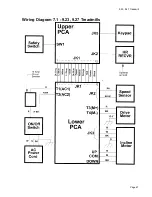
Disconnect the interconnect cable from the JK1 connector on the lower PCA.
6.
Tie a seven to eight foot long piece of string onto the lower end of the interconnect cable.
7.
Draw the interconnect cable out of the upper end of the targa upright. Stop when the string
is projecting out of the upper and lower ends of the targa upright. Remove the interconnect
cable from the string and discard the interconnect cable.
8.
Tie the lower end of the string onto the replacement interconnect cable. Carefully draw the
string out of the top of the targa upright while feeding the interconnect cable into the lower
end of the targa upright. Stop when the interconnect cable is projecting out of the upper and
lower ends of the targa upright. Untie the string from the interconnect cable.
9.
Connect the interconnect cable to the JK1 connector of the upper PCA and the JK1
connector of the lower PCA.
10. Dress the cable into place and fasten it to the console and the treadmill frame with cable
ties.
11. Set the backplate in its mounting position and fasten it with the hardware removed in step 3.
12. Replace the treadmill’s hood.
13. Check treadmill operation per Section 3.

