9.55 Treadmill
Page 1-6
Page 6
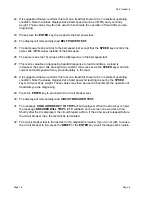
22. It is suggested that you perform this test on a treadmill known to be in excellent operating
condition. Note the values displayed at a fixed speed (such as 3 MPH) and your body
weight. Those values may then be used to benchmark the operation of treadmills you are
diagnosing.
23. Press press the
ENTER
key to proceed to the belt power test.
24. The display will momentarily read
BELT POWER TEST.
25. The belt power test is similar to the belt speed test except that the
SPEED
keys control the
power bits (PWM value) instead of the belt speed.
26. The same (see step 16) values will be displayed as in the belt speed test.
27. This test is valuable in diagnosing treadmill response to load conditions. As load is
increased, the power bits are kept at a constant value (as set via the
SPEED
keys) and the
current and belt speed will vary proportionately to the load.
28. It is suggested that you perform this test on a treadmill known to be in excellent operating
condition. Note the values displayed at a fixed power bit reading (as set by the
SPEED
keys) and your body weight. Those values may then be used to benchmark the operation of
treadmills you are diagnosing.
29. Press the
ENTER
key to proceed to the circuit breaker test.
30. The display will momentarily read
CIRCUIT BREAKER TEST.
31. The message
HOLD ARROW KEY TO TRIP
will be displayed. When the arrow key is held,
the message
BREAKER WILL TRIP 3 2 1 0
will flash on the screen one word at a time.
Shortly after the 0 is displayed, the circuit breaker will trip. If the arrow key is released before
the circuit breaker trips, the test will be terminated.
32. The circuit breaker test is the last test in the diagnostics routine. If you do not wish to cause
the circuit breaker to trip, press the
RESET
or the
ENTER
key to exit the diagnostics routine.
Summary of Contents for 9.55
Page 43: ...9 55 Treadmill Page 43 Wiring Diagram 7 1 9 55 version 1 ...
Page 46: ...9 55 Treadmill Page 1 46 Page 46 Wiring Diagram 7 4 9 55 120 Vac version 2 ...
Page 47: ...9 55 Treadmill Page 47 Wiring Diagram 7 5 9 55 240 Vac version 2 ...
Page 48: ...9 55 Treadmill Page 1 48 Page 48 Block Diagram 7 6 9 55 120 Vac version 2 ...
Page 49: ...9 55 Treadmill Page 49 Block Diagram 7 7 9 55 240 Vac version 2 ...


