C546 Elliptical Fitness Crosstrainer
Page 28
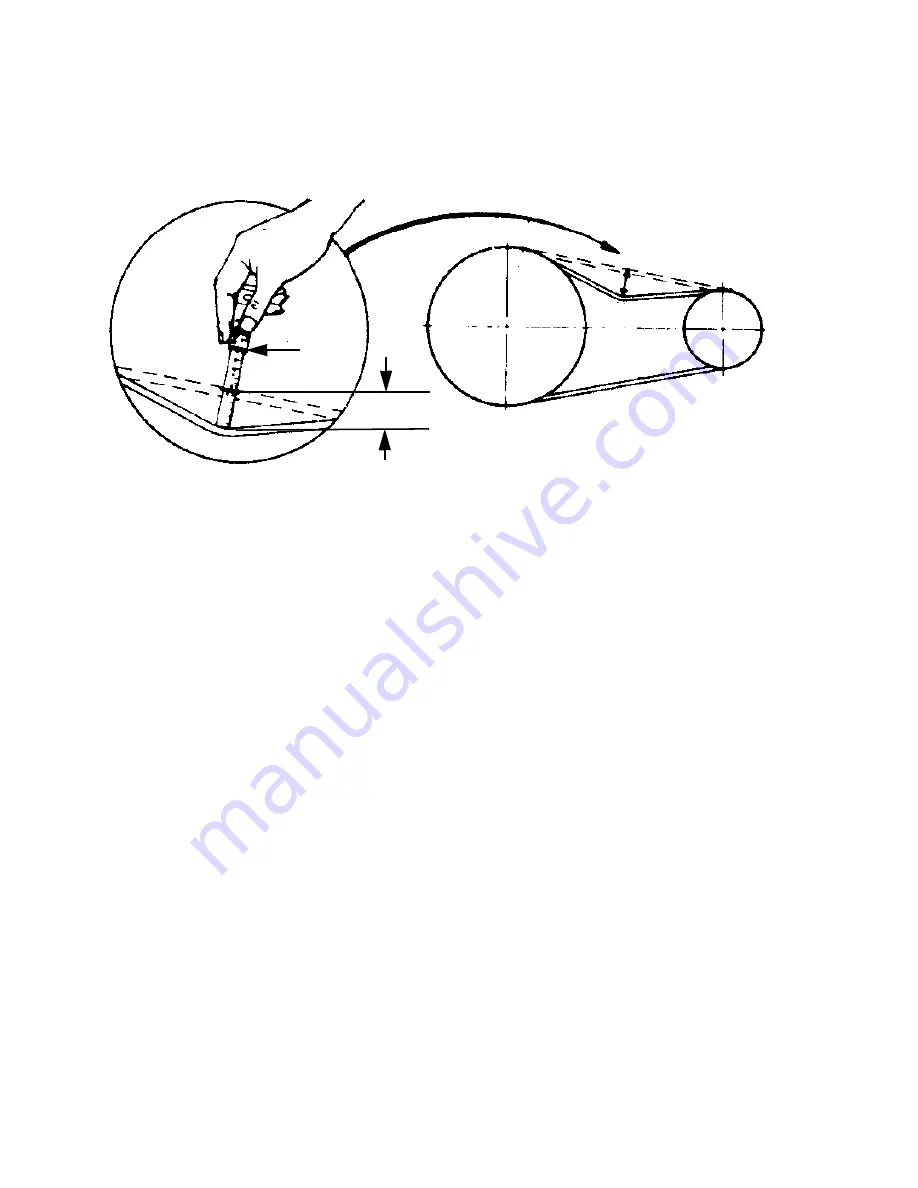
Diagram 5.5 - Measuring Belt tension
16. If the locking tabs on the right and left tension bolts have not been straightened, use pliers to
bend the locking tabs out of the way so that the bolts can be turned.
IF...
THEN...
The belt tensioning gauge reads
Turn both tension bolts
less than 19 pounds
clockwise
, in equal quarter-turn
increments, until the belt tensioning
gauge reads 19 - 21 pounds @1/4” deflection.
The belt tensioning gauge reads
Turn both tension bolts
more than 21 pounds
counterclockwise
, in equal
quarter-turn increments, until the belt
tensioning gauge reads 19 - 21 pounds @ 1/4”
deflection.
17. Verify that the belt alignment is still correct by performing the procedure in step 4.
18. When both the step pulley tension and alignment are correct, use pliers to bend the tension
bolt locking tabs into the “locking” position.
19. The input pulley tension must now be checked and corrected, if necessary. There is not
sufficient room to use the belt tension gauge to set the input pulley belt tension. It will be
necessary to use the correctly tensioned step up belt as a comparison to set the input belt
tension.
20. Using your finger, press in on the center of the step up pulley belt to get a feeling of how
much pressure it takes to deflect the belt a 1/4”.
20 lbs
1/4”
Summary of Contents for C546
Page 55: ...C546 Elliptical Fitness Crosstrainerl Page 55 section to the front cover section ...
Page 111: ...C546 Elliptical Fitness Crosstrainerl Page 111 Wiring Diagram 8 1 C546 120 Vac version 1 ...
Page 112: ...C546 Elliptical Fitness Crosstrainer Page 112 Block Diagram 8 2 C546 120 Vac version 1 ...
Page 114: ...C546 Elliptical Fitness Crosstrainer Page 114 Block Diagram 8 4 C546 240 Vac version 1 ...
Page 116: ...C546 Elliptical Fitness Crosstrainer Page 116 Block Diagram 8 6 C546 120 Vac version 2 3 ...
Page 118: ...C546 Elliptical Fitness Crosstrainer Page 118 Block Diagram 8 8 C546 240 Vac version 2 3 ...


