page 18
C
O
M
M
E
R
C
I
A
L
P
R
O
D
U
C
T
S
D
I
V
I
S
I
O
N
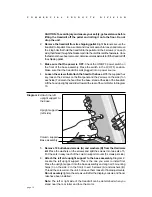
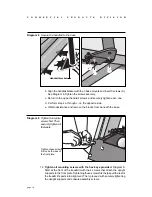
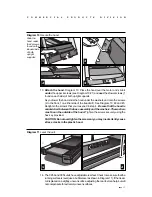
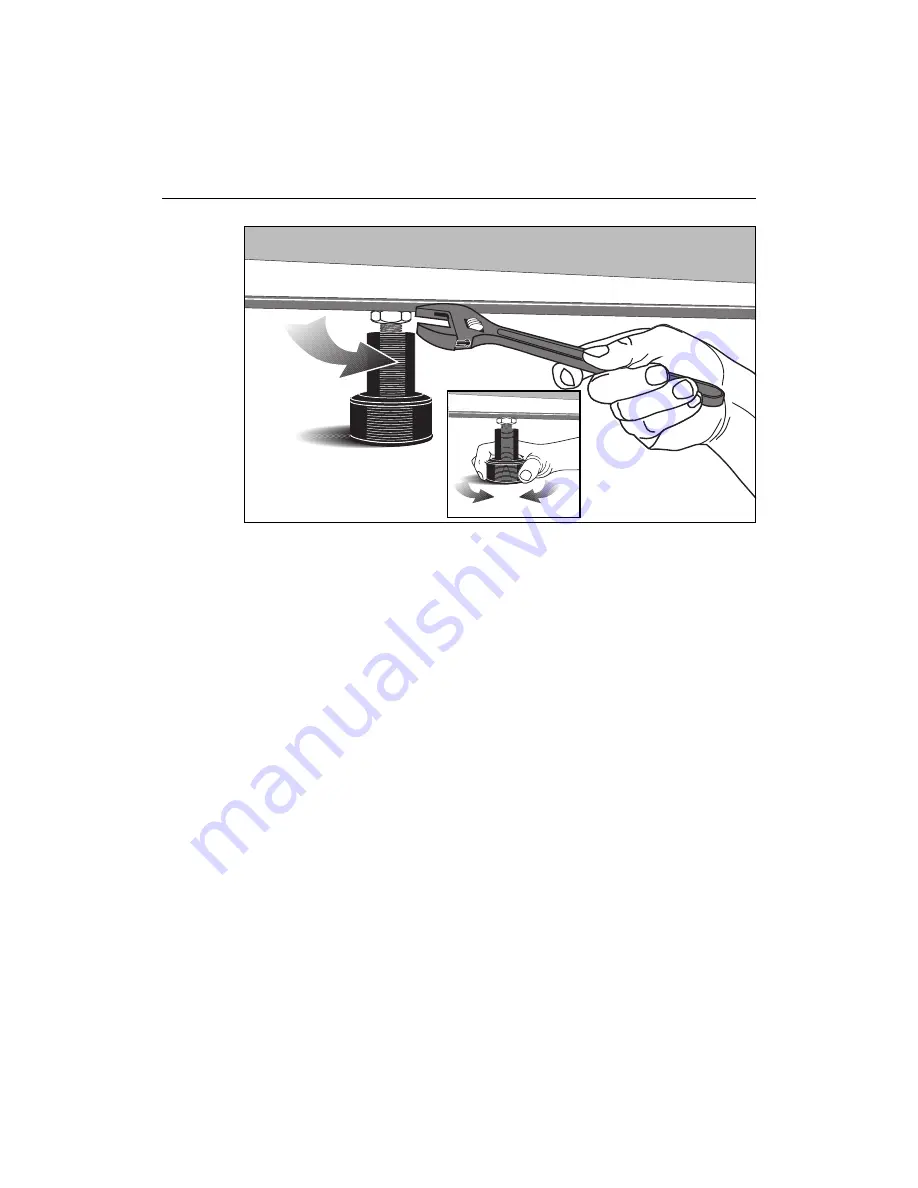
Diagram 12 Adjust the rear foot.
Important: If you need to make adjustments, adjust one rear foot at a time.
Do not use the rear foot to raise or lower the unit more than 1/4” in height.
Check the level of the unit after each adjustment.
15 To adjust a rear foot, locate the nut that secures the rear foot to the deck. See
Diagram 12. Loosen the nut with a crescent wrench or appropriate open-end
wrench until you can easily turn the foot. See inset in Diagram 12.
CAUTION: Ask for assistance to lift the rear of the unit slightly off
the floor. Lift the unit by its side rails. Trying to lift the unit and adjust
the rear foot without assistance may cause injury to yourself or dam-
age to the unit. Do not try to lift the unit using the running belt.
16. To raise the rear deck, turn the foot clockwise and make the proper height
adjustment. Then, retighten (counterclockwise) the nut securely using the
wrench.
TURNING THE UNIT ON AND OFF
Use the ON/OFF (I/O) power switch to turn the unit ON and OFF. This switch is
located on the front of the unit, near the power cord.
The treadmill requires a dedicated circuit. Plug the power cord into a dedicated
20 amp, grounded, power source. Make sure that no other product or machine
uses the same circuit as the treadmill.
CAUTION: Never remove or bypass the 3-prong plug on the unit’s power
cord with an adapter. Do not use a non-grounded outlet. Do not plug the
treadmill into a power transformer in an attempt to adjust the voltage
requirements.
To complete the installation of the treadmill, continue to
Checking the Alignment of
the Running Belt.

