EFX 885, 835, 825
Service Manual 20039-166
Page 70
©2011 Precor Incorporated, Unauthorized Reproduction and Distribution Prohibited by Law
15.
Install the replacement upper PCA into the console using the five screws removed in step 14. Torque to 10 inch
pounds.
Note:
Do not use an electric screw driver or over tighten the screws. Over tightening may damage
the console. This type of damage is not covered under warranty.
16.
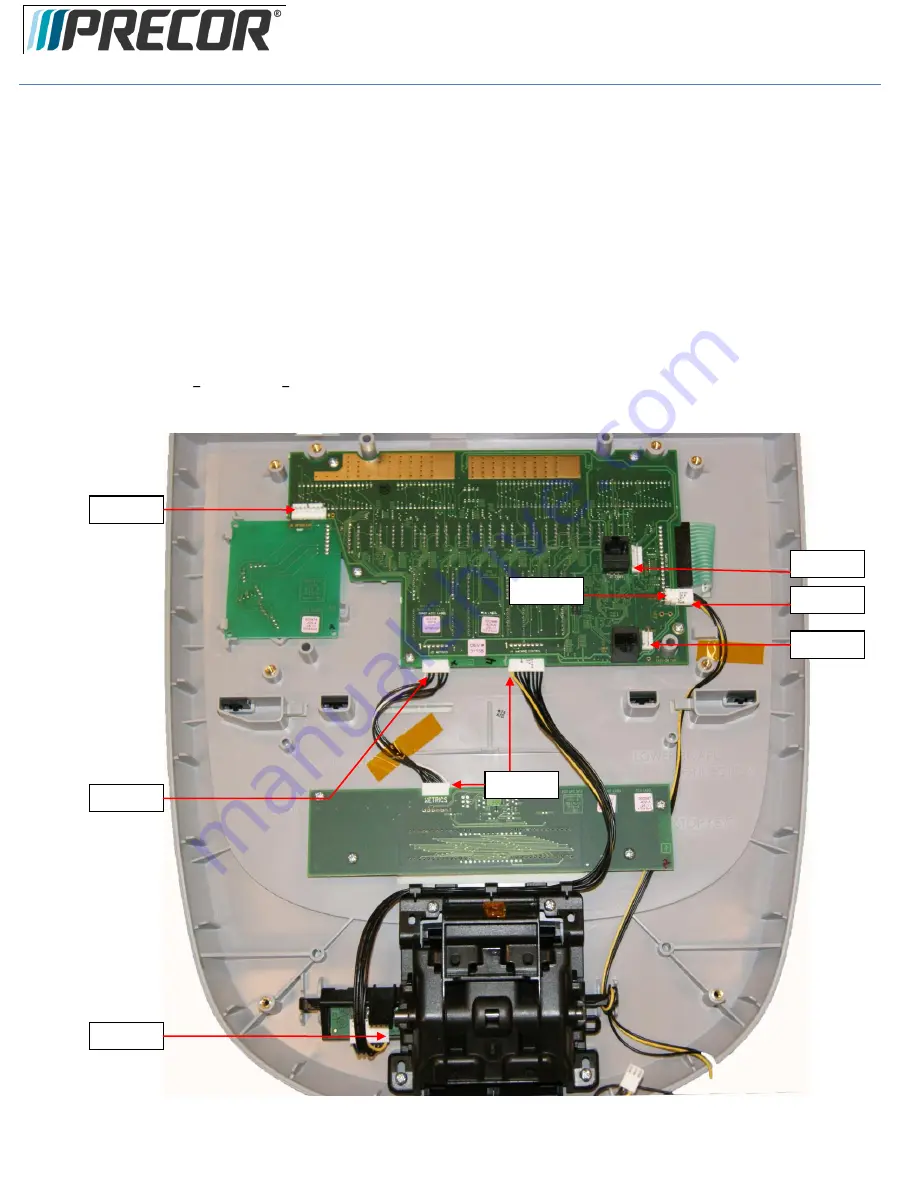
The white wire in the Metrics cable and the yellow wire in the Machine Controls and HR cables indicate pin 1.
Align the white wire in the Metrics cable and yellow wires in the Machine Controls and HR cables with the pin 1
markings on the upper PCA.
See Diagram 5.5.9
Note:
If pin 1 is not marked on the Upper PCA refer to
Diagram 5.5.9
.
Diagram 5.5.9 P30 PCA Pin 1 Reference
Pin 1
Pin 1
Pin 1
Pin 1
Pin 1
Pin 1
Pin 1
Pin 1
Summary of Contents for EFX 825
Page 15: ......


