Procedure 5.4 - Drive Input Assembly Adjustments
This procedure ensures that the drive input assembly, the drive belts and the eddy current
magnet are correctly adjusted and aligned. All of the checks described in this procedure must be
performed to ensure proper operation.
1.
Set the on/off switch in the “off” position, remove the A.C. line cord from the A.C. outlet.
WARNING
Before continuing with this procedure, review the Warning and Caution statements listed in
Section One, Things You Should Know.
2.
Remove the rear covers as described in Procedure 7.1.
3.
Remove both stairarms as described in Procedure 7.17.
Input Drive Assembly Axle Alignment
4.
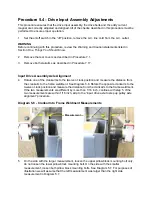
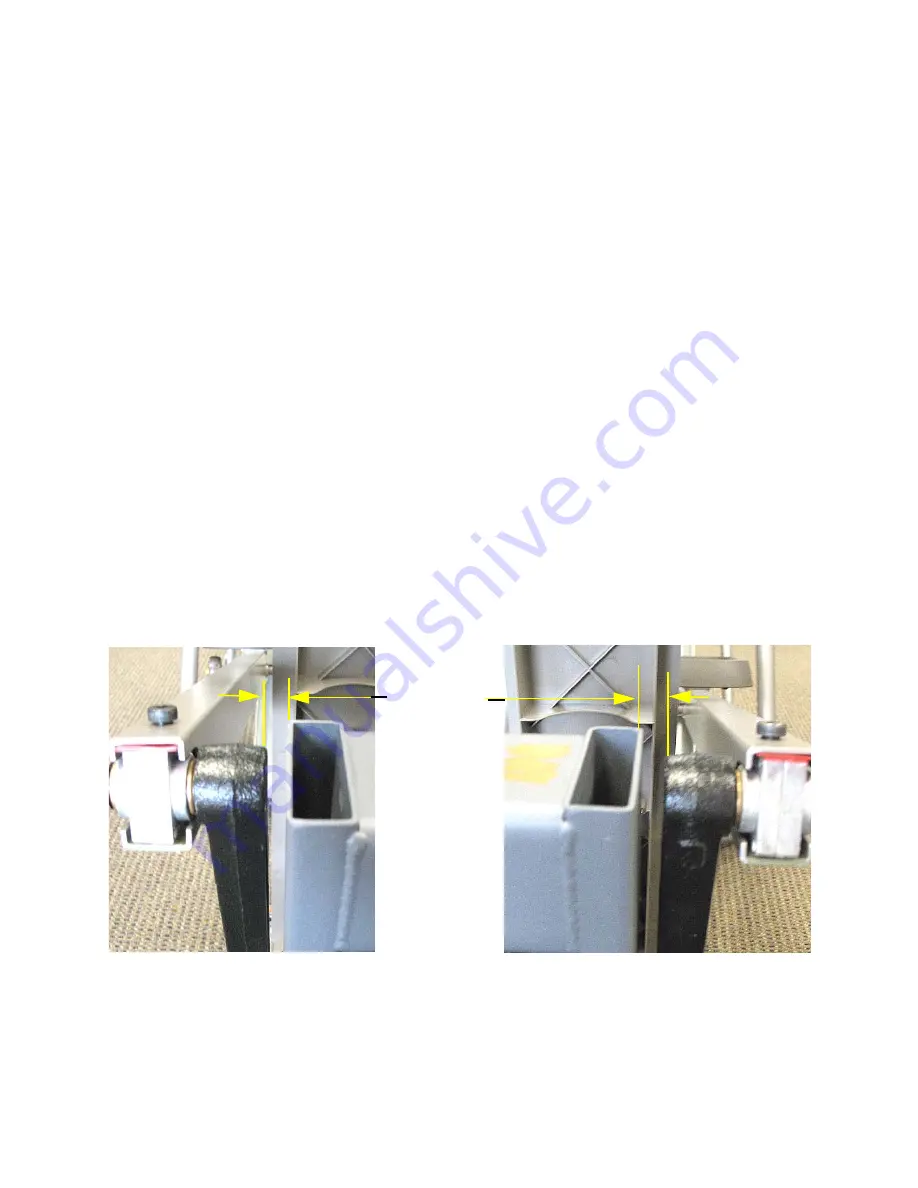
Rotate one of the crankarms to the twelve o’clock position and measure the distance from
the crankarm to the frame weldment. See Diagram 5.6. Rotate the opposite crankarm to the
twelve o’clock position and measure the distance from the crankarm to the frame weldment.
If the two measurements are different by more than 1/16 inch, continue with step 5. If the
two measurements are within 1/16 inch, skip to the “input drive axle to step up pulley axle
alignment” procedure.
Diagram 5.6 - Crankarm to Frame Weldment Measurements
5.
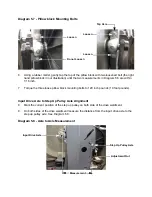
On the side with the larger measurement, loosen the upper pillow block mounting bolt only,
do not loosen the lower pillow block mounting bolt. On the side with the smaller
measurement, loosen both pillow block mounting bolts. See Diagram 5.7. For purposes of
illustration we will assume that the left measurement was larger than the right side
measurement in Diagram 5.7.
Measurement
Summary of Contents for EFX EFX 5.23
Page 79: ...Block Diagram 8 2 5 23 5 25...

