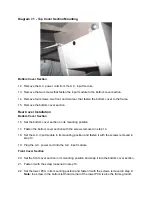
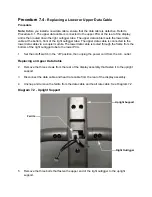
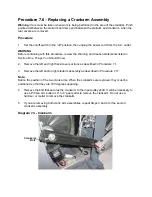
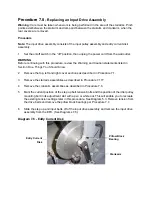

Procedure 7.2
- Replacing a Display Front Panel or Upper PCA
The keyboard is part of the display housing front panel. If the keyboard is not functioning
properly, replace the display housing front panel.
Removing the Display Housing Front Panel
1.
Set the on/off switch in the “off” position, then unplug the power cord from the A.C. outlet.
WARNING
Before continuing with this procedure, review the Warning and Caution statements listed in
Section One, Things You Should Know.
Removal
2.
Attach an anti-static wrist strap to your arm, then connect the ground lead of the wrist strap
to the units frame.
3.
Remove the three screws from the rear of the display assembly that fasten it to the upright
support.
4.
Disconnect the data cable and heart rate cable from the rear of the display assembly.
5.
Remove the eight screws that fasten the display assembly’s rear cover to the display
assembly.
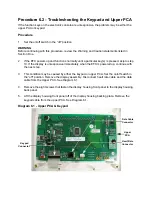
6.
Remove the four screws that fasten the upper PCA to the display front panel and remove
the upper PCA.
Replacement
7.
Set the upper PCA in its mounting position and fasten to the display front panel with the
screws removed in step 6.
8.
Set the water bottle holder in place in the display front panel so that the three slots in the
water bottle holder align and fit into the three tabs on the display front panel.
9.
Set the display assembly’s rear cover in place and fasten it with the screws removed in step
5.
10. Connect the data cable and heart rate cable to the rear of the display assembly.
11. Set the display assembly in its mounting position on the upright support and fasten it with
the screws removed in step 3.
12. Check operation as described in Section Four.
Summary of Contents for EFX EFX 5.23
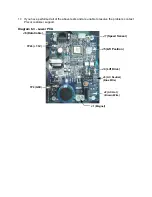
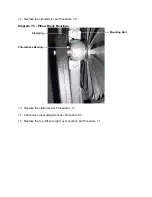
Page 79: ...Block Diagram 8 2 5 23 5 25...


