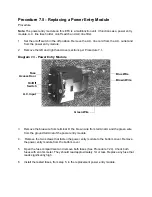
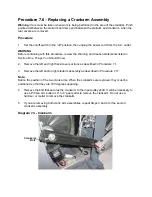
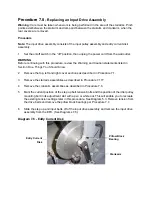
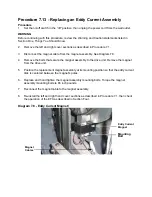
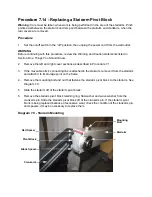
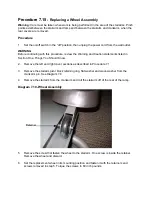

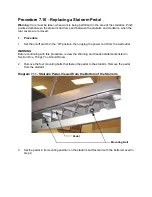
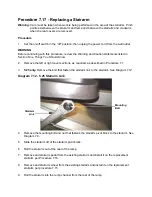
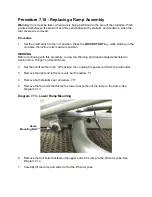


Procedure 7.11 - Replacing a Step-Up Pulley Assembly
Warning:
Care must be taken when work is being performed in the area of the stairarms. Pinch
points exist between the stairarm and ramp and between the stairarm and crankarm, when the
rear covers are removed.
Procedure
1.
Set the on/off switch in the “off” position, then unplug the power cord from the wall outlet.
WARNING
Before continuing with this procedure, review the Warning and Caution statements listed in
Section One, Things You Should Know.
2.
Remove the top, left, right and bottom cover sections as described in Procedure 7.1.
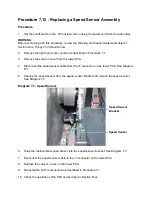
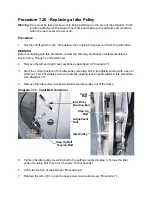
3.
Mark the current position of the step up belt tension bolts and the position of the idler pulley
mounting bolt in its adjustment slot with a pen or white out. This will enable you to recreate
the existing tension settings later in this procedure. See Diagram 5.4
4.
Remove tension from the drive belts.
5.
Slide the step up and input belts off of their pulleys.
6.
Remove the left and right tension bolts, retaining clips and nuts.
7.
Loosen the step up pulley axle nuts and slide the step up pulley assembly with both the step
up and input belts out of the drive unit.
8.
Replace the step up pulley assembly and walk the belts onto the pulley assembly.
9.
Replace the tensioning bolts, retaining clips and nuts removed in step 6. Thread the left and
right tension bolts into the step up pulley shaft.
10. Tighten the right and left hand step up belt tension bolts and the idler pulley mounting bolt to
the settings marked in step 5.
11. Verify the tension of the belts per Procedure 5.2 and 5.4.
12. Torque the step up pulley axle nuts to 480 inch pounds (40 foot pounds)
13. Check drive input adjustment per Procedure 5.4.
14. Replace the top, left, right and bottom cover sections per Procedure 7.1.
Summary of Contents for EFX EFX 5.23
Page 79: ...Block Diagram 8 2 5 23 5 25...


