


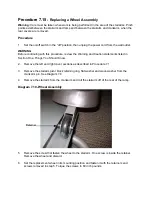

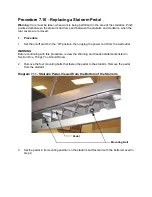


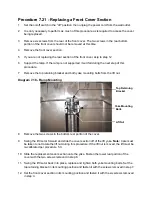
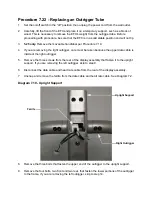

Procedure 7.13 - Replacing an Eddy Current Assembly
Procedure
1.
Set the on/off switch in the “off” position, then unplug the power cord from the wall outlet.
WARNING
Before continuing with this procedure, review the Warning and Caution statements listed in
Section One, Things You Should Know.
2.
Remove the left and right cover sections as described in Procedure 7.1.
3.
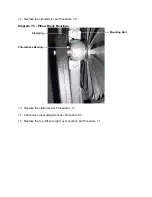
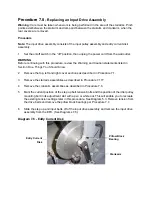
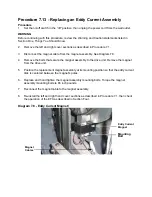
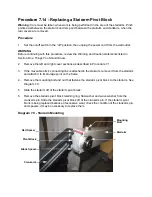
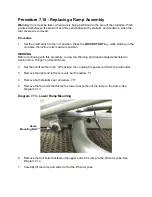
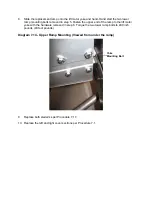
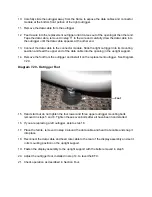
Disconnect the magnet cable from the magnet assembly. See Diagram 7.8.
4.
Remove the bolts that secure the magnet assembly to the drive unit. Remove the magnet
from the drive unit.
5.
Position the replacement magnet assembly at its mounting position so that the eddy current
disk is centered between the magnet’s poles.
6.
Replace and hand tighten the magnet assembly mounting bolts. Torque the magnet
assembly mounting bolts to 66 inch pounds.
7.
Reconnect the magnet cable to the magnet assembly.
8.
Re-install the left and right hand cover sections as described in Procedure 7.1, then check
the operation of the EFX as described in Section Four.
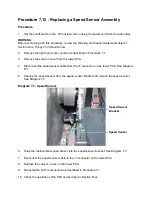
Diagram 7.8 - Eddy Current Magnet)
Eddy Current
Magnet
Magnet
Cables
Mounting
Bolt
Summary of Contents for EFX EFX 5.23
Page 79: ...Block Diagram 8 2 5 23 5 25...


