Procedure 7.25 - Replacing a Lift Motor
1.
Set the on/off switch in the “off” position. Remove the A.C. line cord from the A.C. outlet.
2.
Remove eight screws from the rear of the incline cover. Remove the two screws in the rear
bottom portion of the incline cover.
3.
Remove the front incline cover section.
4.
Support the ramp.
If the ramp is not supported, it will fall during the next step of this
procedure.
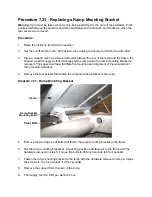
5.
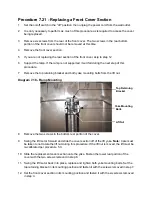
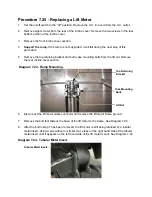
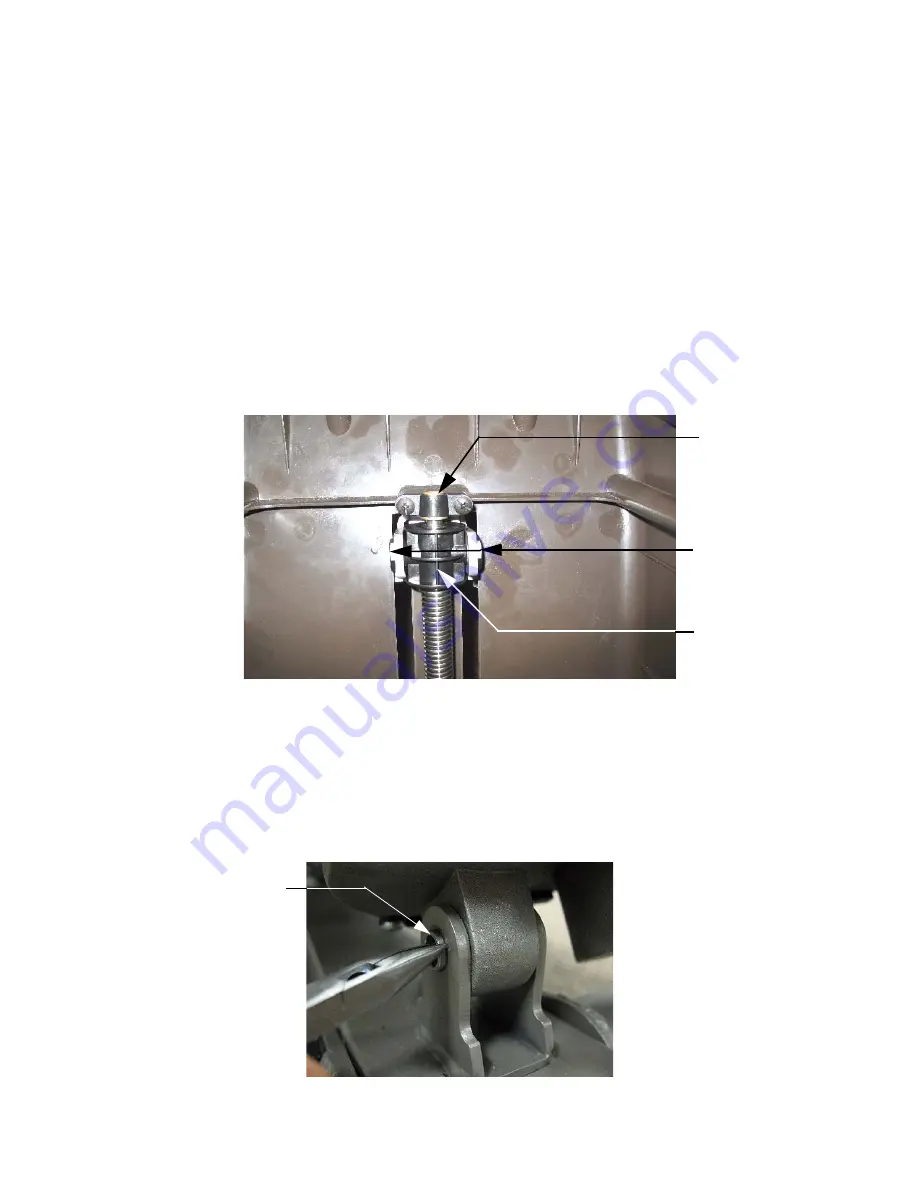
Remove the top retaining bracket and both yoke mounting bolts from the lift nut. Remove
the rear incline cover section.
Diagram 7.23 - Ramp Mounting.
6.
Disconnect the lift motor cable connector and remove the lift motor frame ground.
7.
Remove the bolt that fastens the base of the lift motor to the frame. See Diagram 7.25.
8.
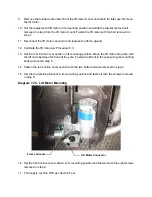
After the bolt in step 7 has been removed, the lift motor is still being retained by a tubular
metal insert. Using a screwdriver or similar tool, press on the right hand side of the tubular
metal insert until it appears on the left hand side of the lift motor mount. See Diagram 7.24
Diagram 7.24 - Tubular Metal Insert.
Top Retaining
Bracket
Yoke Mounting
Bolts
Lift Nut
Tubular Metal Insert
Summary of Contents for EFX EFX 5.23
Page 79: ...Block Diagram 8 2 5 23 5 25...

