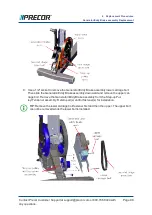
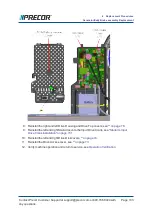
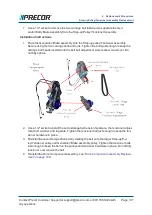
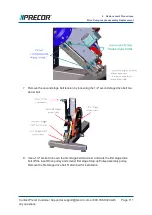
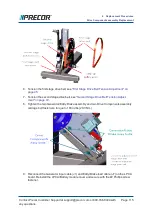

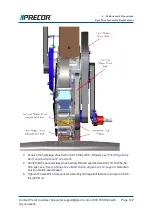
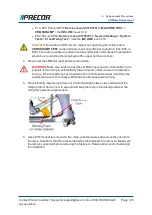
10. Use a 1/2" socket to remove the two Drive Components assembly carriage bolts (2x)
and nuts (2x). Remove the rear (lower) bolt first and then slide the Drive Components
assembly downward to create room to remove the forward (upper) carriage bolt.
Remove the Drive Components assembly. For machines with mfg. dates prior to
01/02/201, remove the bolt isolators (4x) and spacers (2x). Retain part(s) and/or
fastener(s) for installation.
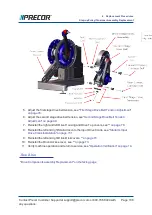
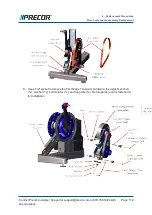
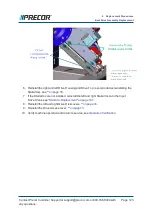
TIP
: Machines with mfg. dates prior to 01/02/2019, the Step-up Pulley/Tensioner
spacers (2x) and bolt isolators (4x) can easily fall out of the mounting bolt holes. Take
care to keep track of these parts for installation.
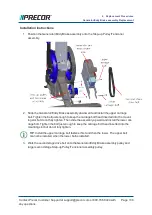
Installation Instructions
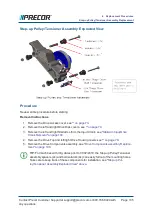
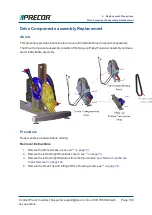
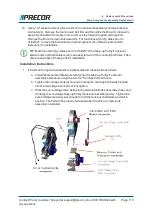
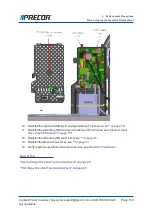
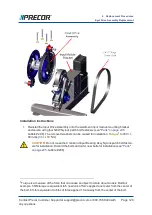
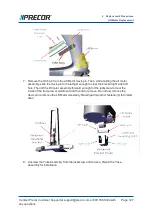
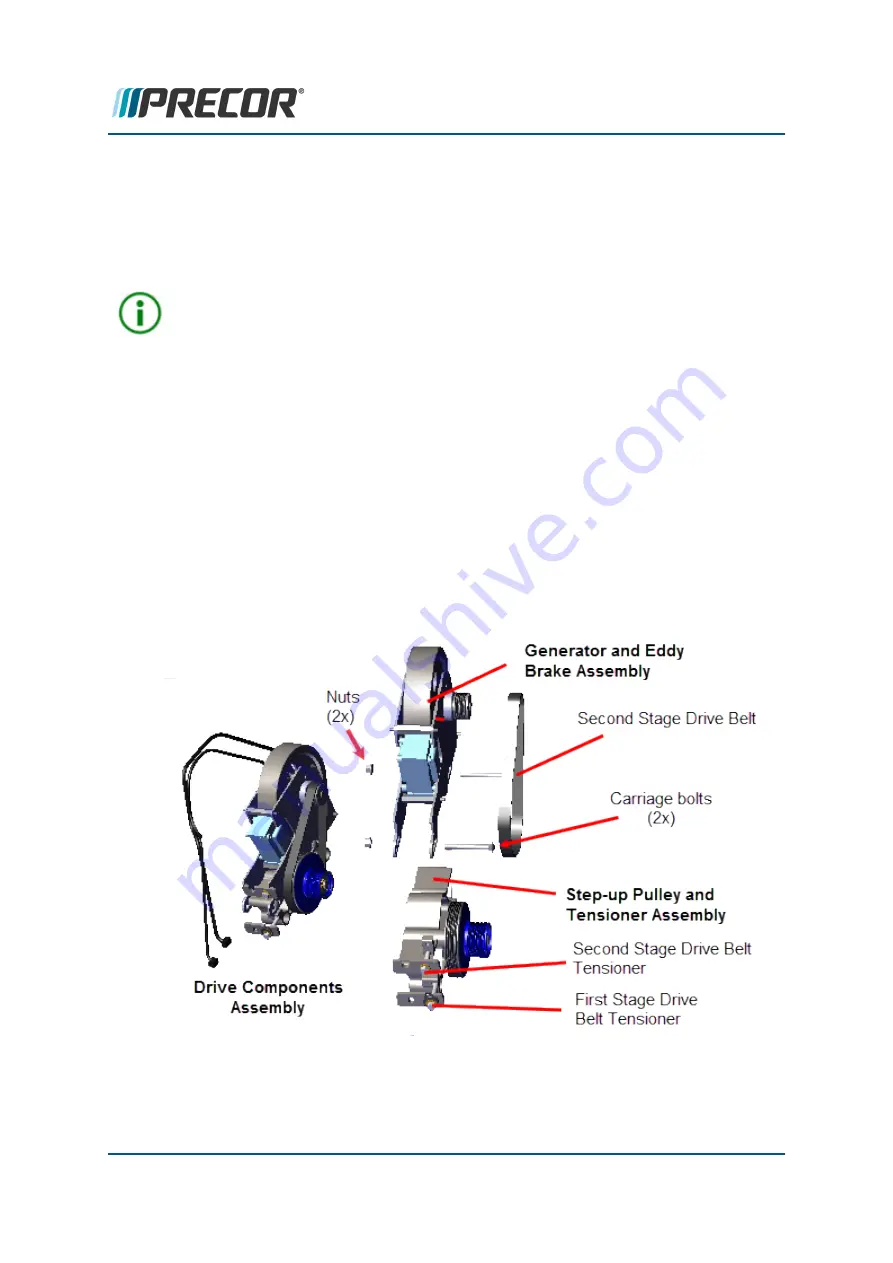
1. If the Drive Components assembly is disassembled, reassemble as follows:
a. Install the Generator/Brake assembly onto the Step-up Pulley/Tensioner
assembly and secure using the two 1/2" Carriage bolts and nuts.
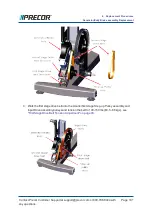
b. Tighten the carriage bolts just enough to keep the carriage bolt heads inserted
into the mounting slot but do not fully tighten.
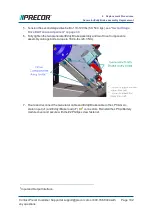
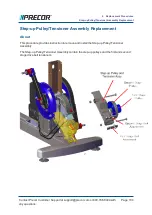
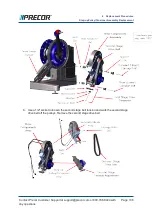
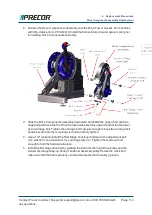
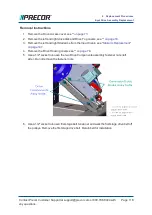
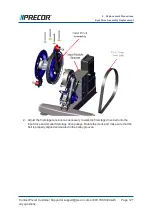
c. Walk the second stage drive belt onto the Generator/Brake assembly pulley and
the larger second stage Step-up Pulley/Tensioner assembly pulley. Tighten the
second stage tensioner just enough to hold the tensioner hardware and belt in
position. The belt will be properly tensioned after the Drive Components
assembly is installed.
Contact Precor Customer Support at support@precor.com or 800.786.8404 with
any questions.
Page 113
6 Replacement Procedures
Drive Components assembly Replacement


