RBK 815 Recumbent Cycle
Page 47
Procedure 7.11 - Replacing a Generator
1.
Remove the top, rear, left and right covers per procedure 7.1.
2.
Disconnect the two generator cables from the lower PCA. The cables are
connected to M1, M2 and M3, M4, M5 on the lower PCA. See Diagram 6.1. Remove
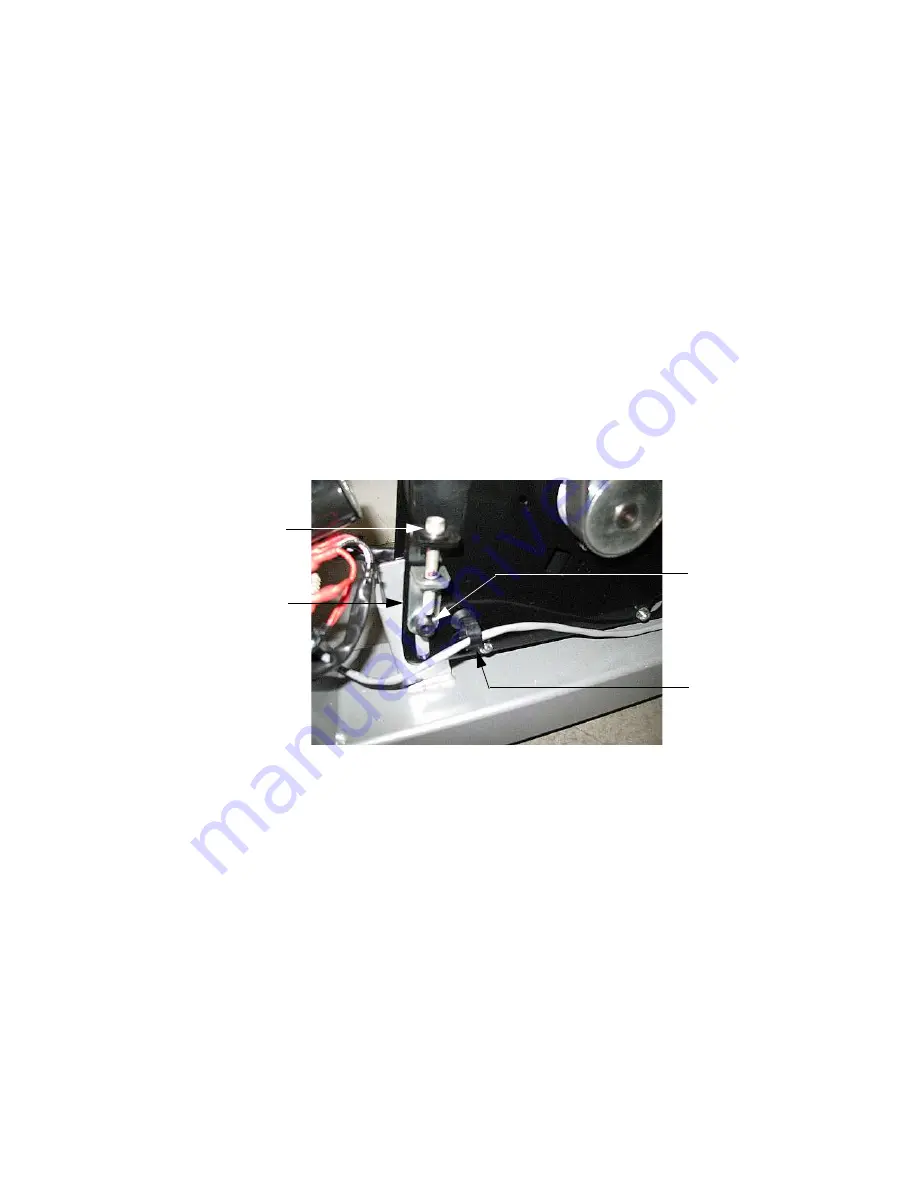
the generator clips from their cable retaining clips. See Diagram 7.13.
3.
Remove the tension adjustment bolt and washer, remove the tension bracket
mounting bolt, washer and tension bracket. See Diagram 7.13.
4.
Loosen the three generator mounting bolts, one front and two rear.
5.
Lift the generator, it will pivot on the rear mounting bolts, to remove the
generator’s weight from the secondary belt then remove the secondary belt.
Diagram 7.13 - Generator Tension Adjustment Hardware
6.
Remove three generator mounting bolts, one front and two rear.
7.
Remove and discard the generator.
8.
Set the replacement generator in its mounting position. Hand start and hand
tighten the three generator mounting bolts removed in step 6.
9.
Place the tension adjustment bolt and washer in its mounting position on the
replacement generator.
10. Thread the adjustment bolt into the tension bracket. Fasten the tension bracket
with the bolt and washer removed in step 3. The bolt should only be hand tight.
11.
Replace the secondary belt.
12. Tension the secondary belt per Procedure 5.2.
13. Torque the three generator mounting bolts and the tension bracket bolt to 100
Tension Bracket
Bolt
Tension Adjustment
Bolt & Washer
Cable Retaining
Clip
Tension Bracket


