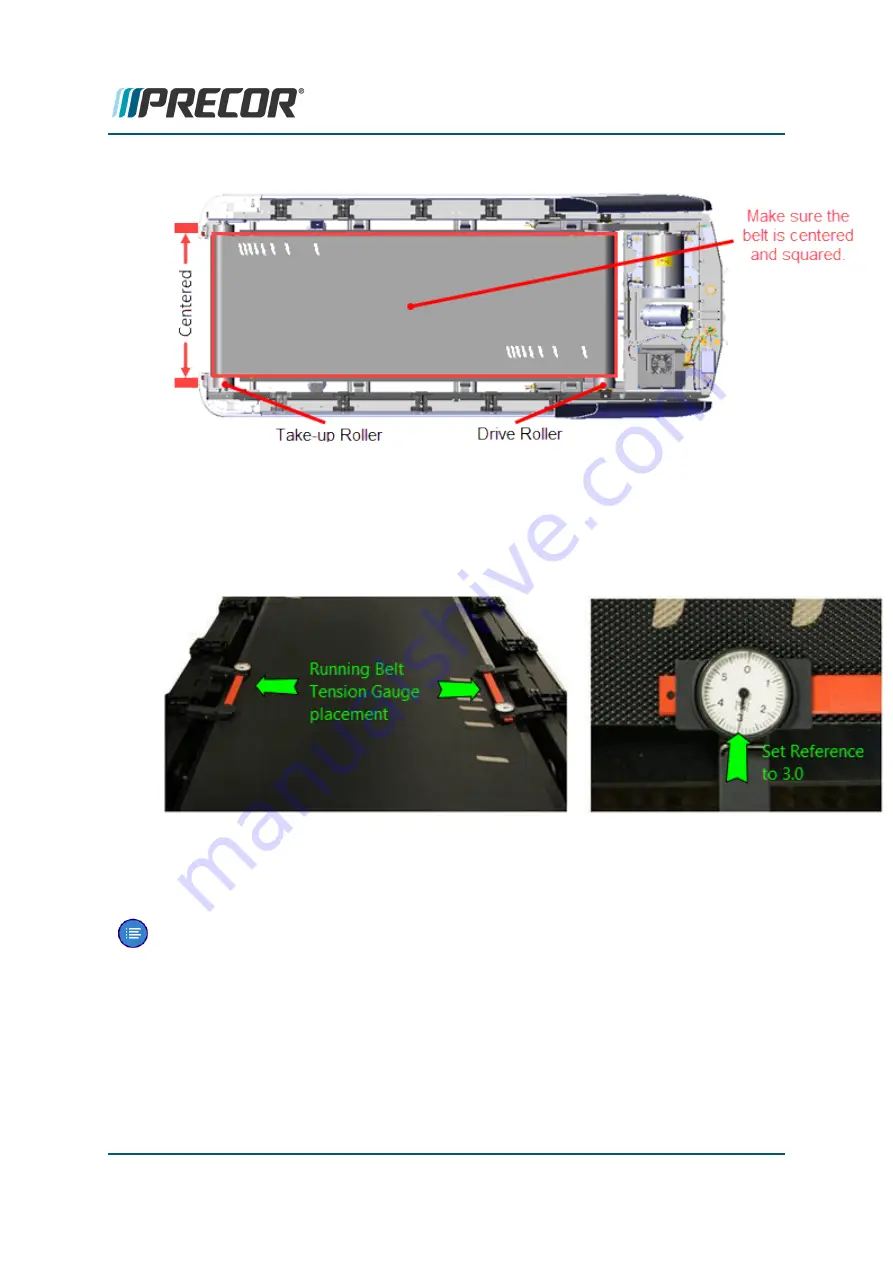
5. Center and square the running belt on the deck and on the Drive and Take-up rollers.
6. Move the running belt so that the seam is positioned on the bottom underside of the
deck.
7. Attach two running belt tension gauges, one on each side of the running belt and posi-
tioned so that they are opposite each other. Place the gauges so that the trim landing
mounting brackets do not interfere with the gauge movement.
8. Slide the gauge dial to set the dial needle as close as possible to 3.0 (0.0%) and then
clip the gauge onto the belt edge. Then use your fingers to rotate the outer gauge dial
to fine adjust the needle to precisely 3.0 (0.0%).
Note
: Setting the gauge to a 3.0 reference value centers the gauge needle at a pos-
ition that allows unhindered gauge movement.
9. Tension the belt to OEM specification:
a. First remove the belt slack by alternately tightening the right and left 1/4” hex
key belt tension adjustment bolts to the point where the belt tension just starts
to exceed 3.0 (0 % ref) for each gauge. Do not exceed 3.0 (0 %) reference.
Contact Precor Customer Support at support@precor.com or 800.786.8404 with
any questions.
Page 54
5 Adjustment Procedures
Running Belt Tension and Tracking Adjustment


