


Assembling the Exercise Bike
21
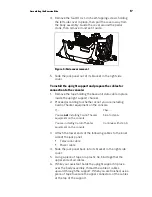
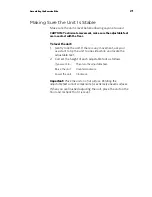
Making Sure the Unit Is Stable
Make sure the unit is level before allowing anyone to use it.
CAUTION: To eliminate movement, make sure the adjustable feet
are in contact with the floor.
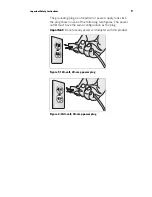
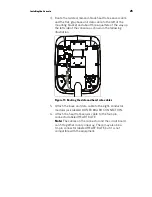
To level the unit:
1.
Gently rock the unit. If there is any movement, ask your
assistant to tip the unit to one side while you locate the
adjustable feet.
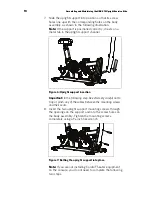
2.
Correct the height of each adjustable foot as follows.
If you want to … Then turn the adjustable feet …
Raise the unit
Counterclockwise
Lower the unit
Clockwise
Important:
Place the unit on a flat surface. Rotating the
adjustable feet cannot compensate for extremely uneven surfaces.
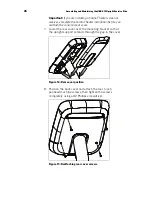
When you are finished adjusting the unit, place the unit on the
floor and recheck that it is level.
Summary of Contents for UBK 815
Page 1: ...Assembling and Maintaining the UBK 815 Upright Exercise Bike ...
Page 2: ......
Page 3: ...Assembling and Maintaining the UBK 815 Upright Exercise Bike ...
Page 40: ...38 Assembling and Maintaining the UBK 815 Upright Exercise Bike Notes ...
Page 41: ...Notes 39 Notes ...
Page 42: ...40 Assembling and Maintaining the UBK 815 Upright Exercise Bike Notes ...
Page 43: ......
Page 45: ...Product Owner s Manual UBK 815 RBK 815 ...
Page 46: ......
Page 47: ...Product Owner s Manual RBK 815 UBK 815 ...
Page 56: ...10 Product Owner s Manual ...
Page 88: ...42 Product Owner s Manual Notes ...
Page 89: ...Notes 43 Notes ...
Page 90: ...44 Product Owner s Manual Notes ...
Page 91: ......


