background image

Page 6

For technical questions, please call 1-888-866-5797.

ITEM 58169 


SAFETY

SETU
p

Op
ERA
TION

M

AINTENANCE

27. Use only accessories that are recommended 

by Harbor Freight Tools for your model.  

Accessories that may be suitable for one 

piece of equipment may become hazardous 

when used on another piece of equipment.

28. Do not operate in explosive atmospheres, 

such as in the presence of flammable 

liquids, gases, or dust.  Gasoline-powered 

engines may ignite the dust or fumes.

29. Stay alert, watch what you are doing and use 

common sense when operating this piece of 

equipment.  Do not use while tired or under the 

influence of drugs, alcohol or medication.

30. Do not overreach.  Keep proper footing and 

balance at all times.  This enables better control 

of the equipment in unexpected situations.

31. Use this equipment with both hands only.   

Using equipment with only one hand 

can easily result in loss of control.

32. Dress properly.  Do not wear loose clothing or 

jewelry.  Keep hair, clothing and gloves away 

from moving parts.  Loose clothes, jewelry or 

long hair can be caught in moving parts.

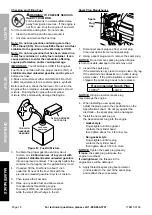
33. Parts, especially exhaust system components, 

get very hot during use.  Stay clear of hot parts.

34. Do not cover the equipment during operation.

35. Keep the equipment and engine clean at all times.

36. Do not operate the equipment with known 

leaks in the engine’s fuel system.

37. When spills of fuel or oil occur, they must be 

cleaned up immediately.  Dispose of fluids and 

cleaning materials as per any local, state, or 

federal codes and regulations.  Store oil rags in 

a bottom-ventilated, covered, metal container.

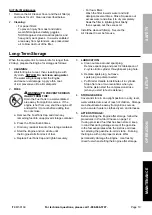
38. Before use, check for misalignment or binding of 

moving parts, breakage of parts, and any other 

condition that may affect the equipment’s operation.  

If damaged, have the equipment serviced 

before using.

  Many accidents are caused 

by poorly maintained equipment.

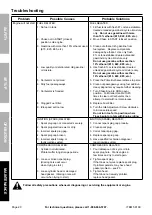
39. Use the correct equipment for the application.  

Do not modify the equipment and do not use the 

equipment for a purpose for which it is not intended.

Summary of Contents for 58169

Page 1: ...ram or month and year of purchase if product has no number Keep this manual and the receipt in a safe and dry place for future reference When unpacking make sure that the product is intact and undamaged If any parts are missing or broken please call 1 888 866 5797 as soon as possible Copyright 2021 by Harbor Freight Tools All rights reserved No portion of this manual or any artwork contained herei...

Page 2: ...ed air cooled Fuel Type 87 octane stabilizer treated unleaded gasoline containing no more than 10 ethanol E10 mixed with 2 stroke oil see below Capacity 0 27 Gallon Oil Type 2 stroke oil designed specifically for mixing with gasoline Must meet either JASO M345 FD or ISO L EGD requirements for air cooled engines synthetic Ratio 50 1 gasoline to oil ratio 2 6 oz oil per gallon of gasoline Sound Leve...

Page 3: ...ided could result in minor or moderate injury Addresses practices not related to personal injury Symbol Definitions Symbol Property or Statement RPM Revolutions Per Minute HP Horsepower WARNING marking concerning Risk of Eye Injury Wear ANSI approved safety goggles with side shields Read the manual before set up and or use WARNING marking concerning Risk of Hearing Loss Wear hearing protection Sym...

Page 4: ...re extinguishers nearby 5 Do not operate the equipment without wearing adequate protective clothing Wear protective footwear that will improve footing on slippery surfaces 6 Never attempt to make any adjustments while the engine is running 7 Operation of this equipment may create sparks that can start fires around dry vegetation A spark arrestor may be required The operator should contact local fi...

Page 5: ...ity or light 12 Do not use the Cultivator on steep inclines Use only on level ground surfaces 13 Keep a safe distance from the edges and banks of ditches Avoid any actions that may cause the Cultivator to tip over 14 Be careful when operating in hard ground The tines may catch in the ground and propel the tiller forward If this occurs let go of the handlebars and do not restrain the machine 15 Kee...

Page 6: ...ntrol 32 Dress properly Do not wear loose clothing or jewelry Keep hair clothing and gloves away from moving parts Loose clothes jewelry or long hair can be caught in moving parts 33 Parts especially exhaust system components get very hot during use Stay clear of hot parts 34 Do not cover the equipment during operation 35 Keep the equipment and engine clean at all times 36 Do not operate the equip...

Page 7: ... Do not store fuel or other flammable materials near the engine 8 Wear ANSI approved safety goggles heavy duty work gloves and dust mask respirator during service 9 Maintain labels and nameplates on the equipment These carry important information If unreadable or missing contact Harbor Freight Tools for a replacement 10 Have the equipment serviced by a qualified repair person using only identical ...

Page 8: ...Switch of the equipment to its OFF position wait for the engine to cool and unplug the spark plug wire s before assembling or making any adjustments to the equipment At high altitudes the engine s carburetor governor if so equipped and any other parts that control the fuel air ratio will need to be adjusted by a qualified mechanic to allow efficient high altitude use and to prevent damage to the e...

Page 9: ...heel 5 Attach the completed Axle Drag Bar Assembly onto the bracket on the Cultivator using the R Clip and Clevis Pin removed in steps 1 and 2 Attach the Axle Drag Bar Assembly in the rolling position with the Drag Bar facing up as shown for moving the Cultivator before and after use For cultivating change the direction to the working position with the Drag Bar facing down Bracket Axle Drag Bar As...

Page 10: ...s 59 and Knobs 15 Make sure the Knobs are on the outside 2 Attach the Right Handle 11 and Left Handle 13 to the Middle Handle using four M8x45 Capscrews 14 Ø8 Flat Washers 58 Ø8 Lock Washers 59 and Knobs 15 Make sure the Knobs are on the outside 3 Completed Handle Assembly Middle Handle M8x45 Capscrew Lower Handle Ø8 Flat Washer Ø8 Lock Washer Knob Right Handle Left Handle Middle Handle M8x45 Caps...

Page 11: ...l questions please call 1 888 866 5797 ITEM 58169 Safety Setup Operation Maintenance Components and Controls Choke Choke Prime Prime Bulb Bulb Fuel Tank Air Filter Tines Engine Switch Throttle Control Lever Starter Handle ...

Page 12: ...TANT Your Warranty is VOID if the Engine s Fuel Tank is not filled with the proper mixture 50 1 of stabilizer treated unleaded gasoline and 2 cycle oil before each use 2 Stroke oil must meet either JASO M345 FD or ISO L EGD requirements for air cooled engines synthetic Before each use check the fuel level Do not run the Engine with an improper unleaded gasoline 2 cycle oil mixture Running the Engi...

Page 13: ...ition 2 Press the Prime Bulb 7 10 times until fuel can be seen in the fuel line 3 Turn the Engine Switch ON Note Do not pull on the Throttle Control Lever when starting the Engine 4 Grip the Starter Handle of the Engine loosely and pull it gently until resistance is felt Allow Cable to retract fully and then pull it quickly Repeat until the Engine starts Note Do not let the Starter Handle snap bac...

Page 14: ...ull and release the Throttle Control Lever to return Choke to its RUN position and follow Steps 3 and 4 in the starting instructions above If Engine fails to start use the cold engine starting procedure Stopping the Engine 1 To stop the engine in an emergency release the Throttle Control Lever and turn the Engine Switch OFF 2 Under normal conditions use the following procedure a Release the Thrott...

Page 15: ...efore first use practice operating the Cultivator controls with Tines raised off of the ground Know how to keep control at all times how to stop the Tines from turning and how to stop the Engine For actual field use operate at a slow pace until familiar with Cultivator handling 3 Start the Engine following instructions in Manual Start on page 13 4 Grip the Handles firmly with both hands 5 With the...

Page 16: ...dures TO PREVENT SERIOUS INJURY FROM EQUIPMENT FAILURE Do not use damaged equipment If abnormal noise vibration or excess smoking occurs have the problem corrected before further use Follow all service instructions in this manual The engine may fail critically if not serviced properly Many maintenance procedures including any not detailed in this manual will need to be performed by a qualified tec...

Page 17: ... regular checks and maintenance explained as part of the regular operation of the engine and equipment Procedure Before Each Use After Each Use Monthly or every 20 hr of use Every 3 mo or 50 hr of use Every 6 mo or 100 hr of use Yearly or every 300 hr of use Every 2 Years Brush off outside of engine Check engine fuel oil mixture level Check for loose hardware Check adjust idle speed Clean debris f...

Page 18: ...ently agitate the container to thoroughly mix the gasoline 2 cycle oil 4 If needed fill the Fuel Tank to about 1 inch under the fill neck of the Fuel Tank with the pre mixed unleaded gasoline 2 cycle oil mixture 5 Then replace the Fuel Cap 6 Wipe up any spilled fuel and allow excess to evaporate before starting engine To prevent FIRE do not start the engine while the smell of fuel hangs in the air...

Page 19: ... If the engine is hot from use shut the engine off and wait for it to cool before adding fuel Do not smoke a Remove the Fuel Tank Cap and drain any remaining fuel into an approved storage container b Press the Prime Bulb 8 times c Drain any residual fuel into the storage container d Start the Engine and run at idle until the Engine stalls from lack of fuel e Replace Fuel Tank Cap and tighten secur...

Page 20: ...ditive Heavy deposits may require further cleaning 7 Turn Choke Knob to RUN open position Pull Starter Handle 10 20 times to clear out Carburetor then attempt to start with normal process 8 Replace Fuel Filter 9 Turn the Idle Adjustment Screw clockwise to increase idle speed Do not turn too far to position where Tines begin to rotate with Engine idling IGNITION SPARK RELATED 1 Spark plug cap not c...

Page 21: ...s when under heavy load 1 Dirty air filter 2 Engine running cold 1 Clean element 2 Allow engine to warm up prior to operating equipment Engine knocks 1 Old or low quality gasoline oil mixture 2 Engine overloaded 3 Incorrect spark timing deposit buildup worn engine or other mechanical problems 1 Refuel with fresh 87 octane stabilizer treated unleaded gasoline 2 cycle oil mixture Do not use gasoline...

Page 22: ...5 Needle Roller Thrust Bearing 1 Part Description Qty 36 Bearing Thrust Reducer 1 37 Worm Gear Shaft 1 38 Washer 1 39 Needle Roller Bearing 1 40 Seal Washer 2 41 Bolt M6x10 2 42 Tine Assembly D 1 43 Tine Assembly C 1 44 Bolt M6x20 6 45 Left Gear Housing 1 46 Right Gear Housing 1 47 Tine Assembly B 1 48 Tine Assembly A 1 49 R Clip 2 50 Dust Cap 2 51 Fiber Washer 2 52 Seal FB 19x32x6 5 2 53 Tine Sha...

Page 23: ...ain Assembly Diagram 1 2 3 5 6 7 1 4 8 9 10 11 12 13 15 14 14 15 16 17 18 20 14 21 22 23 24 25 24 23 22 21 26 27 28 29 30 57 60 61 62 65 58 59 59 58 58 59 59 58 58 59 59 58 58 59 59 14 19 67 31 32 33 34 35 36 37 38 39 41 40 42 43 44 45 47 46 48 49 50 51 52 53 54 55 56 54 53 52 51 50 49 63 64 55 56 66 68 69 ...

Page 24: ...d Bearing 1 33A Piston Pin Circlip 2 34A Piston 1 35A Piston Pin 1 36A Piston Ring 2 Part Description Qty 37A Cylinder Gasket 1 38A Cylinder 1 39A Screw M5x20 4 40A Engine Housing 1 41A Spark Plug 1 42A Spark Plug Spring 1 A43 Gasket 1 A44 Spark Plug Cap 1 45A Plug 1 46A Top Cover 1 47A Insulation Gasket 1 48A Muffler Gasket 1 49A Muffler Assembly 1 50A Muffler Cover 1 51A Screw M5x12 2 52A Screw ...

Page 25: ...p Operation Maintenance Engine Assembly Diagram 62 63 12 12 59 61 58 60 58 9 2 1 3 54 53 55 56 31 42 43 41 45 46 27 68 64 65 10 66 67 69 26 39 19 15 34 32 11 13 33 14 16 25 18 15 38 37 36 35 33 23 30 22 2 24 31 28 29 51 48 2 40 52 49 44 20 21 71 50 17 47 57 51 70 71 4 5 4 5 6 7 8 72 ...

Page 26: ...nnot readily and quickly provide you with a replacement We will return repaired products at our expense but if we determine there is no defect or that the defect resulted from causes not within the scope of our warranty then you must bear the cost of returning the product This warranty gives you specific legal rights and you may also have other rights which vary from state to state Emissions Contr...

Page 27: ...blies This warranty does not cover normal maintenance services or replacement of maintenance items such as filters oils or spark plugs WHAT YOU MUST DO TO OBTAIN WARRANTY SERVICE As the engine owner you are responsible for the performance of the required maintenance listed in your Owner s Manual HFT may deny you warranty coverage if your engine or a part has failed due to abuse including failure t...

Page 28: ...YER THAT HE OR SHE IS QUALIFIED TO MAKE ANY REPAIRS TO THE PRODUCT OR THAT HE OR SHE IS QUALIFIED TO REPLACE ANY PARTS OF THE PRODUCT IN FACT THE MANUFACTURER AND OR DISTRIBUTOR EXPRESSLY STATES THAT ALL REPAIRS AND PARTS REPLACEMENTS SHOULD BE UNDERTAKEN BY CERTIFIED AND LICENSED TECHNICIANS AND NOT BY THE BUYER THE BUYER ASSUMES ALL RISK AND LIABILITY ARISING OUT OF HIS OR HER REPAIRS TO THE ORI...

Reviews: