6
Assembly Instructions, Power Rail P6 (Version 2, Rev A)
CAUTION
This is a two per-
son activity.
In addition to the
difficulties associat
-
ed with working on
a sloped rooftop,
PV Modules are
heavy. One person
should hold and
align the modules
while a second per-
son secures mod-
ules with clamping
hardware. Failure
to do so could lead
to serious personal
injury and/or dam-
aged components.
4 Install the Modules
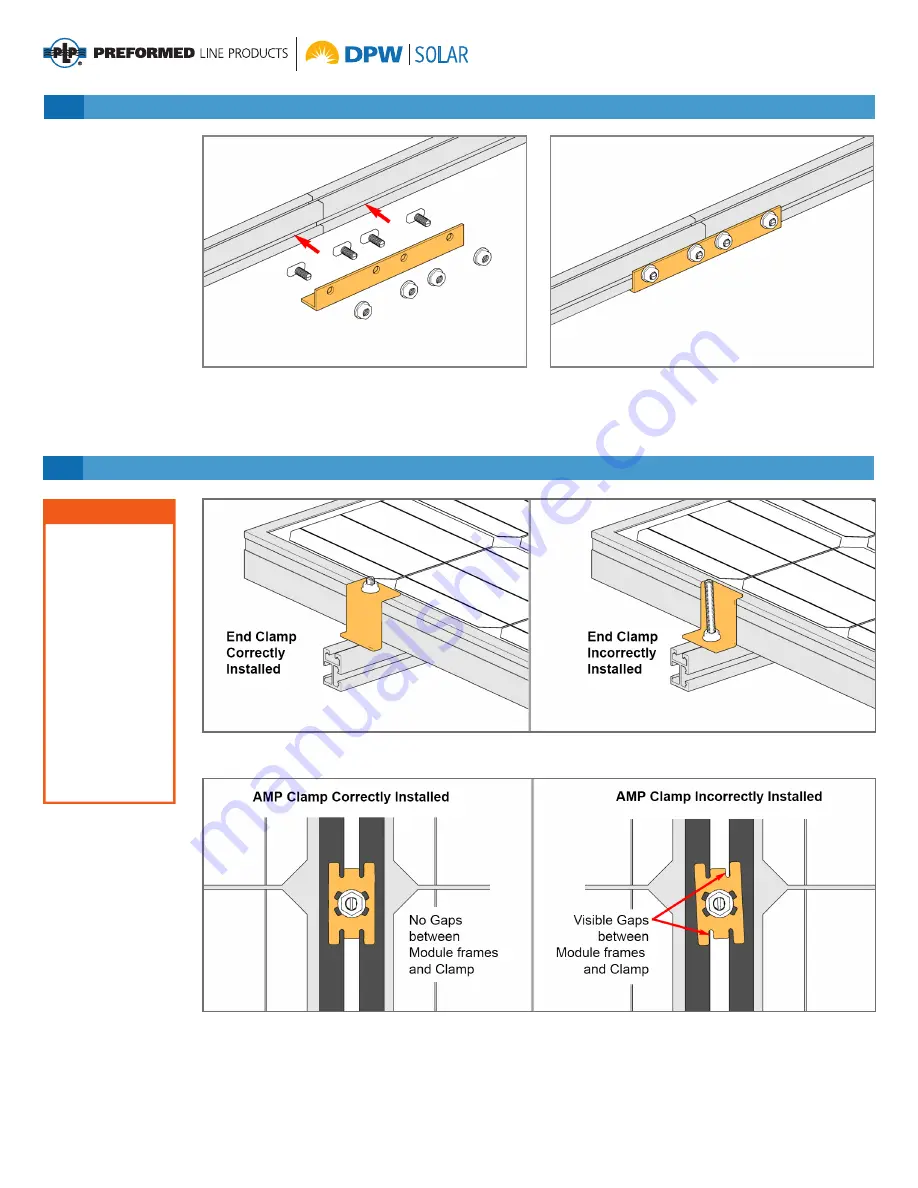
Splice Plates come in two configurations, 2-hole or
4-hole (above is a 4-hole). Insert 5/16” x 3/4” Turn
Bolts into Power Rail and rotate 90-degrees to lock
Turn Bolts in place. Align Splice Plate with center of
splice and secure to Power Rail with 5/16” Flange
Nuts.
Torque to 14-16 ft.-lbs.
3 Splicing Power Rail with Splice Plates
End Clamps must be installed as shown above left, not upside down as shown to the right.
AMP Clamp bonding Mid Clamps must be installed as shown at above left and not as shown to the right. There
cannot be any visible gaps between the bonding Mid Clamps and module frames.


