Welcome to the DevKit8600 Evaluation Kit Quick Start Guide.
This guide is designed to help you through the initial setup of
your DevKit8600. The DevKit8600 allows you to experience
both Linux, Windows Embedded Compact 7 and Android 2.3
operating systems showcasing the AM3359 Cortex™-A8
processor, 3D graphics, Wi-Fi/Bluetooth based on WG7310, and
much more. The DevKit8600 Evaluation Kit contains the
following:
DevKit8600 evaluation board
2GB TF card
Serial port line (DB9-DB9)
12V,1.25A power adapter
USB main data line (A type
male to mini-B type male)
USB slave data line (A type
female to mini-A type female)
Crossover cable
WIFI antenna
Optional
4.3” LCD display screen or 7”
display screen (with
touchscreen functionality)
On the DVD
:
DevKit8600 Quick Start
Guide
DevKit8600 User Manual
DevKit8600 Schematic
Diagram
Board Carrier Chip
Datasheet
DevKit8600 Development
Software
(
Linux/Windows
Embedded Compact
7/Android
)
Factory default configuration:
The TF card is provided with Windows Embedded Compact 7 pre
installed. The DevKit8600 NAND Flash comes factory installed
with a Linux operating system and 4.3-inch LCD driver. The
DevKit8600 Development board requires a CR1220 cell battery
which is not included.
DevKit8600 evaluation board will boot from the TF card by
default, and subsequently from the NAND Flash if no TF card is
present.
1
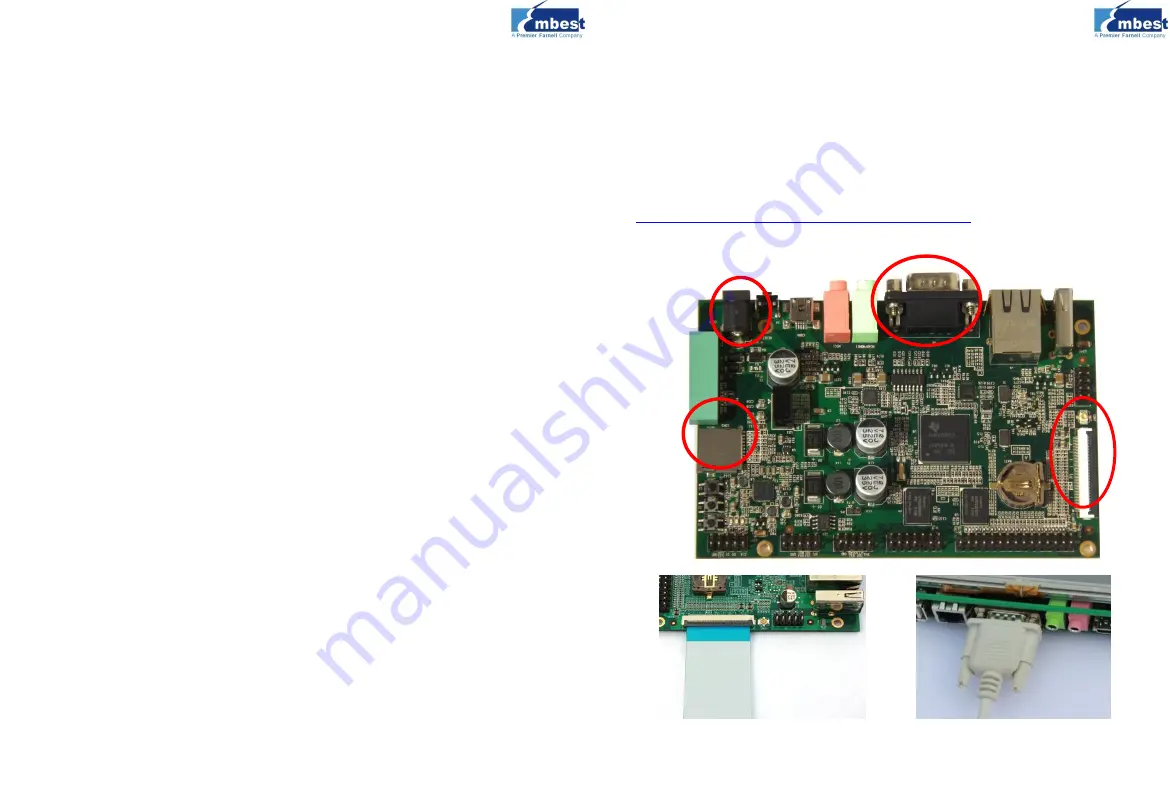
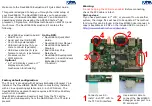
Use a serial cable to
connect the DevKit8600
debugger serial port to a
PC serial port
2
Connect your 4.3-
inch/7-inch TFT-LCD to
the TFT-LCD interface
Start-up steps:
If you have purchased a 7” LCD, or you want to use another
system, the image files will need to be updated. The method
for doing this can be found in the DevKit8600 User manual. A
copy is available as a PDF on the included DVD or online at:
http://www.embest-tech.com/download
1
2
3
4
Warning:
Do not hot-plug the LCD screen cable!
Before connecting,
check the FPC cable is intact.


