background image


Page | 1 


1


Product Overview 

1.1


Introduction 

The SBC8140 is a Single Board Computer designed by Embest using the 
MINI8510 processor card as the CPU core board. The MINI8510 is built 
around  the  DM3730  microcontroller  featuring  256MByte  DDR  SDRAM, 
512MByte NAND Flash, RTC, LEDs, Camera interface and a 10-pin JTAG 
interface  on  board.  It  is  connected  with  the  SBC8140  expansion  board 
through  two  1.27mm  space  2x45-pin  dip  connectors.  The  SBC8140 
expansion board utilises many of other features of the DM3730 through 
headers and connectors including serial ports, USB Host, OTG, Ethernet, 
Audio In/Out, Keyboard, LCD/Touch Screen interface, VGA, SD card, etc.   
 
The  board  targets  those  applications  requiring  high  definition  video  or 
large-scale data processing such as:   


2D/3D game console products,   


Portable media devices,   


High-end industrial equipment,   


Medical devices,   


Intelligent home systems.   
 

1.2


Kit Contents 


SBC8140 


Cross-over serial cable (DB9 to DB9) 


5V/2A power adapter 


DVD-ROM 


Optional 

LCD screen (available in 4.3” 480x272 or 7” 800x480) 

Summary of Contents for Embest SBC8140

Page 1: ...SBC8140 Single Board Computer Quick Start Guide Version 1 1 22nd Jan 2014...

Page 2: ...ology has the copyright of this document and reserves all rights Any part of the document should not be modified distributed or duplicated in any approach and form without prior written permission iss...

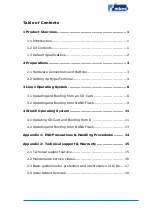
Page 3: ...d Booting from an SD Card 8 3 2 Updating and Booting from NAND Flash 9 4 WinCE Operating System 11 4 1 Updating SD Card and Booting from It 11 4 2 Updating and Booting from NAND Flash 13 Appendix 1 ES...

Page 4: ...dip connectors The SBC8140 expansion board utilises many of other features of the DM3730 through headers and connectors including serial ports USB Host OTG Ethernet Audio In Out Keyboard LCD Touch Sc...

Page 5: ...ave an on board RTC battery by default The SBC8140 has a Linux2 6 32 system in NAND Flash by default The SBC8140 boots from NAND Flash by default pressing and holding the BOOT button button CN12 befor...

Page 6: ...and Buttons The hardware connection points and button locations can be found in the diagram below Figure 1 Hardware connections No Description No Description 1 SD card slot 3 BOOT button 2 Serial cab...

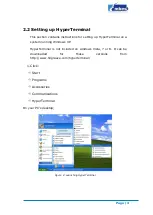
Page 7: ...erminal on a system running Windows XP HyperTerminal is not included on windows Vista 7 or 8 It can be downloaded for these versions from http www hilgraeve com hyperterminal 1 Click Start Programs Ac...

Page 8: ...Page 5 2 Enter a name in the Name field and select an icon as below and then click OK Figure 3 Create a new HyperTerminal 3 Select the port to be used and click OK Figure 4 Select Port...

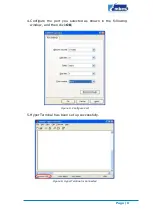
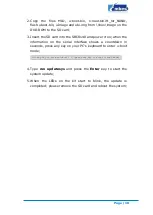
Page 9: ...Page 6 4 Configure the port you selected as shown in the following window and then click OK Figure 5 Configure Port 5 HyperTerminal has been set up successfully Figure 6 HyperTerminal is Connected...

Page 10: ...ncluded on windows Vista 7 or 8 It can be downloaded for these versions from http www hilgraeve com hyperterminal Of course you can also use other serial communications software just pay attention to...

Page 11: ...ystem from them respectively 3 1 Updating and Booting from an SD Card 1 You can download the HP USB Disk Storage Format Tool 2 0 6 from http www embest tech com resource download HP USB Disk S torage...

Page 12: ...the Linux system SBC8100_PLUS login enter root Note By default the SBC8140 boots from NAND Flash pressing and holding the BOOT button before connecting power will force it to boot from the SD card By...

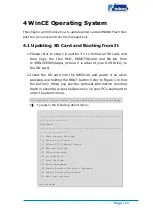
Page 13: ...er it on when the information on the serial interface shows a countdown in seconds press any key on your PC s keyboard to enter u boot mode Hit any key to stop autoboot 0 press any key to enter u boot...

Page 14: ...SBC8140 and power it on while pressing and holding the BOOT button refer to Figure 1 to find the button When you see the terminal information counting down in seconds press the Space key on your PC s...

Page 15: ...x600 56Hz 7 VGA 1024x768 60Hz VGA display 8 DVI 1280x720 60Hz 0 Exit and Continue Selection actual LCD 480x272 60Hz 4 3 Type 7 and y in the following menu to save settings and then type number 0 to co...

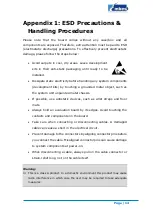
Page 16: ...the label of your DVD drive to the SD card and then rename EBOOTNAND nb0 to EBOOTND nb0 2 Insert the SD card into the SBC8140 and then power it on while pressing and holding the BOOT button when you s...

Page 17: ...nit unpainted metal chassis If possible use antistatic devices such as wrist straps and floor mats Always hold an evaluation board by its edges Avoid touching the contacts and components on the board...

Page 18: ...e the lowest production costs possible Embest insists on a simple business model to offer customers high performance low cost products with the best quality and service 2 1 Technical support service E...

Page 19: ...are subject to damage caused by operations inconsistent with their specification Products are subject to damage in either appearance or function due to natural disasters flood fire earthquake lightni...

Page 20: ...will not take any responsibility for products returned without the prior permission of the company 2 3 Basic guidelines for protection and maintenance of LCDs 1 Do not use finger nails or other hard...

Page 21: ...as serial ports USB interface devices and LCD screens Control system transplantation BSP driver development API software development Other value added services including supply of power adapters and...

Reviews: