Installation Instructions
Page 9
Security
Wrench
WMK-027
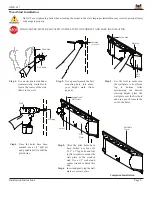
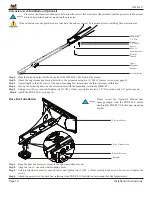
Step 1
. Insert the inner slide plate into the projector
arm.
Step 2
. Determine which adjustment slot will be
best for the projector placement.
Step 3
. Raise the upper mounting bracket into
position.
Step 4
. Align the mounting holes of the upper
projector plate with the mounting holes of
the inner slide plate.
Step 5
. Secure and finger-tighten two (2)
M6 x 12mm security head screws.
Step 6
. Once the correct throw distance has been
determined, use the security wrench
(supplied) to tighten the mounting screws.
Do not overtighten the screws.
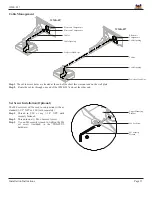
Projector Arm
Inner Slide
Plate
Upper Mounting
Bracket
M6 x 12mm
Security Screw
Adjustment
Slot
Calculated
Throw Distance
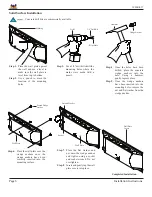
Upper Mounting Bracket Installation


