background image

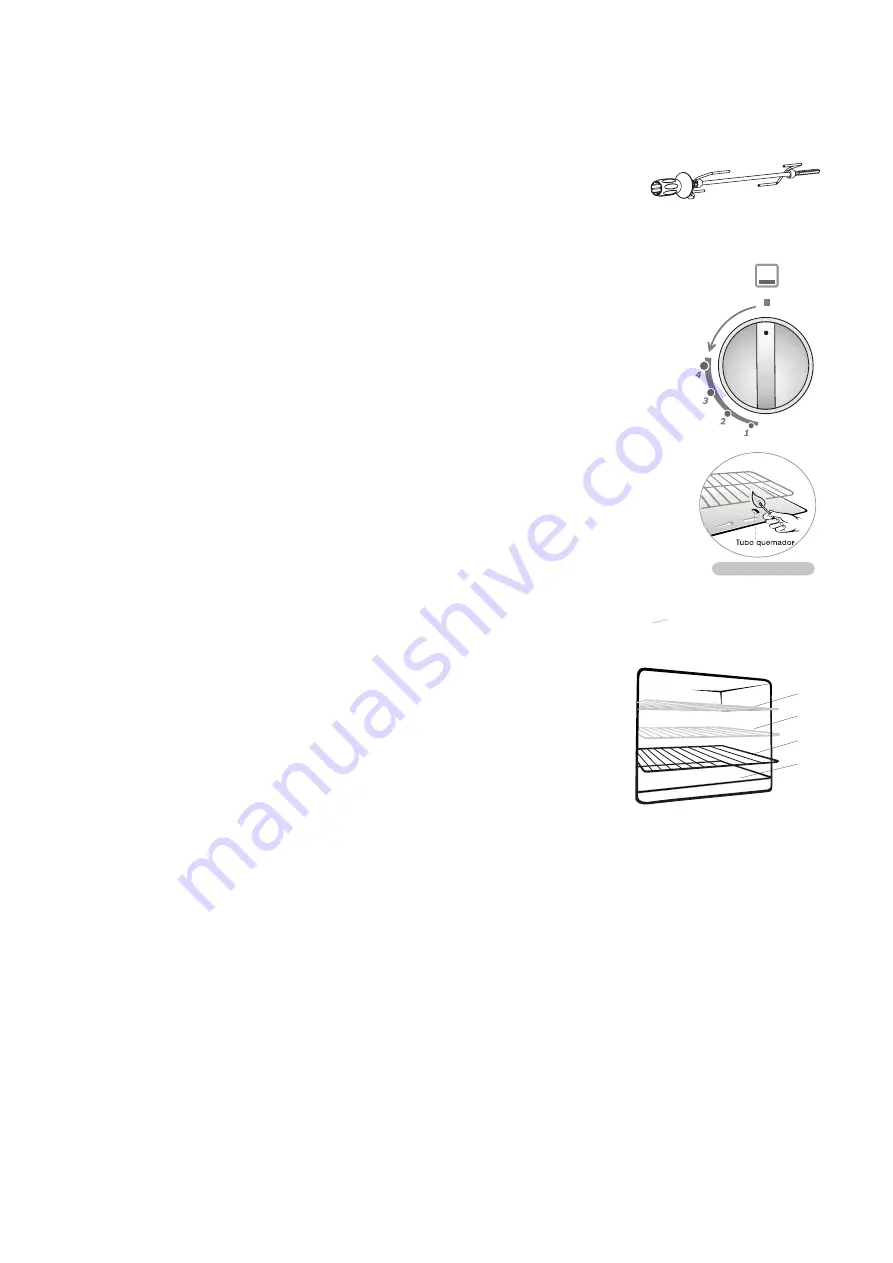
Accesorios: (sólo para algunos modelos) 

Pincho de asado 
El asador en su velocidad media calienta la comida uniformemente. 
Al mismo tiempo, esto puede garantizar una mejor cocción. 

Consejos 

1. No use cualquier tipo de protección (papel aluminio), ya que esto podría 
causar obstrucción de la boquilla del gas o mal funcionamiento de las 
piezas de las hornillas. 
2. Cuando use el horno, evite tocar el vidrio externo y los accesorios 
internos, espere que estos se enfríen dejándolos un tiempo prudencial y 
luego proceda a retirarlos. 

Recomendaciones Importantes

Para un menor y más eficiente consumo de gas es recomendable usar las 
parrillas con un diámetro adecuándose al tamaño de las hornillas previniendo 
quemaduras con la llama de la hornilla al momento de abrirla. Es recomendable 
reducir la llama antes que el líquido empiece a hervir. Y mantenga la llama a 
fuego mínimo mientras sea necesario con el fin de mantener la ebullición. Asegúrese que 
haya una buena ventilación en el lugar en donde se encuentre instalada la estufa de gas. 
Es recomendable encender la hornilla antes de colocar la olla sobre la parrilla. 

Limpieza y Mantenimiento 

Antes de hacer limpieza y mantenimiento la estufa de gas deberá estar 
desenchufada. 
1. Al terminar de usar la estufa de gas límpiela con un paño suave, con una 
solución de agua, jabón y bicarbonato (2 cucharaditas llenas en 1 litro de 
agua) 
2. Para limpiar el vidrio frontal y el panel de control, es recomendable usar 
un papel seco. 
3. No use detergentes, corrosivos o abrasivos muy fuertes. 

 Nivel más alto 

 Medio

 Bajo

 bandeja grasera

 encendido manual

ES-5

Summary of Contents for PGS2410S

Page 1: ...PGS2410S Estufa de Gas Freestanding Gas Stove ...

Page 2: ...n buenas condiciones 6 Asegúrese que su casa tenga un enchufe exclusivo para la estufa de gas y si se encuentra en buenas condiciones 7 No instale la estufa de gas encima de las alfombras 8 No instale la estufa de gas cerca del refrigerador porque el calor excesivo dificulta su rendimiento Instalación de la estufa de gas 1 Deja al menos 80 a 85 cm entre la parte superior de la estufa de gas y cual...

Page 3: ...limentación 3 No es recomendable modificar las características del equipo No instalar la cocina de gas sobre el cable de alimentación Conecte la estufa de gas en su propia toma de corriente No use extensiones ni enchufes adaptadores Para evitar cualquier accidente antes de reemplazar la lámpara de la luz apague las hornillas superiores y desenchufe el equipo Use una lámpara de 40v para reemplazarl...

Page 4: ...an pasteles etc 2 Siga las instrucciones de la receta adecuada 3 Para hornear pan galletas pizzas y alimentos similares use la placa de hornear en la rejilla Importante Nunca hornear los alimentos directamente sobre el quemador superior o la bandeja que cubre el quemador Quemador para el encendido 1 Elige el mando del quemador que desea a la luz 2 El encendido puede ser manual o eléctrico Manual d...

Page 5: ...niendo quemaduras con la llama de la hornilla al momento de abrirla Es recomendable reducir la llama antes que el líquido empiece a hervir Y mantenga la llama a fuego mínimo mientras sea necesario con el fin de mantener la ebullición Asegúrese que haya una buena ventilación en el lugar en donde se encuentre instalada la estufa de gas Es recomendable encender la hornilla antes de colocar la olla so...

Page 6: ...ecte la estufa La toma de corrientes no tiene energía Conecte el cordón eléctrico Compruebe el toma corriente conectando una lámpara Al encender la lámpara se inicia el motor del asador Esto es normal TABLA GENERAL DE EQUIVALENCIAS MEDIDAS COMUNES MEDIDAS LIQUIDAS 1 Pizca Menos de de cucharadita 8 cucharadas taza 3 Cucharaditas 1 cucharada 1 taza 8 onz liquidas 2 cucharadas 30 gramos 1 Onza 1 taza...

Page 7: ... is in good condition 6 Be sure that your house has an exclusive plug for your gas range and this is in good conditions 7 Do not install the range on top of carpets 8 Do not install the range near the refrigerator as the excessive heat hinders its performance The appliance that you have bought may be slightly different from the one illustrated in this manual Please refer to the information related...

Page 8: ...of the pressure regulator Pressure 200mm C A Max consumption 2kg h 3 Always use a PVC hose to work from 20O C to 100O C Be sure that hose does not have joints does not go on the back of the gas range neither close to the hot air exits Its less then 125cm long 4 If possible install the gas cylinder outside the kitchen in a place protected and with air flow 5 Use a metallice hose to connect to the g...

Page 9: ...ook top burners and unplug the appliance Use a range lamp of 40W to replace it Care with food and cookware 1 To handle or remove food please use the cooking gloves 2 Never leave clothes or flammable materials near the burners when the range is in use When using frying oil or butter additional care must be taken since these products are flammable 3 Do not use the oven to store utensils especially t...

Page 10: ...mostat will give you more precise temperature as indentified mo the oven konb Oven racks Leveling the baking rack or tray will depend on the type of the food you want to cook We recommend 1 Use the central slider to bake bread cakes etc 2 Follow the instructions of the proper recipe 3 To bake bread cookies pizzas or similar food use the baking plate on the grate Burner ignition 1 Choose the knob o...

Page 11: ...rack and replace with the oven tray 2 Put the food on the rosisserie and fix it using the forks then install the rod on corresponding support inside the oven 3 Turn on the knob Grill as indicated in the previous point 4 Gently close the door to start roasting Accessories Rotisserie skewer The average speed of the motor heat the food evenly AT the same time it can guarantee the nutrition of the foo...

Page 12: ...cted stove socket without power Connect the electric cord Check the socket connecting a lamp PROBLEM SOLUTION Gas Smell Strong Smells Noise When turning on the lamp the roasting rod It is normal GENERAL EQUIVALENCES TABLE COMMON MEASURES LIQUID MEASURES 1 Pinch Less than teaspoonful 8 Spoonfuls Cup 3 Teaspoonfuls 1 Spoonful 1 Cup 8 Liqude Ounces 2 Spoonfuls 30 grams 10 Ounce 1 Cup Liter 4 Spoonful...

Reviews: