background image

USING THE MP3 PLAYER MENU 

Vantage/Vanguard II Manual 

307 

Using the MP3 PLAYER MENU 

Summary of Contents for Vanguard II

Page 1: ...CURACY AND EFFORT INCLUDING LACK OF NEGLIGENCE IS WITH YOU ALSO THERE IS NO WARRANTY AGAINST INTERFERENCE WITH YOUR ENJOYMENT OF THE SOFTWARE OR AGAINST INFRINGEMENT IF YOU HAVE RECEIVED ANY WARRANTIE...

Page 2: ...ipient agrees to this EULA If the SOFTWARE is an upgrade any transfer must also include all prior versions of SOFTWARE EXPORT RESTRICTIONS You acknowledge that SOFTWARE is subject to U S export jurisd...

Page 3: ...MPANY 1022 Heyl Rd Wooster Ohio 44691 Telephone 330 262 1984 Fax 330 263 4829 E Mail Address info prentrom com Web Site Address www prentrom com Prentke Romich International Minerva House Minerva Busi...

Page 4: ...nd 2 this device must accept any interference received including interference that may cause undesired operation Warning Changes or modifications to this product which are not authorized by Prentke Ro...

Page 5: ...be fitted by a qualified person Failure to install the mounting system according to the manufacturer s instructions may result in an injury to the user Important Note To achieve the best results from...

Page 6: ...he batteries the entire unit was turned OFF at the factory before it was shipped To use it you must turn your device ON To Turn the Device ON Press and hold the 1 0 key on the front of the case until...

Page 7: ...e Color Coded Toolbox 45 Change the Speaker and Headphone Volume 47 About the CALL Tool in the Toolbox 48 SETTING UP YOUR COMMUNICATION DEVICE 49 About Setting Up your Device 51 About User Areas 53 Ab...

Page 8: ...hoose to turn Large Selection Area On or Off 125 Spell and Select Words 127 Display Recent Words 129 Computer Command for Delete 131 Highlight Color 133 Add a Word to the Word Prediction Dictionary 13...

Page 9: ...Original Icon 203 About Macros 205 Store a Macro Under an Icon Sequence 207 Assign a Macro to a Core Key 209 Erase Macros 211 Hide a Core Vocabulary Key 213 Swap Core Vocabulary Keys on Your Overlay...

Page 10: ...ow Keys 286 Character Word 287 Plurals 288 Text Marker Speech Marker Text Speech Marker 289 Clear Display 290 Delete Options and Arrow Keys 291 USING THE TRANSFER MEMORY MENU 293 About Memory Transfer...

Page 11: ...ing the X 10 359 USING A COMPUTER 361 Computer Emulation with a USB Cable 363 Computer Emulation with a Serial Cable 364 About the Computer Access Overlays 367 Loading the Computer Access Overlays 369...

Page 12: ...ix C The Pre Stored Songs in your Device 437 To Copy a Pre Stored Song to Your Overlay 438 Appendix D How to Use DECtalk to Program and Store Your Own Songs 439 Appendix E Helpful DECtalk Speech Tips...

Page 13: ...GETTING ACQUAINTED WITH YOUR COMMUNICATION DEVICE Vantage Vanguard II Manual 13 Getting Acquainted with your Communication Device...

Page 14: ...GETTING ACQUAINTED WITH YOUR COMMUNICATION DEVICE Vantage Vanguard II Manual 14 Vantage Vanguard II...

Page 15: ...II has larger keys and a larger display size which makes it a little easier for scanners and headpointers to use It is less portable and is designed be mounted on a wheelchair The Vantage and Vanguar...

Page 16: ...ls ON OFF Battery is Charging Battery needs charging TOOLBOX 2 USER DEFINED KEYS Left key pre programmed as CHOOSE ACTIVITY Right key pre programmed as SETUP KEY ON OFF TOOLBOX Battery is charging Bat...

Page 17: ...l continue to trickle charge as long as the charger is plugged in GO TO TOOLBOX Press to go to the Toolbox Press again to return where you were USER DEFINED Keys 2 Program with whatever command or Too...

Page 18: ...empty of lines Headphone Icon Loudest Volume Lines clear across bar graph No Volume Bar graph empty of lines Time Date This displays the current time and date Set this using the CLOCK MENU in the Tool...

Page 19: ...Displays current time and date Set this in the CLOCK MENU in the Toolbox See Appendix I for clock and date setting information Battery Bar Graph This shows the status of the batteries When the graph h...

Page 20: ...D WITH YOUR COMMUNICATION DEVICE Vantage Vanguard II Manual 20 The Exploration Wizard Non English speaking devices may not have this overlay Text Display Word Prediction or Icon Display Area Device St...

Page 21: ...on English devices you may not see the Demonstration Overlay The device will open in the 45 location overlay instead The Target key and the Unity 4 8 15 key will take you to pages that contain a Back...

Page 22: ...GETTING ACQUAINTED WITH YOUR COMMUNICATION DEVICE Vantage Vanguard II Manual 22 Unity 45 2 Hit Overlay Activity Row...

Page 23: ...ored message The top row of keys is the Activity Row The third key down in the far left column says CHOOSE ACTIVITY Press this key to see more activities in the Activity Row If you want to look at som...

Page 24: ...GETTING ACQUAINTED WITH YOUR COMMUNICATION DEVICE Vantage Vanguard II Manual 24 Vantage with Keyguard Visor Table Stand And Strap Holders Strap Holders Keyguard Visor...

Page 25: ...or 15 location keyguard is an option you can purchase for the Vantage A 45 location keyguard is available for the Vanguard II To attach the keyguard bend in the top left and right edges so that the t...

Page 26: ...rd II Manual 26 Right Side of the Vantage Left Side of the Vantage Left Side Open The Connectors on the Sides of the Vantage Serial Port Switch A Switch B USB Ports Memory Door External Microphone Hea...

Page 27: ...at contains the system software for your device The system card is in the bottom slot The center slot will take a Secure Digital card The top slot will take PCMCIA card To open the door press down wit...

Page 28: ...A Card A System Software Compact Flash Card USB PORTS The rectangular port for memory transfers with a USB flash drive the square port for USB Serial Port A Use this port for Memory Transfers and keyb...

Page 29: ...MEMORY CARD DOOR behind this door is the card that contains the system software for your device Slot A holds your system card Slot B will hold a PCMCIA card Slot C is available for a Secure Digital me...

Page 30: ...H YOUR COMMUNICATION DEVICE Vantage Vanguard II Manual 30 Vantage STRAP HOLDERS IR Learning and Transmitting Window Wheelchair mounting plate Table Stand on Vantage It s on the edges of the VGII case...

Page 31: ...wo more strap holders on the bottom edge of the case There is a wheelchair mounting plate on the bottom of the case This plate slips into the wheelchair mount to hold your device upright The Table Sta...

Page 32: ...he case To turn your device off and on Default 2 Minutes Backlight automatically turns off after 2 minutes if no activations are made You can select 5 or 10 minutes Activate this key in the Toolbox or...

Page 33: ...klight after 2 minutes if no activations have been made You can also select 5 or 10 minutes but 2 minutes is the default When you receive your device this feature is already set for you To turn device...

Page 34: ...minutes 5 minutes or 10 minutes before the backlight dims Activate any key or switch to bring it back After TEN MINUTES of dimmed backlight the screen goes dark Activate any key or switch to bring it...

Page 35: ...turns off and the screen becomes dark Activate any key to restore the backlighting and the screen After two hours of no key activations the unit shuts down completely As usual you can activate any ke...

Page 36: ...W when the LED next to this icon is lit on the front of the case Plug in the battery charger V When the charger is plugged in Fast Flashing Red LED the device is fast charging Slow Flashing Red LED th...

Page 37: ...at all Nearly Dead red lines only plug in charger now Charger Plugged in blue lines Low Battery Warning When the batteries in your device get low you hear a Low Battery Warning This is a two toned run...

Page 38: ...GETTING ACQUAINTED WITH YOUR COMMUNICATION DEVICE Vantage Vanguard II Manual 38 I want to have fun Minspeak Icon Sequences...

Page 39: ...s Minspeak offers many advantages it is logical in how it represents a person s language it is easy to learn because it fits into a person s natural ability to associate many meanings to one picture i...

Page 40: ...GETTING ACQUAINTED WITH YOUR COMMUNICATION DEVICE Vantage Vanguard II Manual 40 Activate an Icon Icon Prediction Grays Out all the Icons that do not Contain Messages...

Page 41: ...possible selections for messages that are part of the vocabulary that was pre stored in your device If you press a key that is bright the icon for that key will appear in the icon display area Other...

Page 42: ...GETTING ACQUAINTED WITH YOUR COMMUNICATION DEVICE Vantage Vanguard II Manual 42 The key above is at ROW 3 COLUMN 1 The key above is at ROW 5 COLUMN 6...

Page 43: ...e top to the bottom of the overlay There are nine columns of keys from left to right on the overlay The key with the HAMMER on it is at location ROW 3 COLUMN5 R3C5 If you prefer you could say COLUMN 5...

Page 44: ...GETTING ACQUAINTED WITH YOUR COMMUNICATION DEVICE Vantage Vanguard II Manual 44 Activate the TOOLS key on the front of the device The Toolbox...

Page 45: ...Toolbox keys are color coded Notice that Menus Pages Activity keys etc are all in different color groups to help you remember where the tools are and what they allow you to do Activate the FEEDBACK M...

Page 46: ...GETTING ACQUAINTED WITH YOUR COMMUNICATION DEVICE Vantage Vanguard II Manual 46 Change the Speaker and Headphone Volume in the Toolbox or in the FEEDBACK MENU...

Page 47: ...play Area As you press the SPEAKER VOLUME DOWN key the lines on the graph next to the picture of a speaker disappear The fewer lines there are in the graph the lower the volume of the speaker Now pres...

Page 48: ...ill probably be times when you will want some assistance The CALL Tool is just for this purpose When you activate the CALL key your device plays a series of beeps These are designed to get someone s a...

Page 49: ...SETTING UP YOUR COMMUNICATION DEVICE Vantage Vanguard II Manual 49 Setting Up your Communication Device...

Page 50: ...SETTING UP YOUR COMMUNICATION DEVICE Vantage Vanguard II Manual 50 KEYBOARDS OVERLAYS SELECTION TECHNIQUES USER AREAS Set Up Options...

Page 51: ...rd size There are different spelling keyboard overlays There are also a number of different computer access pages and remote control pages to choose from All of these options are available to you in t...

Page 52: ...SETTING UP YOUR COMMUNICATION DEVICE Vantage Vanguard II Manual 52 Current User Area Displayed in Text Area Select a User Area to Switch to Select a User Area...

Page 53: ...n allows you to change the overlay in any Area You can select the keyboard size the overlays you want to use and a spelling keyboard from this option too Other options allow you to switch to a differe...

Page 54: ...SETTING UP YOUR COMMUNICATION DEVICE Vantage Vanguard II Manual 54 8 Location Keyboard 4 Location Keyboard...

Page 55: ...chniques etc There are a variety of different overlays to choose from Some of the overlays are blank and come in different keyboard sizes A blank overlay does not come with pre stored vocabulary The o...

Page 56: ...SETTING UP YOUR COMMUNICATION DEVICE Vantage Vanguard II Manual 56 Unity 45 2 Hit Overlay...

Page 57: ...vocabulary and activities All of these overlays work only with the 45 location keyboard Unity 84 uses an 84 location keyboard If you are going to use a 15 8 or 4 location keyboard you must select the...

Page 58: ...SETTING UP YOUR COMMUNICATION DEVICE Vantage Vanguard II Manual 58 Spelling Keyboards User Defined Option QWERTY Spelling Keyboard...

Page 59: ...If you select User Defined press the User Defined key again and you will see a message box that tells you what the current spelling page If you want to see different spelling pages select YES You can...

Page 60: ...SETTING UP YOUR COMMUNICATION DEVICE Vantage Vanguard II Manual 60 8 Location Computer Overlay IBM Word Processing Computer Overlay...

Page 61: ...overlays that are specific to different monitor sizes for Mac and IBM computers These overlays contain pages with computer keyboard keys keys for using a mouse and keys for opening and using menus Th...

Page 62: ...SETTING UP YOUR COMMUNICATION DEVICE Vantage Vanguard II Manual 62 TV Remote Control Page CD Remote Control Page...

Page 63: ...for the electronic appliances mentioned above All you have to do is to teach your remote signals to the Vantage or Vanguard II and you are ready to go There are also pages set up for an EZ Phone and a...

Page 64: ...SETTING UP YOUR COMMUNICATION DEVICE Vantage Vanguard II Manual 64 Activities Pages...

Page 65: ...ption that allows you to Copy Pages and Activities from your current User Area to another User Area You can copy specific Pages and Activities or all of the Pages and Activities in a given Area You ca...

Page 66: ...SETTING UP YOUR COMMUNICATION DEVICE Vantage Vanguard II Manual 66 The CHOOSE OVERLAY MENU...

Page 67: ...board and overlay activate the Overlay Menu option Select either the QWERTY for your spelling keyboard or a User Defined keyboard You cannot select a 15 8 or 4 key spelling keyboard unless you are usi...

Page 68: ...SETTING UP YOUR COMMUNICATION DEVICE Vantage Vanguard II Manual 68 Selection Techniques Keyboard Tracker Internal Headpointer Single 1 Switch Dual 2 Switch Joystick The Selection Techniques...

Page 69: ...Headpointer Madentec s Tracker technology is integrated into the Vantage and Vanguard II Place the small reflective dot on your forehead and face the headpointing sensor window on the front of the ca...

Page 70: ...SETTING UP YOUR COMMUNICATION DEVICE Vantage Vanguard II Manual 70 Choose a Selection Technique in the SELECTION TECHNIQUE MENU...

Page 71: ...Technique 1 Press the TOOLS button on the front of the case or on your overlay 2 Press the SELECTION TECHNIQUE MENU in the Toolbox 3 Press the up or down arrow until you see the name of the selection...

Page 72: ...SETTING UP YOUR COMMUNICATION DEVICE Vantage Vanguard II Manual 72 Select your keyboard options then select OK Keyboard Selection Technique...

Page 73: ...not to scratch it with your pointing device The keyboard is the default selection technique for your device Turn your device On and then press the keys on the keyboard The options for the KEYBOARD sel...

Page 74: ...ntage Vanguard II Manual 74 Headpointing Options LED lights when headpointer is working correctly Headpointing sensor Your reflective dot must be within a 30 35 degree range of the sensor in order for...

Page 75: ...e Internal Tracker option is set to ON When everything is working correctly on the Vanguard II the LED inside the small picture of the head on the front of the case will light up On the Vantage an LED...

Page 76: ...SETTING UP YOUR COMMUNICATION DEVICE Vantage Vanguard II Manual 76 1 Switch Options...

Page 77: ...the display screen acts as a switch Tap the screen to make selections This option does not work when you are in the Toolbox Plug your switch into the connector labeled SWITCH A or SWITCH B on your dev...

Page 78: ...SETTING UP YOUR COMMUNICATION DEVICE Vantage Vanguard II Manual 78 2 Switch Options...

Page 79: ...ector marked SWITCH B on your device If you have a dual switch plug it into either switch connector Select 2 Switch in the SELECTION TECHNIQUE MENU If you are using a dual switch and select the Manual...

Page 80: ...SETTING UP YOUR COMMUNICATION DEVICE Vantage Vanguard II Manual 80 You must have a Joystick adapter in order to use a Joystick with your device Joystick Options...

Page 81: ...irection to scan up down left right or diagonally You can also use an Arm Slot Control instead of a Joystick The Arm Slot Control allows Joystick type scanning for people who do not have enough fine m...

Page 82: ...DEVICE Vantage Vanguard II Manual 82 Some Selection Technique Options Some Selection Technique Options Scan Mode 1 or 2 Auto Repeat Row Column or Column Row Scanning Speed Predictive Selection Averag...

Page 83: ...lects a location after the acceptance time has passed Manual you must activate your switch to select a location Use this with 2 switch or a joystick Scan Auto Restart If this is Off once you have sele...

Page 84: ...ICATION DEVICE Vantage Vanguard II Manual 84 To avoid accidental key activations The higher the number you select the further into a key s area you must move before the key will be become highlighted...

Page 85: ...s The number you select tells your device how far you must move out of one key location before a second key is activated This generally means that when you cross the centerline between one key and the...

Page 86: ...reaching the right and left edges Increase the Horizontal number Move off the horizontal edges too easily Decrease the Horizontal number Trouble reaching the top or bottom edges Increase the Vertical...

Page 87: ...g the top or bottom edges increase the Vertical adjustment number If just the slightest head movement to the left or right moved you off the edges of the screen decrease the Horizontal number If the s...

Page 88: ...TING UP YOUR COMMUNICATION DEVICE Vantage Vanguard II Manual 88 Select High when device is vertical or nearly vertical Select Low when device is horizontal or nearly horizontal Headpointing Field of V...

Page 89: ...positioned whether mounted on a wheelchair placed flat on a surface or propped up on its table stand If the communication device is perpendicular or nearly perpendicular on your mount or a table sele...

Page 90: ...SETTING UP YOUR COMMUNICATION DEVICE Vantage Vanguard II Manual 90 Select a Pointer Color Highlight the Key you have pointed to...

Page 91: ...en you use Headpointing you will see a pointer in the shape of a hand The default color for the hand is gray If this is hard for you to see or if you would just like a different color select the Point...

Page 92: ...SETTING UP YOUR COMMUNICATION DEVICE Vantage Vanguard II Manual 92 Use the Headpointing Menu for all Headpointers...

Page 93: ...ou want to use other pointing devices such as the HeadMaster AirMouse or a track ball you can still use the Headpointing options in the SELECTION TECHNIQUE MENU Depending on your headpointer you will...

Page 94: ...de 1 Row Column Scan 1 Activate switch Scan proceeds down the rows Text Area is included at the end of the scan 2 When you reach the row you want activate switch Scan proceeds across the columns you s...

Page 95: ...n the key you want lights up activate your switch or tap the screen to select that key If a message is stored in the location you have selected and the speech is turned On the device speaks the messag...

Page 96: ...ode 2 Activate switch Scan proceeds down the rows Text Display Area is included at the end of the scan When scan reaches the row you want activate switch Activate switch again to begin scanning the co...

Page 97: ...select the Scan Mode 2 option To Scan The first switch activation causes the top row to light The scan continues automatically down the rows When it reaches the row you want activate and release your...

Page 98: ...ey top row And moves down the column Activate switch 1 again Scan reverses and moves up the column When you reach the row you want Activate switch 2 Begins scan of row from left to right Activate swit...

Page 99: ...e switch again and the scan reverses The first activation of switch 2 starts the scan across the rows Push the switch again and the scan reverses Press and hold the switch to start scan tap the switch...

Page 100: ...0 2 Switch Scan Mode 2 Activate switch 1 Rows are scanned from top to bottom When scan reaches row you want activate Switch 2 Activate switch 1 Scan goes across the columns from left to right When sca...

Page 101: ...to start the scan The top row or first column is highlighted To move the scan to the next row or column hold Switch 1 down until the row or column you want is highlighted You can also press and releas...

Page 102: ...n scans column you selected from top to bottom LINEAR Step through keys from left to right across the rows or from top to bottom down each column STEP Activate switch to step through each row When you...

Page 103: ...olumns When the scan reaches the column that contains the key you want activate your switch The scan then highlights each key in that row When the key you want is highlighted activate your switch Row...

Page 104: ...SETTING UP YOUR COMMUNICATION DEVICE Vantage Vanguard II Manual 104 SCANNING SPEED The amount of time it takes the scan to move from one key row or column to the next Default 1 second Scanning Speed...

Page 105: ...to use a very slow scanning speed to start with perhaps 5 seconds 5 0 between beeps This means it will take 5 seconds from the time one key is highlighted and the device beeps to the time the next key...

Page 106: ...ingBoard accepts a location and activates the key Headpointing Amount of time you must point to a key before the key is activated Defaults Switch 01 second Headpointer 1 second Note We recommend that...

Page 107: ...unt of time you must maintain contact with your switch before the key you have scanned to is accepted If you are using the headpointer acceptance time is the amount of time it takes from when you poin...

Page 108: ...window after you release a key or switch During this window the device will not recognize repeated key or switch activations For example if you set your release time for 1 second you must wait 1 secon...

Page 109: ...a key When Activation Delay is turned On you can scan to a key select it and then if you change your mind you can hit your switch again to keep the key from being activated The default for Activation...

Page 110: ...SETTING UP YOUR COMMUNICATION DEVICE Vantage Vanguard II Manual 110 Select the Up Arrow to turn Auto Repeat on Select the repeat rate you want Hold down a key to make it repeat Auto Repeat Rate...

Page 111: ...you just hold your switch down If you are using a headpointer you must continue to point at the key to get it to repeat automatically If you are using a 2 switch or a joystick and have selected Manua...

Page 112: ...SETTING UP YOUR COMMUNICATION DEVICE Vantage Vanguard II Manual 112 Only the bright keys with icons will work Keys that are white or gray won t work Predictive Selection...

Page 113: ...Icon Prediction in the FEEDBACK MENU is On along with Predictive Selection your device highlights only those icons where messages are stored These highlighted icons are the only keys on the keyboard...

Page 114: ...SETTING UP YOUR COMMUNICATION DEVICE Vantage Vanguard II Manual 114 Save Your Settings...

Page 115: ...for up to three different Selection Technique set ups When you save settings you select the SAVE SETTINGS key and then one of the 1 2 or 3 keys Any options you set in the menus that have BLUE titles a...

Page 116: ...SETTING UP YOUR COMMUNICATION DEVICE Vantage Vanguard II Manual 116 Store a Settings Key Under an Icon Sequence...

Page 117: ...e that is described on the previous page This example describes storing a Settings key under an icon sequence Store the 1 2 or 3 SETTINGS Key Under an Icon Sequence 1 Go to the Toolbox overlay 2 Activ...

Page 118: ...tangular USB port on your device On the Vanguard You can also plug a serial mouse or regular keyboard into port B When the keyboard is plugged in you can use it for storing You must be in STORE CORE o...

Page 119: ...WORD PREDICTION Vantage Vanguard II Manual 119 Word Prediction...

Page 120: ...Vocabulary words you use all the time that are easily accessed with icon sequences Use Word Prediction for longer words that you don t use often but want to have available Word prediction saves you t...

Page 121: ...and combine icon sequences to produce a very large vocabulary indeed Word Prediction Benefits Word Prediction systems help improve a person s ability to communicate by cutting down on the amount of t...

Page 122: ...ak we went to the museum see Special vocabulary to select from Word Prediction Impressionist exhibit Use Minspeak for words that are 6 letters in length or under Use Word Prediction for words that are...

Page 123: ...exhibition You can certainly recall We went to the and to see the using Minspeak You might have museum stored in your device too in which case you can also recall it using Minspeak But you probably d...

Page 124: ...WORD PREDICTION Vantage Vanguard II Manual 124 Turn Word Prediction ON...

Page 125: ...turn Large Selection Area On or Off There is an option in the WORD PREDICTION MENU that allows you use a larger selection area than just the Word Predicition area when you select a predicted word Wor...

Page 126: ...WORD PREDICTION Vantage Vanguard II Manual 126 The Word Prediction Window QWERTY Keyboard Word Prediction Window Scanning The Word Prediction window...

Page 127: ...derived from the word you selected You can select one of these words or you can continue to spell and watch more words come up in the Word Prediction window You can continue to spell words and select...

Page 128: ...WORD PREDICTION Vantage Vanguard II Manual 128 Display Recent Words...

Page 129: ...t the number of recently used words that you would like to see on the display When you begin to spell a word your device will display the 5 or whatever number you have selected most recently used word...

Page 130: ...WORD PREDICTION Vantage Vanguard II Manual 130 The Default Delete Command is backspace...

Page 131: ...ed typing When Word Prediction is On and Serial Output is set to Immediate in the OUTPUT MENU any characters you type are sent to the display and to the computer monitor When you select a word from th...

Page 132: ...WORD PREDICTION Vantage Vanguard II Manual 132 Highlight the Background or Text Color...

Page 133: ...the Set Background Color box or the Set Text Color box One of the squares on the color grid will light up with a frame around it The color inside the frame is the current background or text color Use...

Page 134: ...WORD PREDICTION Vantage Vanguard II Manual 134 Add a Word to the Word Prediction Dictionary Add a Word step 3...

Page 135: ...a word with similar word endings that is a word used the same way in sentences and with the same kind of endings as the word you entered Type in a similar word For this example type Terminate Termina...

Page 136: ...WORD PREDICTION Vantage Vanguard II Manual 136 Delete a Word from the Word Prediction Dictionary...

Page 137: ...nguard II Manual 137 Delete a Word This allows you to delete a word from the dictionary Activate Delete a Word Type in the word you want to delete Select the word from the Word Prediction Window Activ...

Page 138: ...WORD PREDICTION Vantage Vanguard II Manual 138 Review Words in the Word Prediction Dictionary...

Page 139: ...me whether you are using Step or Auto Review to Display This sends the dictionary to the display screen When you select this option your device tells you to enter the start letters of the words you wa...

Page 140: ...ictionary can be re loaded at any time However when you do this all of the changes you have made to your current dictionary will be lost If you want to save your current Word Prediction dictionary per...

Page 141: ...STORING MESSAGES Vantage Vanguard II Manual 141 Storing Messages...

Page 142: ...STORING MESSAGES Vantage Vanguard II Manual 142 The Activity Row and the Core Vocabulary Areas Core Vocabulary Area Activity Row...

Page 143: ...chool or when ordering in a restaurant can be stored under activities in the Activity Row The Activity Row can also be used for things other than vocabulary You can have keys to access the Calculator...

Page 144: ...ophone Location On the Vantage Small hole to the left of the headpointing infrared window on the front of the case On the Vanguard II Small hole with picture of microphone next to it on front of case...

Page 145: ...H MENU in the Toolbox You can store approximately 1 5 megabytes worth of synthesized messages You can store approximately 45 minutes worth of recorded messages When you import icons you use up digitiz...

Page 146: ...antage Vanguard II Manual 146 Before you begin to store messages PLAN What do you want to say How do you want to store it What type of speech will you use What icon sequence will you use Plan What You...

Page 147: ...e some decisions What do you want to say Are you storing Core vocabulary or Activity Row vocabulary Decide on the icon or icons you want to use Are you going to use synthesized or recorded speech or b...

Page 148: ...STORING MESSAGES Vantage Vanguard II Manual 148 Record a Message...

Page 149: ...the Record Message key A new screen comes up 2 When you are ready press and hold the Record Message key and speak your message 3 Release the Record Message key as soon as you have finished recording T...

Page 150: ...STORING MESSAGES Vantage Vanguard II Manual 150 ERASE a Recorded Message Select icon sequence to erase You can also Select icon sequence to erase Follow storing steps and record over current message...

Page 151: ...t to erase 4 Activate OK 5 If you still want to erase the message activate YES If you change your mind activate NO 6 The Text Display Area tells you that the sequence has been erased You can also eras...

Page 152: ...u are doing a lot of storing shut the device Off periodically to save your work then turn it back On You should also save the memory to a computer or some kind of memory device if you have made signif...

Page 153: ...o your message 7 Activate OK when you have finished 8 Your message shows in the small Text to Speak box If you want to edit it activate the Spell Text for Message key again Then use the Spelling keybo...

Page 154: ...STORING MESSAGES Vantage Vanguard II Manual 154 Activate sequence to edit You see the message to edit Edit the message Edit a Core Vocabulary Message...

Page 155: ...CORE 3 Select the icon sequence for the message you want to edit 4 In the Storing menu activate DECtalk under Type of Message 5 Activate Spell Text for Message 6 Edit the message Press the Text Displ...

Page 156: ...STORING MESSAGES Vantage Vanguard II Manual 156 Select the icon sequence to erase Answer YES to erase or NO if you change your mind Erase a Core Vocabulary Message...

Page 157: ...Manual 157 Erase a Core Vocabulary Message To Erase a Message 1 Press the TOOLS key to go to the Toolbox 2 Activate ERASE CORE 3 Activate the icon sequence you want to erase 4 Answer YES to erase or...

Page 158: ...STORING MESSAGES Vantage Vanguard II Manual 158 Use INSERT TOOL and SET PAGE to link an icon sequence to a Page...

Page 159: ...ox 2 Select the icon sequence you want to use then select OK 3 Select DECtalk or Record 4 Select Spell Text for Message 5 Select INSERT TOOL on the spelling overlay 6 Select More Items until you see t...

Page 160: ...STORING MESSAGES Vantage Vanguard II Manual 160 Select CHOOSE ACTIVITY The next Activity Row appears...

Page 161: ...s as your interests change You can also make Activities dynamic When an Activity is dynamic you can switch from one Activity to another speak a single message from the second Activity and automaticall...

Page 162: ...STORING MESSAGES Vantage Vanguard II Manual 162 A CREATE ACTIVITY Page...

Page 163: ...and then activate the flour key in the Baking Cookies Activity To create a new Activity you use the CREATE ACTIVITY key in the Toolbox When you create an Activity you tell your device where you want t...

Page 164: ...STORING MESSAGES Vantage Vanguard II Manual 164...

Page 165: ...e Perhaps you would like to have some keys predicted in an Activity but not others For example the MORE ITEMS key should always remain in its place In this case open the MODIFY ACTIVITY MENU select th...

Page 166: ...icon for the activity Select key to define Type Message and or Record a message or import a sound file The key s position can be locked in or unlocked for use with Picture Prediction Change icon labe...

Page 167: ...When you select an icon your device automatically inserts the icon name as a text label for the icon This saves you some typing if this is what you want your device to speak If not change the icon la...

Page 168: ...N 2 Set Activity Persistence to Temporary or Permanent in most cases you will want Temporary 3 Select Add Dynamic Activity 4 Choocse an icon or icon sequence to store 5 Select the activity you want to...

Page 169: ...y This means the activity stays dynamic for one activation only then takes you back to where you were If you want to remain in the new activity make it Permanent 4 Activate Add Dynamic Activity 5 Sele...

Page 170: ...ke sure Dynamic Activities is On Set Activity Persistence to Temporary Activate Add Dynamic Activity Select an icon sequence You may select only one icon if you want Select the Activity you want to ma...

Page 171: ...e actual Activity That is the sequence that produces the Activity is erased If you want to erase the whole Activity go to MODIFY ACTIVITY and use the Delete Entire Activity option Within the Activity...

Page 172: ...STORING MESSAGES Vantage Vanguard II Manual 172 Select an Activity to Modify Select an Item within the Activity to Modify...

Page 173: ...Activity 4a Some options within the Activity Change Icon Choose a new icon from the icon categories Change Label A label can contain up to 9 letters If you want a blank label type a space instead of...

Page 174: ...STORING MESSAGES Vantage Vanguard II Manual 174 Select or Select the key where you want to store the link or Select Page or Activity to link to Link an Activity to a Page or another Activity...

Page 175: ...have already created select MODIFY ACTIVITY in the Toolbox and select the Activity you want to modify then select Modify Item within Activity 1 Select the key you want to contain the link 2 Select DE...

Page 176: ...STORING MESSAGES Vantage Vanguard II Manual 176 Copy Pages and Activities to Other User Areas...

Page 177: ...ill turn gray Continue to select specific keys until you have selected all you want 4c Activate OK when you are finished 4d Answer YES to continue copying or NO to cancel 5 If you want to copy all the...

Page 178: ...STORING MESSAGES Vantage Vanguard II Manual 178 Set Activity Template...

Page 179: ...s To Set and Use an Activity Template 1 Select Set Activity Template from the CHOOSE OVERLAY MENU 2 You see a message box that tells you the current template is Template 1 and asks if you want to chan...

Page 180: ...STORING MESSAGES Vantage Vanguard II Manual 180 Copy Erase Sequences Beginning with Selected Icon s...

Page 181: ...same icon or icon sequence and store them under another sequence For example you could copy all the sequences that begin with APPLE or APPLE plus another icon and store them under JUICE or JUICE plus...

Page 182: ...STORING MESSAGES Vantage Vanguard II Manual 182 REVIEW VOCABULARY MENU...

Page 183: ...review vocabulary on your device screen simply choose Review to Display or Review to Display and Speaker Auto means your device automatically moves through the vocabulary screens Step means you activ...

Page 184: ...iew to Output Method on your device The review will be visible on your computer screen Option 2 with serial cable You can perform a review on the computer by using either the Hyper Terminal applicatio...

Page 185: ...r review using that icon as the reminder for it Press OK In the Phone Number dialogue box At Connect Using select COM 1 If you connected your cable to a different COM port select the correct port Pres...

Page 186: ...put When the review has been transferred to your computer you can Copy it into a word processing program Save it in a file or folder and then use the computer Print function to print the review On a M...

Page 187: ...ng program Save it in a file or folder and then use the computer Print function to print the review To Print Directly to a Serial Printer Attach the printer cable to the serial port with the picture o...

Page 188: ...on of the serial ports on your device Set the baud rate on the printer to match baud rate on your device The printer should be set for 8 Data Bits 2 Stop Bits and Parity should be set to None In the...

Page 189: ...in two different sequences Some words will be used in more sequences some in less or none Updating Icon Tutor If you do a lot of customizing to your vocabulary you should update Icon Tutor periodical...

Page 190: ...190...

Page 191: ...PERSONALIZE YOUR COMMUNICATION KEYBOARD AND OVERLAY Vantage Vanguard II Manual 191 Personalize Your Communication Keyboard and Overlay...

Page 192: ...PERSONALIZE YOUR COMMUNICATION KEYBOARD AND OVERLAY Vantage Vanguard II Manual 192 The 45 Location Keyboard with the Unity 2 Hit Overlay...

Page 193: ...store them under icon sequences on your keyboard You can learn how to create pages in different overlay sizes You can learn how to swap keys turn keys off and on and rename icons You can learn how to...

Page 194: ...PERSONALIZE YOUR COMMUNICATION KEYBOARD AND OVERLAY Vantage Vanguard II Manual 194 Page 1 of the ALL TOOLS LIST...

Page 195: ...r and store them in sequences or assign them to keys The ALL TOOLS LIST is a list of all the Tools that are available for use in your device You must be in a storing menu to access the ALL TOOLS LIST...

Page 196: ...PERSONALIZE YOUR COMMUNICATION KEYBOARD AND OVERLAY Vantage Vanguard II Manual 196 Spelling Keyboards Use INSERT TOOL When You Store a Tool on Your Overlay...

Page 197: ...g keyboard When you use INSERT TOOL you are telling your device to do two things 1 to show you the ALL TOOLS LIST and 2 to insert a Tool from the ALL TOOLS LIST to the key or icon sequence you have ch...

Page 198: ...E YOUR COMMUNICATION KEYBOARD AND OVERLAY Vantage Vanguard II Manual 198 Select icon sequence to be used Select Spell any message Select Insert Tool Select the Tool to insert Store a Tool Under an Ico...

Page 199: ...Select Spell text for message 6 You see your spelling overlay Activate the INSERT TOOL key 7 You see the first page of the ALL TOOLS LIST The Tools are arranged alphabetically on the screen Activate...

Page 200: ...SONALIZE YOUR COMMUNICATION KEYBOARD AND OVERLAY Vantage Vanguard II Manual 200 Select key on your overly where you want to assign tool Select a Tool from the list Assign a Tool to a Core Vocabulary K...

Page 201: ...rform the duties of the Tool you assigned to it When you assign a Tool to a key you can no longer use that key as part of an icon sequence for a message To Assign a Tool to a Core Vocabulary Key 1 Go...

Page 202: ...PERSONALIZE YOUR COMMUNICATION KEYBOARD AND OVERLAY Vantage Vanguard II Manual 202 Erase a Tool from a Key Select Icon that contains the Tool you want to change Select ICON Erase the Tool and the Icon...

Page 203: ...ool and Restore the Icon 1 Go to the Toolbox Activate the ASSIGN CORE KEYS 2 Activate the key on your overlay that contains the Tool you want to erase 3 Select ICON in the Assign Key As box 4 The orig...

Page 204: ...NICATION KEYBOARD AND OVERLAY Vantage Vanguard II Manual 204 This Macro is stored under an Icon Sequence When you activate the sequence your device Speaks Charge Displays the word Charge Plays the CAL...

Page 205: ...r tasks that normally require a number of key activations When you store a Tool on your overlay you are creating a basic macro You can also create and store macros that tell your device to do a lot mo...

Page 206: ...PERSONALIZE YOUR COMMUNICATION KEYBOARD AND OVERLAY Vantage Vanguard II Manual 206 Select icons you want to use for your sequence Type a message if you want one Store a Macro Under an Icon Sequence...

Page 207: ...u want to use to store the macro under 4 Activate OK 5 Select DECtalk from the storing screen 6 Select Spell text for message 7 You see your spelling overlay 8 Activate the INSERT TOOL key 9 You see t...

Page 208: ...PERSONALIZE YOUR COMMUNICATION KEYBOARD AND OVERLAY Vantage Vanguard II Manual 208 Select the key you want to use Select TOOL Type a message if you want one Assign a Macro to a Core Vocabulary Key...

Page 209: ...se to store the macro under 4 Select TOOL in the Assign Key As box 5 Select the Enter Assignment key 6 You see your spelling overlay 7 Activate the INSERT TOOL key 8 You see the first page of the ALL...

Page 210: ...d II Manual 210 Erase a Macro Stored Under an Icon Sequence Select the sequence you stored the macro under Then select YES Erase a Macro Assigned to a Key Select the key you assigned the macro to Ente...

Page 211: ...ES 6 Activate GO TO MINSPEAK to return to your overlay To Erase a Macro that has been Assigned to a Core Key 1 Go to the Toolbox overlay 2 Activate ASSIGN CORE KEYS 3 The Toolbox returns you to your o...

Page 212: ...ION KEYBOARD AND OVERLAY Vantage Vanguard II Manual 212 Selecting Hide show Keys takes you to your overlay Select all the keys on your overlay you want to hide or show Select Selected keys are hidden...

Page 213: ...see it on the overlay anymore If you activate the space where the key used to be nothing will happen In effect you are turning the key off so that you can t use it To Hide a Core Vocabulary Key 1 Go t...

Page 214: ...xit TO EXIT SWAP KEYS After you have completed a SWAP CORE KEYS operation activate the Text Display Area to save the keys in their new position and exit TO EXIT BEFORE YOU HAVE FNISHED SWAPPING If you...

Page 215: ...AP CORE KEYS When you swap keys the whole key including any sequences that might be stored under it is swapped To Swap Two Keys 1 Go to the Toolbox and open SWAP CORE KEYS 2 Activate the first key you...

Page 216: ...YOUR COMMUNICATION KEYBOARD AND OVERLAY Vantage Vanguard II Manual 216 Select a key for your Tool Select Tool Select Enter Assignment Use Insert Tool select the Tool activate OK Assign a Tool to an A...

Page 217: ...ol where the Activity was and move the Activity one place to the right in the row ASSIGN ACTIVITY KEYS will not allow you to assign a Tool to a key within an Activity Use the CREATE ACTIVITY or MODIFY...

Page 218: ...ual 218 Open CHOOSE OVERLAY MENU Select Select from the Icon Categories the icon you want to change Select from the Icon Categories the icon you want to change to Select YES or NO Your device tells yo...

Page 219: ...icon to appear wherever the SUN icon is assigned but you don t want to go to the trouble of reassigning the icon to all the instances where SUN might occur Happily your device will do this for you au...

Page 220: ...PERSONALIZE YOUR COMMUNICATION KEYBOARD AND OVERLAY Vantage Vanguard II Manual 220 A Custom Page Screen...

Page 221: ...Custom Page as one big single Activity Before you create a Custom Page think about what you are going to want on it You will need to be able to move from your Custom Page to other overlays You might...

Page 222: ...e Activate Select an Overlay Size or Copy from Existing Page then select the page you want to copy Select a key to define Spell any text to be displayed Record your message or import a sound file Add...

Page 223: ...cord 7 Type in any text that you want your device to speak If you are recording something type in any text that you want to have displayed Remember to use INSERT TOOL if you want any Tools to be part...

Page 224: ...PERSONALIZE YOUR COMMUNICATION KEYBOARD AND OVERLAY Vantage Vanguard II Manual 224 Open the PAGE MENU Page 1 of the PAGE MENU...

Page 225: ...not need the whole PAGE MENU you can store a specific Custom Page under an icon sequence on your overlay To do this you must use INSERT TOOL and the SET PAGE or SET PAGE TEMPORARY Tool when you store...

Page 226: ...PERSONALIZE YOUR COMMUNICATION KEYBOARD AND OVERLAY Vantage Vanguard II Manual 226 Select a Page to modify Select a key to define Modify a Custom Page...

Page 227: ...ke any changes to the key e g change icon icon name color etc 6 If you want to modify another key activate Choose next key to define 7 When you are finished activate OK To Check Your Modifications 1 G...

Page 228: ...nguard II Manual 228 Link a Page to another Page Go to the Toolbox Select Select the key where you want to store the link Select Page or Activity to link to Use GO TO MINSPEAK instead of SET PAGE to l...

Page 229: ...the key you want to use to link this Page to another Page 4 Select Spell Text for Message 5 Select INSERT TOOL 6 Select More Items until you see the Tool SET PAGE then select it 7 You see all of your...

Page 230: ...PERSONALIZE YOUR COMMUNICATION KEYBOARD AND OVERLAY Vantage Vanguard II Manual 230 Expanded 15 Location into a 45 Location Expanded 45 2 Hit into 84 Location Expanded HOLIDAY PAGE into 84 Location...

Page 231: ...lect the user area you want to expand In this example that would be the area you are most used to using let s say Unity 2 hit 5 Now select the overlay size you want to expand to In this example Unity...

Page 232: ...ICATION KEYBOARD AND OVERLAY Vantage Vanguard II Manual 232 Use ASSIGN CORE KEYS to assign the SET UP Tool to one of the blank keys on your device case then Press the SET UP key Select a key to modify...

Page 233: ...e SET UP tool was assigned to the key nearest the top right corner on the front of your case If for some reason this has been changed you can re assign it using the ASSIGN CORE KEYS menu in the Toolbo...

Page 234: ...OUR COMMUNICATION KEYBOARD AND OVERLAY Vantage Vanguard II Manual 234 LABEL PROMPT H SUN CONTENT PROMPT VH I LIKE Prompts can only be in DECtalk or ScanSoft You cannot record an auditory prompt Audito...

Page 235: ...hear prompts through the device s speaker Auditory Prompts You can also plug stereo headphones into the HEADPHONE jack on the side of the case This allows you but not others to hear the prompts If yo...

Page 236: ...the PROMPT MARKER The prompt will not be displayed on the screen or spoken with the rest of the text in the regular message Category prompts are only used if you are scanning Category prompts should h...

Page 237: ...SSIGN CORE KEYS 2 Select the key on your overlay that contains the label you want to erase 3 Activate the Rename Icon key 4 Activate CLEAR DISPLAY from your spelling overlay to erase the name of the l...

Page 238: ...PERSONALIZE YOUR COMMUNICATION KEYBOARD AND OVERLAY Vantage Vanguard II Manual 238 The Notebook Menu...

Page 239: ...User Area 2 for example Notebooks can also be locked This means that a person can look at a Notebook but cannot change anything or create any new text in it Display Area Color When you are in a Notebo...

Page 240: ...to add any more text to that Notebook The Notebook workspace can hold approximately 30 000 text characters If you activate SAVE NOTEBOOK or shut the device Off the Notebook will be saved Notebooks ca...

Page 241: ...ebook 4 Spell a name for your new Notebook Activate OK Notice that the display screen is now a pale yellow color This tells you that you are in a Notebook If the display were white you would know that...

Page 242: ...PERSONALIZE YOUR COMMUNICATION KEYBOARD AND OVERLAY Vantage Vanguard II Manual 242 The NOTEBOOK MENU...

Page 243: ...you may have entered When you close your Notebook the display area returns to the color white This reminds you that you are no longer using your Notebook To use a Notebook again after you have closed...

Page 244: ...otebook using an Icon sequence Notebooks take up a lot of memory space If you find that you no longer need a Notebook you should delete it Deleting Notebooks that you no longer need also helps to keep...

Page 245: ...e the one you want to rename 5 Delete the old name and type in the new name Select OK 6 The Notebook is now renamed Transfer Notebooks to a Computer Load them back into your Device You can save your N...

Page 246: ...ports have a computer icon next to them and the letter A or B The printer and your device s baud rates must match If necessary you can use the OUTPUT MENU to change your device s baud rate to match th...

Page 247: ...speak Use the SPEAK ALL Tool to speak any open Notebook See pages 195 203 for information on storing and using insertable Tools Lock a Notebook You can lock a Notebook so that other people can look a...

Page 248: ...Manual 248 Copy a Notebook from One Area to Another To Copy a Notebook from One Area to Another Area 1 Open the NOTEBOOK MENU 2 Select the Copy Notebook option 3 Select the Notebook you want to copy...

Page 249: ...low the directions below to store a Notebook under an icon sequence on your overlay 1 Go to the Toolbox and activate STORE CORE 2 Activate the icon sequence you want to use Activate OK 3 Activate DECt...

Page 250: ...PERSONALIZE YOUR COMMUNICATION KEYBOARD AND OVERLAY Vantage Vanguard II Manual 250 The Vantage Vanguard CALCULATOR...

Page 251: ...the display area If you make a mistake activate the CLEAR or BACKSPACE key to clear the last entry Activate the ALL CLEAR key to clear the entire problem and to start over The OK Key The OK key exits...

Page 252: ...PERSONALIZE YOUR COMMUNICATION KEYBOARD AND OVERLAY Vantage Vanguard II Manual 252 FEEDBACK MENU...

Page 253: ...e volume for the speaker or for an earphone You can adjust the intensity of the backlight You can decide whether or not you want to hear a beep when you activate a key You can make several choices whe...

Page 254: ...LIZE YOUR COMMUNICATION KEYBOARD AND OVERLAY Vantage Vanguard II Manual 254 Some FEEDBACK MENU Options Icon Prediction Speaker Volume Text Size Contrast Backlight Intensity Beep Volume Some Feedback O...

Page 255: ...x for more information Activation Beep and Scan Beep The default is On If you do not want to hear a beep activate the OFF key Spell One Word When you are using your spelling screen and decide that you...

Page 256: ...PERSONALIZE YOUR COMMUNICATION KEYBOARD AND OVERLAY Vantage Vanguard II Manual 256 Show by Icon Show Selections by Icon Name...

Page 257: ...ICON which means that you will see the picture that is on the key you activate For example if you choose ICON when you activate the 1icon you will see 1in the icon display area If you choose ICON NAM...

Page 258: ...PERSONALIZE YOUR COMMUNICATION KEYBOARD AND OVERLAY Vantage Vanguard II Manual 258 Activate an icon Icon Message Label on Bottom Icon Message Label On Top Message Labels...

Page 259: ...Activity Row The labels on the core vocabulary icons tell you what the message will be if you activate one of the icons If you open one of the food Activities you can activate icons to name different...

Page 260: ...PERSONALIZE YOUR COMMUNICATION KEYBOARD AND OVERLAY Vantage Vanguard II Manual 260 Embellished Icons On Embellished Icons Off...

Page 261: ...n embellished icon or you can choose to use an icon that is completely different from the original icon An embellished icon is one that has been partially changed from the original Unity icon For exam...

Page 262: ...PERSONALIZE YOUR COMMUNICATION KEYBOARD AND OVERLAY Vantage Vanguard II Manual 262 The numbers in the System Information box may be different on your device...

Page 263: ...of the Tools and enter some of the menus but not all of them To unlock the system open the MAINTENANCE MENU and press OFF in the System Lock box Auto Power Down When this is On the backlight will powe...

Page 264: ...n that you purchase You must have a password to activate this option in the menu Call PRC for more information Enter Shipping Mode If you need to ship your device somewhere always put the device in Sh...

Page 265: ...MORE TOOLS FOR COMMUNICATION Vantage Vanguard II Manual 265 More Tools for Communication...

Page 266: ...MORE TOOLS FOR COMMUNICATION Vantage Vanguard II Manual 266 DECtalk RealSpeak SPEECH MENU...

Page 267: ...oice selection boxes use the Up and Down arrows to step to the voice you want to use Select an Auditory Prompt Voice We recommend that the auditory prompt voice be different from your speaking voice i...

Page 268: ...MORE TOOLS FOR COMMUNICATION Vantage Vanguard II Manual 268 Select an Average Pitch...

Page 269: ...r all or lower over all Each voice defaults to a different pitch level The range is 0 9 The nearer to nine the higher the pitch the nearer to zero the lower the pitch To Change the Pitch of the Voice...

Page 270: ...MORE TOOLS FOR COMMUNICATION Vantage Vanguard II Manual 270 Selecting a Speech Rate...

Page 271: ...DECtalk and RealSpeak 1 Go to the Toolbox 2 Activate SPEECH MENU 3 Select Main or Prompt in the Voice to Modify box 4 Select the voice you want to modify 5 Activate the arrows for Speech Rate until th...

Page 272: ...MORE TOOLS FOR COMMUNICATION Vantage Vanguard II Manual 272 Selecting a Pitch Range...

Page 273: ...ly that they can barely be understood A good pitch range is one where words can be easily understood but are also interesting to listen to The pitch range is from 0 9 0 is a monotone and 9 is extremel...

Page 274: ...MORE TOOLS FOR COMMUNICATION Vantage Vanguard II Manual 274 or or Select icons to use Type in message When you are finished activate Change Voices Within a Message DECtalk speech only...

Page 275: ...The voice code must be entered right before the words that are to be spoken in that particular voice For example you could store the following message using a number of different voices np Papa Bear...

Page 276: ...epeat yourself so that someone listening can understand you better or to get someone s attention SPEAK ALL Speaks all of the text on the display and in the buffer SPEAK SENTENCE Speaks the message tha...

Page 277: ...l 1 Go to the Toolbox Activate STORE 2 Select an icon sequence and activate OK 3 Choose Spell message to Speak Spell in the message Remember to use INSERT TOOL and then WAIT ANY KEY to allow for any p...

Page 278: ...MORE TOOLS FOR COMMUNICATION Vantage Vanguard II Manual 278 DICTIONARY MENU...

Page 279: ...the dictionary you are teaching your device to pronounce it correctly You can review all the words that you have put in the dictionary This can help you decide if you have words that you no longer nee...

Page 280: ...MORE TOOLS FOR COMMUNICATION Vantage Vanguard II Manual 280 Correctly spell the word to be added fajita Spell the word the way you want it to be pronounced Fa hee tuh Add Words to the Dictionary...

Page 281: ...nished spelling the word correctly activate OK 6 Now spell the word the way you want it to be pronounced This means typing the word the way it sounds You may want to try out different spellings until...

Page 282: ...MORE TOOLS FOR COMMUNICATION Vantage Vanguard II Manual 282 Correctly spell the word you want to delete Fajita The word is automatically deleted Delete Words from the Dictionary...

Page 283: ...Dictionary 1 Go to the Toolbox and open the DICTIONARY MENU 2 Activate the Delete a Word key 3 Correctly spell the word you want to delete 4 Activate OK 5 The word is automatically deleted Note If you...

Page 284: ...MORE TOOLS FOR COMMUNICATION Vantage Vanguard II Manual 284 Review the Words in the Dictionary...

Page 285: ...nd delete them To Review Words in the Dictionary 1 Go to the Toolbox and open the DICTIONARY MENU 2 In the Review Method box you can choose to review the words automatically or you can activate a key...

Page 286: ...he letters that you select afterwards will be capital letters The Caps Lock LED in the Control Panel stays lit until you release the CAPS LOCK Tool by activating it again CAPS LOCK is available on the...

Page 287: ...racter to the left of the cursor If your cursor is at the end of a long sentence or paragraph and you want to correct a mistake at the beginning you can activate the CHAR WORD Tool to switch from CHAR...

Page 288: ...have spelled a word onto the display or whether you have placed the cursor next to a word in a message that you have retrieved from storage To pluralize a word position the cursor so that the word you...

Page 289: ...ront of the text that is to be spoken Use the TEXT SPEECH MARKER Tool to end the operation where individual speech and text markers were used in a message An Example of Using Text and Speech Markers S...

Page 290: ...t are on the display screen It also clears any text that has scrolled off screen into the buffer When you type the letters and words eventually move off the text area in order to make room for new let...

Page 291: ...brought up on the display when you activated your last previous selection If the previous selection was a Tool DELETE LAST SELECTION does nothing DELETE ICON This Tool deletes the last icon that you...

Page 292: ...292...

Page 293: ...USING THE TRANSFER MEMROY MENU Vantage Vanguard II Manual 293 Using the TRANSFER MEMORY MENU...

Page 294: ...USING THE TRANSFER MEMROY MENU Vantage Vanguard II Manual 294 The TRANSFER MEMORY MENU...

Page 295: ...low you to save your device s memory You can save the memory in a single area or you can save the entire device memory You can also load saved memory back into your device import graphics and store so...

Page 296: ...USING THE TRANSFER MEMROY MENU Vantage Vanguard II Manual 296 USB Flash Drive Secure Digital Card Examples of a USB Drive and a Secure Digital Card...

Page 297: ...in the small slot above the System Card The side of the card that has the small arrow on it should be face up and the arrow end should slide into the slot first Push it in until it clicks into place...

Page 298: ...name Select the file A dialogue box will appear to tell you when the transfer is complete To load files onto your computer read the directions that came with your SD Card or USB flash drive For an SD...

Page 299: ...want to import or use Select All to select all the graphics icons Select OK 5 You see the graphic and an option to change the name You can also change the Aspect Ratio We suggest you leave this set to...

Page 300: ...as an MTI file and e mails it to you You can load the imported icons from the MTI file into your device without loading all the friend s vocabulary too 1 The MTI file must be on a USB flash drive or...

Page 301: ...Page you want to save 5 Spell a name for the file you are saving 6 The Page is loaded onto your flash drive or SD card as an mti file 7 Activate OK to exit Load a Page 1 Make sure your USB Flash Driv...

Page 302: ...want to save 6 The Notebook is loaded onto your flash drive or SD card as a txt file 7 Activate OK to exit Load a Notebook You must have a Notebook to load on your USB flash drive or Secure Digital ca...

Page 303: ...the drive that has the MTI CD in it 4 Double click on MTI exe The MTI screen is visible on your computer monitor 5 Open the Options menu at the top of the MTI screen Open the Device option and select...

Page 304: ...everything is connected correctly you will see the Memory Transfer in progress on your computer screen and device display 11 The transfer may take awhile When it is finished click OK To Restore a Fil...

Page 305: ...age area in your device You rarely remove the card from your communication aid However your USB drive frequently travels between your device and your computer because you use it to download files from...

Page 306: ...6 When you have finished selecting files select OK 7 Select the destination for the files i e the other storage device 8 If you have a folder on the destination memory device that you want to store t...

Page 307: ...USING THE MP3 PLAYER MENU Vantage Vanguard II Manual 307 Using the MP3 PLAYER MENU...

Page 308: ...USING THE MP3 PLAYER MENU Vantage Vanguard II Manual 308...

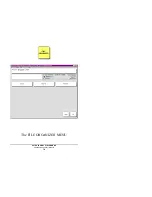
Page 309: ...r a Secure Digital card you can play them on your communication aid Plug the flash drive or secure digital card into your device open the MP3 PLAYER MENU in the Toolbox and select the options you want...

Page 310: ...USING THE MP3 PLAYER MENU Vantage Vanguard II Manual 310 MP3 PLAYER MENU...

Page 311: ...on a flash drive or SD card will repeat 1 repeat the song that is currently playing This song will repeat until you select Stop Next or Previous Play Source AUTO Playlist SD Card USB Disk This tells y...

Page 312: ...USING THE MP3 PLAYER MENU Vantage Vanguard II Manual 312 MP3 PLAYER MENU...

Page 313: ...st have been played You can also pause a song by pressing Play while the song is playing Stop Select this to stop listening to music Previous Next Select Previous to listen to the song before the one...

Page 314: ...r SD card There may be more than one page Check the boxes of the songs you want on your playlist or use Select All Use the arrow keys to arrange the songs in the order you want When you are ready sele...

Page 315: ...Select All to choose all the sound files on the all the pages 7 When you have finished activate OK You see your playlist You may see a message box telling you that a certain song may not play and ask...

Page 316: ...ect OK 12 You see the MP3 PLAYER MENU Underneath the Playlist button you should see Loaded Playlist with the name of your playlist If you have more than one playlist you can select the Playlist option...

Page 317: ...ave a song you are really crazy about at the moment You could store the PLAY FILE tool select the song you want to link to and then activate the key or sequence you used on your overlay to hear the so...

Page 318: ...select the Create Directory button 4 Spell a name for the Directory e g Playlists 5 There is nothing in the Directory yet so select OK 6 Select OK to exit If you have already created playlists that ar...

Page 319: ...rage device At the bottom of the screen select the Create Directory button 4 Select a name for this directory e g MTI Files Activate OK Notice that the display tells you where you are storing your new...

Page 320: ...USING THE MP3 PLAYER MENU Vantage Vanguard II Manual 320 The FILE ORGANIZER MENU...

Page 321: ...e FILE ORGANIZER MENU allows you to do this To Move Files from One Memory Device to Another 1 Make sure your SD card and USB drive are plugged into your communication aid 2 Go to the Toolbox and open...

Page 322: ...USING THE MP3 PLAYER MENU Vantage Vanguard II Manual 322 Import a Sound File and Store it on your Overlay...

Page 323: ...ored as speech This means that they act exactly as if you had recorded and stored them as vocabulary messages For example if you store a 3 minute song under an icon sequence you cannot use your commun...

Page 324: ...a word or phrase associated with it you can keep the word or phrase and store the sound file with it or you can delete the word and just have the sound file If you keep it you might want to add somet...

Page 325: ...USING A REMOTE COTROL Vantage Vanguard II Manual 325 Using a Remote Control When using infrared in a medical environment do not use with any product that is not medically approved...

Page 326: ...USING A REMOTE COTROL Vantage Vanguard II Manual 326 C c...

Page 327: ...w is on the top of your communication aid between the two speaker grilles If you want to teach a remote control signal you point your remote control at this window If you want the send a signal your d...

Page 328: ...USING A REMOTE COTROL Vantage Vanguard II Manual 328 C c Use your Device as a Remote Control...

Page 329: ...ges for a TV Tuner CD Tape VCR Tivo EZ Phone and X 10 You may not need all of these pages or you may want to create your own Your device has already learned signals for the EZ Phone and X 10 modules A...

Page 330: ...USING A REMOTE COTROL Vantage Vanguard II Manual 330 Remote Control Activity Icon...

Page 331: ...and then selecting a page to look at For example activate the TV page On all the remote control pages the column on the left of the display screen contains the keys you will use to go to any other re...

Page 332: ...USING A REMOTE COTROL Vantage Vanguard II Manual 332 Teaching Remote Control Signals to your Device...

Page 333: ...k top of your device Hold the remote control 6 8 away from the IR window Point the infrared area of the remote at your device s IR window and press the function button on the remote for example Power...

Page 334: ...USING A REMOTE COTROL Vantage Vanguard II Manual 334 IR SETUP MENU...

Page 335: ...w 6 On your device activate the Re learn Signal key 7 Press the function key on the remote control e g the Power key 8 If you are near the device you want to be controlled you can test the signal Poin...

Page 336: ...Vantage Vanguard II Manual 336 Select Add a Device Spell the new device name Activate OK Spell the name of the first function you want to use Activate OK Teach the signal to your device Add a Device...

Page 337: ...that you can use them Do you want to create a TV2 page like your other remote control pages Do you want it to be part of your REMOTES activity Or do you want to store the functions under different ic...

Page 338: ...COTROL Vantage Vanguard II Manual 338 Activate CREATE PAGE Spell the name for the new page Select the keyboard size Now begin to define your keys Choose Key to Define page TV2 POWER STOP key Other rem...

Page 339: ...2 POWER to go Remember to link this page with the other Remote pages leave the keys in the far left column blank If you want to add the STOP SIGN do not use the top key in the far right column 5 When...

Page 340: ...USING A REMOTE COTROL Vantage Vanguard II Manual 340 Link the New Remote Page to the other Remote Pages...

Page 341: ...steps until you have linked TV2 to all the Remote Pages 6 Do not exit from your TV2 page Option Add the STOP Sign to Your TV2 Page The stop sign takes you to your Minspeak overlay When you select thi...

Page 342: ...USING A REMOTE COTROL Vantage Vanguard II Manual 342 Select TV2 from the PAGE MENU Add the New Remote Page to the REMOTES Activity...

Page 343: ...ange the icon and label if you wish 7 Activate OK Then activate GO TO MINSPEAK 8 Activate the REMOTES key in the Activity Row to see if your TV2 page is there Try it out To Add TV2 to the Other Remote...

Page 344: ...vate STORE CORE Select an icon sequence and activate OK Select Spell Text for Message Select INSERT TOOL then select IR Select TV2 then select the function you want Select OK Repeat until all the func...

Page 345: ...Activate OK Choose Spell Text for Message Select INSERT TOOL activate More Items until you see IR then select it Select TV2 select Power select OK Modify the last picture and change the label if you...

Page 346: ...USING A REMOTE COTROL Vantage Vanguard II Manual 346 Delete a Device and Rename a Device...

Page 347: ...you change your mind When you delete a device from the IR SETUP MENU you may also want to delete the device page Activate the DELETE PAGE key in the Toolbox Select the device page that you want to del...

Page 348: ...USING A REMOTE COTROL Vantage Vanguard II Manual 348 Add a New Function to an Existing Device...

Page 349: ...the signal 9 Continue to add functions or activate OK to exit the menu Once the function is added to the IR SETUP MENU you must add it to the device page In some cases the function may already be on t...

Page 350: ...USING A REMOTE COTROL Vantage Vanguard II Manual 350 Rename a Function...

Page 351: ...nd open the IR SETUP MENU 2 Use the arrow keys to select the device for the function you want to rename 3 Activate Modify a Device 4 Use the arrow keys to select the function you want to rename 5 Acti...

Page 352: ...USING A REMOTE COTROL Vantage Vanguard II Manual 352 Delete a Function...

Page 353: ...3 Activate Modify a Device 4 Use the arrow keys to select the function you want to delete 5 Activate Delete a Function 6 Activate YES in the yellow box or NO if you change your mind 7 Activate OK You...

Page 354: ...USING A REMOTE COTROL Vantage Vanguard II Manual 354...

Page 355: ...3 Select Modify a Device 4 Select the function to relearn 5 Select Re Learn a Signal 6 Hold the remote control s IR window 6 8 away from your device s IR window and tap the function key on the remote...

Page 356: ...USING A REMOTE COTROL Vantage Vanguard II Manual 356 Type in phone number after the DIAL command Do not delete DIAL Command Just add the phone number...

Page 357: ...e these if you wish 4 Activate the Directory key where you want to store a number 5 You see the Spelling overlay Activate Spell Text for Message DO NOT DELETE the DIAL command that is already in place...

Page 358: ...N OFF BRIGHT DIM ALL LIGHTS ON ALL UNITS OFF 1 4 5 8 E I M 1 9 5 13 3 7 11 15 A C E G I K M O HOUSE UNIT COMMAND CENTER Receiver Appliance Power Module Make sure the two HOUSE codes are the same A Uni...

Page 359: ...all Plug your module into a wall outlet Plug the appliance you want to control into the module Set the House Code to A on the module and the Command Center Select one of the numbers 1 16 to represent...

Page 360: ...360...

Page 361: ...USING A COMPUTER Vantage Vanguard II Manual 361 Using a Computer...

Page 362: ...USING A COMPUTER Vantage Vanguard II Manual 362 Connect to a Computer...

Page 363: ...USB cable to the square port USB on the right side of the case Connect the other end to the USB port on your computer this may be on the front of the computer or in back or both If they are not alrea...

Page 364: ...e using a Serial Cable Connect one end of the battery charger that came with your communication aid to the battery charger port on the left side of the case Plug the other end into a working wall outl...

Page 365: ...vice could be too strong for the IRR to read Either move the devices farther apart or place your communication aid so that its IR window is at an angle to the IRR window Your device is set up to send...

Page 366: ...USING A COMPUTER Vantage Vanguard II Manual 366 1 Open the CHOOSE OVERLAY MENU 2 Activate Load Computer Access Pages 3 You see the following options The Computer Access Overlay Options...

Page 367: ...computer games or educational software There are also word processing overlays for use with a Macintosh computer and an IBM or compatible computer The 8 location and word processing overlays are singl...

Page 368: ...USING A COMPUTER Vantage Vanguard II Manual 368 Load the 8 Location Computer Access Overlay...

Page 369: ...e PAGE MENU For example to load and view the 8 location computer access overlay 1 Open the CHOOSE OVERLAY MENU in the Toolbox 2 Activate the Load Computer Access Pages option 3 Activate the 8 Location...

Page 370: ...USING A COMPUTER Vantage Vanguard II Manual 370 8 Location Computer Access Overlay...

Page 371: ...OUTPUT MENU you can use this overlay When you activate the arrow keys the cursor on the computer will move left right up and down The OOPS key allows you to move the cursor back one space The RETURN...

Page 372: ...USING A COMPUTER Vantage Vanguard II Manual 372 IBM Word Processing Overlay Macintosh Word Processing Overlay...

Page 373: ...ch your document for the same word using the find command When you are finished you can quit the program Both overlays give you access to your communication overlay and your spelling overlay Note When...

Page 374: ...USING A COMPUTER Vantage Vanguard II Manual 374 IBM Desktop Computer Keyboard Page 1 IBM Desktop Computer Mouse Page...

Page 375: ...can use your device to gain access to any application you might have on your computer There are two pages of IBM computer keyboard keys These include the alphabet keys number keys F keys and numeric...

Page 376: ...USING A COMPUTER Vantage Vanguard II Manual 376 Macintosh PST17 Keyboard Page 1 Macintosh PST17 Mouse Menu...

Page 377: ...en you load one of these options you get complete computer access You can use your communication aid to gain access to any application you might have on your computer There are two pages of Macintosh...

Page 378: ...USING A COMPUTER Vantage Vanguard II Manual 378 Select the icon sequence you want to use Store the 8 Location and Word Processing Computer Access Overlays...

Page 379: ...SERIAL ON from the All Tools List this allows your device and the computer to communicate with each other 6 Activate INSERT TOOL 7 Activate SET PAGE from the All Tools List 8 Select the 8LOCCOMP key...

Page 380: ...USING A COMPUTER Vantage Vanguard II Manual 380 Computer Access Icons in Activity Row Computer Access Activity Row 1 Computer Access Activity Row 2...

Page 381: ...keys for your mouse overlay keyboard overlay arrows etc Activate the MORE ITEMS key You see COMP ON and COMP OFF keys In order to send information to the computer activate the COMPUTER ON key before y...

Page 382: ...ce sends all messages to the computer If the your device s speech is ON messages will also be spoken When you have activated COMP OFF no messages are sent to the computer If your device s speech is ON...

Page 383: ...utput is now Off How to Talk When You Are Using the Computer As long you are using your computer and output is On whatever you say will be sent to the computer If your speech is On your device will al...

Page 384: ...USING A COMPUTER Vantage Vanguard II Manual 384 IBM Desktop Keyboard Overlay page 1 Macintosh PST17 Keyboard Overlay page 1...

Page 385: ...the CONTROL key while selecting the Del Char BACKSPACE key will delete a word in some IBM word processing programs If you want to use a modified key command such as the one in the example above you wo...

Page 386: ...USING A COMPUTER Vantage Vanguard II Manual 386 STEP GRID IBM Mouse Overlay PRE SET LOCATION GRID Mac Mouse Overlay Mouse Overlays...

Page 387: ...h small square represents a location on the computer screen When you activate one of these keys the mouse will move to that location on the computer screen The mouse moves automatically to the pre set...

Page 388: ...USING A COMPUTER Vantage Vanguard II Manual 388 IBM Desktop Mouse Overlay Macintosh PST17 Mouse Overlay...

Page 389: ...puter Access Mouse overlay you must re set the mouse If you move the computer s own mouse you must re set the overlay mouse If the keys in the pre set location grid do not move the mouse to the locati...

Page 390: ...USING A COMPUTER Vantage Vanguard II Manual 390 Open the Menu Overlay from the Mouse Overlay IBM Desktop Menu Overlay...

Page 391: ...neath the menu row to move the mouse through a menu These arrows let you move Left 1 Up 1 Right 1 Down 1 and Down 3 Activate the Make Selection key to select an item from a menu This automatically ret...

Page 392: ...USING A COMPUTER Vantage Vanguard II Manual 392 Select a key to modify from a Computer Access Page Select a Key to Modify from a Computer Access Activity Row Modify a Computer Command...

Page 393: ...es exactly as they are written You can change already defined computer commands by using the MODIFY PAGE MENU in the Toolbox 1 Activate MODIFY PAGE MENU 2 Select the computer overlay that you want to...

Page 394: ...OMPUTER Vantage Vanguard II Manual 394 Open MODIFY PAGE menu Activate IBM MOUSE page Activate Button Down key You see the Hold mouse button down command The Use of the SERIAL MARKER Tool in a Computer...

Page 395: ...utton Down to be displayed in the text display area but you don t want this text to go to the computer You want the command itself moulock to go to the computer The CLEAR DISPLAY Tool clears your devi...

Page 396: ...ng Computer Access Pages If you want to delete a single computer access page use the DELETE PAGE MENU If you decide to delete one of the full computer access activities you must also use the MODIFY AC...

Page 397: ...USING A COMPUTER Vantage Vanguard II Manual 397 Infrared Troubleshooting On the following pages...

Page 398: ...USING A COMPUTER Vantage Vanguard II Manual 398 The ADVANCED INFRARED SETUP Menu...

Page 399: ...INFRARED SETUP MENU Vantage or Vanguard II Unit Number 1 The default is Number 1 In multiple device situations you can choose to be Unit 1 2 3 or 4 EZ Phone Unit Number 1 The default is Number 1 In m...

Page 400: ...gning the same unit number to your communication aid the EZ Phone and the IRR The ADVANCED SETTINGS menu allows you to set unit codes for your communication aid and its devices If you are the only per...

Page 401: ...lows you to assign a Unit Number to each device Packet protocol also checks for errors in the infrared communication and screens out infrared information from outside sources This provides for more ac...

Page 402: ...d IRR windows are closer than 18 inches to each other and are directly facing each other the IRR may not be able to read the communication aid s signal Either move the communication aid farther away f...

Page 403: ...USING THE PHONE Vantage Vanguard II Manual 403 Using the Phone...

Page 404: ...USING THE PHONE Vantage Vanguard II Manual 404 Store this tool on a Phone Page Use your Device to Send and Receive Calls...

Page 405: ...xt messaging is included in this option You can purchase the card antenna and or cable from PRC Installation instructions come in the package The latest Vantages and Vanguards will accept the phone ca...

Page 406: ...USING THE PHONE Vantage Vanguard II Manual 406 Phone Configuration Menu...

Page 407: ...ou put the AirCard in your device IMPORTANT NOTE Turn this option OFF when you are in a place where cell phone use is not allowed e g an airplane a theatre certain areas of hospitals etc Band and Set...

Page 408: ...G THE PHONE Vantage Vanguard II Manual 408 Store Phone Numbers All phone functions Send text messages only no dial pad Receive and end calls no dial pad Read text messages only no dial pad New Phone T...

Page 409: ...s receive calls end calls read and send text messages go to your Minspeak overlay configure the phone and clear the display The Phone Dial Pad contains all the separate tools listed below Phone Dial N...

Page 410: ...USING THE PHONE Vantage Vanguard II Manual 410 When you activate Send to make a call you see this icon You also see this icon when the phone is ringing on your device Phone Dial Pad...

Page 411: ...e ready to talk when someone answers 4 When the call has ended activate End on the Dial Pad The Clear button clears the display The Connecting Icon replaces the Wing icon in the Status Display Area wh...

Page 412: ...USING THE PHONE Vantage Vanguard II Manual 412 Gain Out to better hear the person talking to you turn this up Gain In to enable the person on the other end of the line to hear you better turn this up...

Page 413: ...e phone volume so a listener can hear you better and or so you can hear a caller better Activate the Phone Configuration option on the Phone Dial Pad You see the Gain In and Gain Out options Gain Out...

Page 414: ...E PHONE Vantage Vanguard II Manual 414 Send a Text Message Enter phone number Select OK Enter text message You may also use Minspeak Select OK The message is sent and you see the message above Text Me...

Page 415: ...key on the Dial Pad 2 You see the spelling overlay If you have not yet entered a phone number type in the number you want and select OK If your display shows Phone Number Address ignore Address You ca...

Page 416: ...USING THE PHONE Vantage Vanguard II Manual 416 Read Text Messages You have a message You will see all messages Select message to read Reply Delete or Cancel Cancel saves the message Read a Message...

Page 417: ...lay Area To Read a Text Message 1 Select the Text Messages key on the Dial Pad 2 You see a screen that contains all new and saved text messages The buttons display the first few words of the messages...

Page 418: ...el option to make the volume louder or softer Remember that if the volume is too loud you will get feedback noise You can use Minspeak whether the microphone is On or not Using Headphones You can plug...

Page 419: ...APPENDICES Vantage Vanguard II Manual 419 Appendices...

Page 420: ...420...

Page 421: ...IGHT INTENSITY UP BEEP OFF BEEP ON BEEP ON OFF CALCULATOR CALL CANCEL CAPS LOCK CHARACTER WORD CHOOSE ACTIVITY CHOOSE OVERLAY MENU CLEAR DISPLAY CLOCK MENU CLOSE NOTEBOOK CREATE ACTIVITY CREATE PAGE C...

Page 422: ...MARKER SERIAL OFF SERIAL ON SERIAL ON OFF SET ACTIVITY SET PAGE SET PAGE TEMPORARY SETTINGS 1 SETTINGS 2 SETTINGS 3 SETTINGS MENU SETUP KEY SHIFT SING SPEAK ALL SPEAK DATE SPEAK DISPLAY SPEAK LAST SE...

Page 423: ...ws you to assign a Tool in an Activity Row ASSIGN CORE KEY Allows you to assign a Tool or Tools and text to a key on your communication overlay AUDITORY PROMPT MENU Assign the AUDITORY PROMPTS MENU to...

Page 424: ...ws you to select an activity from the Activity Row CHOOSE OVERLAY MENU Lets you select keyboards and overlays CLEAR DISPLAY Removes all text and prompts from the display and text buffer See page 290 C...

Page 425: ...the word or group of letters to the left of the cursor up to the next space or punctuation mark If the character to the left of the cursor is a space DELETE WORD removes the space DICTIONARY MENU Allo...

Page 426: ...lay GO TO TOOLBOX This takes you from the screen you are currently using to the Toolbox screen HELP Press this key plus the Tool or menu that you want help for Once you are in a Help screen you can sc...

Page 427: ...N Store this on your overlay if you would like to keep your device Lesson MAINTENANCE MENU This menu allows you to load software erase the device find out how much memory is left etc MODIFY ACTIVITY A...

Page 428: ...YER MENU This tool gives puts the MP3 player menu on your overlay for easy access MP3 PREV Select Previous to listen to the song before the one currently playing MP3 STOP Select this to stop listening...

Page 429: ...DIAL NUMBER Store under a key or sequence allows you to create a phone book page of frequently called numbers PHONE DIAL PAD This is the phone pad for the phone card option Use this to dial and recei...

Page 430: ...uctions REVIEW VOCABULARY MENU Allows you to review all the vocabulary in your device You can print it out or see it on the display ROLL DICE This tool allows you to play dice games that use from one...

Page 431: ...rial output to its last active setting either Immediate or Delayed Text is automatically sent out the serial port when this is turned On SERIAL ON OFF Toggles between Serial On and Serial Off SET ACTI...

Page 432: ...he text area of the display and in the buffer When you type letters and words will move off the screen in order to make room for new letters and words Words that are no longer on the screen have moved...

Page 433: ...mething you are working on sounds before you store it It is also useful if you are going to give a speech or presentation People seem to understand DECtalk speech better when they hear it one sentence...

Page 434: ...u to swap core vocabulary keys on your communication overlay SWAP PAGE KEYS Allows you to swap keys on any pages you use SWITCH USER AREA Allows you to switch back and forth between User Areas Assign...

Page 435: ...ctivated See page 277 WORD PREDICTION MENU This menu allows you to turn Word Prediction On and Off add words to the word prediction dictionary delete words etc The ARROW KEYS The UP DOWN LEFT and RIGH...

Page 436: ...ou activate the last USER DEFINED key on the far right of the case The key that was pre programmed as the SET UP key 2 Release both keys 3 You will see a cross in the middle of a blank screen 4 With a...

Page 437: ...vice The following songs are pre stored in your device for your use Amazing Grace Joy to the World O Come Little Children Silent Night Away in a Manger My Country Tis of Thee Old MacDonald Mary Had A...

Page 438: ...Overlay Go to the Toolbox Activate STORE Select the icon sequence you want to use Select Spell text for message Activate INSERT TOOL on your Spelling overlay Activate SING Select the song you want to...

Page 439: ...o use Programming songs is not difficult but it is time consuming so plan accordingly Highly Recommended Write down the programming of your song before you begin to program it into your device This me...

Page 440: ...t to program a song by activating the left square bracket This tells your device that you are programming a song Program all songs in STORE mode for DECtalk speech Break the Song into Phrases or Lines...

Page 441: ...se Use a reminder of some kind to tell you to activate the CTRL and k keys when you are actually programming 6 Start the next phrase or line with the left square bracket 7 Continue until you have comp...

Page 442: ...he second C below middle C on a piano 25 corresponds to the note C4 middle C on a piano 37 corresponds to C5 the first C above middle C on a piano The two tables PITCH NOTES AND VALUES and PITCH VALUE...

Page 443: ...t tle la mb MER IY HXAE D AX LIH T TUHL LEYAE M li t tle la mb li t tle la mb LIH T TUHL LEYAE M LIH T TUHL LEYAE M mar y ha d a li t tle la mb MER IY HXAE D AX LIH T TUHL LEYAE M I t s flee ce wa s w...

Page 444: ...o your device using the phonemes you think might work Then listen to them Soon you will develop an idea about which phonemes are going to correspond to which sounds 2 Find the correct PITCH value in t...

Page 445: ...in an octave lower For example the first note in Mary Had a Little Lamb is B above middle C This B has a PITCH value of 36 To assign the correct value in an octave lower go to the PITCH Value Chart an...

Page 446: ...s each note one beat gets divide 4 into 2 5 In this case each note gets 625 milliseconds per beat You can round these numbers up or down so that they are easier to work with e g 600 7 An 1 8 note is h...

Page 447: ...timing of the song Decide how many seconds you want a whole note to be held Then divide the and 1 8 notes accordingly For example If you give a whole note the time of 2 seconds or 2000 milliseconds t...

Page 448: ...MER 300 is easier to work with than 312 and there is no noticeable difference between the length of 300 and 312 When you compare the notes on your sheet music with the notes on the PITCH Charts you s...

Page 449: ...H that leaves us with a TIME value of 50 for T 300 minus 250 equals 50 Its PITCH value is 24 TUHL uses an 1 8 note so it gets a TIME value of 300 and its PITCH value of 24 Now we have MER 300 24 IY 30...

Page 450: ...ing Select the key on your keyboard and then select the CTRL key and the k key You will see a symbol for CTRLk on your display not the letters IMPORTANT When you end a phrase or line of a song with a...

Page 451: ...4 LEYAE 500 24 M 100 24 CTRLk IH 170 24 T 50 24 S 80 24 FLIY 200 22 S 100 22 WAX 200 22 Z 100 22 WAY 220 24 T 80 24 AE 200 22 Z 100 22 SNOW 600 20 Helpful Hints If you have Auto Power Down turned On y...

Page 452: ...te STORE 2 Select the icon sequence you want to use 3 Activate INSERT TOOL 4 Activate TEXT MARKER 5 Type the title of the song 6 Activate INSERT TOOL 7 Activate SPEECH MARKER 8 Activate the left squar...

Page 453: ...oa t aw b ou t oy b oy ax a bou t rr b ir d ay b i te uh b oo k eh b e t uw b oo t ey b a ke yu c u te R Colored Diphthongs ar b ar er b ear ir b eer or b or e ur p oor Syllable Consonants el bott le...

Page 454: ...s s it dh th is sh sh in f f in t t est g g ive th th in hx h ead v v est jh g in w w est k c at z z oo l l et m m et n n et nx si ng dx ri d er wri t er lx be ll rx o r ation tx La t in Chart copied...

Page 455: ...TCH NOTES AND PITCH VALUES C C D D E F F G G A A B C3 C 1 2 3 4 5 6 7 8 9 10 11 12 13 14 D D E F F G G 15 16 17 18 19 20 21 G G A A B C4 C D 20 21 22 2 32 24 25 26 27 BASS CLEF TREBLE CLEF If you sele...

Page 456: ...6 27 D E F F G G A A 28 29 30 31 32 33 34 35 B C5 C D D E F F 36 37 554 5 587 6 62 2 4 659 6 697 8 740 2 G G A A B C6 C 284 4 831 0 880 0 932 4 988 0 104 6 1109 0 PITCH NOTES AND VALUES cont d If you...

Page 457: ...d II Manual 457 PITCH Value Code PITCH NOTE PITCH VALUE OCTAVE RANGE C4 B A A G G F F E D D C C3 B A A G G F F E D D C C2 25 24 23 22 21 20 19 18 17 16 15 14 13 12 11 10 9 8 7 6 5 4 3 2 1 C4 Middle C...

Page 458: ...33 34 35 36 37 555 4 587 6 622 4 659 6 697 8 740 2 784 4 831 0 880 0 932 4 988 0 1046 8 C4 Middle C ONE OCTAVE ABOVE MIDDLE C TWO OCTAVES ABOVE MIDDLE C For two octaves above middle C you must enter P...

Page 459: ...E Values of Notes dotted whole 1 16 note 1 8 note 1 4 note 1 2 note 1 2 note note 1 8 note triplet 1 4 note triplet l pair of pair of 1 4 note note 1 8 notes 1 16 notes 3 3 1 8 rest 1 4 rest half rest...

Page 460: ...0 4500 4800 6000 4000 4800 3430 4000 3000 3430 2610 3000 3600 4500 3000 3600 2570 3000 2250 2570 1960 2250 2400 3000 2000 2400 1715 2000 1500 1715 1300 1500 1800 2250 1500 1800 1285 1500 1125 1285 980...

Page 461: ...70 2000 1430 1670 1200 1430 Less than 1200 1670 1960 1500 1670 1250 1500 1070 1250 900 1070 Less than 900 1110 1300 1000 1110 835 1000 715 835 600 715 Less than 600 835 980 750 835 625 750 535 625 450...

Page 462: ...rter note gets one beat 4 4 for example If the time signature for your music has an 8 for the lower number in the time signature 6 8 for example an eighth note gets one beat so you would double the nu...

Page 463: ...9 3 D 73 4 D 77 5 E 82 Bass 6 F 87 Bass 7 F 92 Bass 8 G 98 Bass Baritone 9 G 103 Baritone 10 A 110 Baritone 11 A 116 Baritone 12 B 123 Baritone 13 C3 130 Baritone Tenor 14 C 138 Baritone Tenor 15 D 14...

Page 464: ...II Manual 464 Use the Guide Below to Decide on a Singing Voice when Programming a Song The chart below may help you to select a voice to use for the song you want to sing BASS Harry BARITONE Rita Denn...

Page 465: ...lternate pronunciation for the word activate the CTRL key and then the SPACE key Type the word you want and add a space after it If you store a word using CTRL SPACE every time you retrieve that word...

Page 466: ...excuse progress torment attribute exploit project transform august export protest transport bass extract read upset close implant rebel use combat import recall wind combine imprint recap wound compa...

Page 467: ...Ave Avenue bldg Building Blvd Boulevard CH Chapter Ch Chapter cm centimeters cms centimeters Co Company COD see oh dee cont continued Corp corporation Ctr center CTRL control cu cubic dec DEC as in Di...

Page 468: ...board fn footnote Fr Father Fri Friday ft feet not foot Ft Fort not Foot Gen General gm grams Gov Governor hrs hours i e eye ee not that is Inc Incorporated Intl international Jan January Jr Junior Ju...

Page 469: ...z ounces ozs ounces Pl Plural pp pages ppd post paid Pres President Rd Road recd received Rep Representative Rev Reverend rsts ris tis rsts e ris tis ee Rte route Sat Saturday Sen Senator Sep Septembe...

Page 470: ...or more DECtalk speech information see the following web site http www forcecomputers com binary images dectalk dtdocuments dectalk_ref_ Producing a Long A in the Middle of a Sentence Usually an A by...

Page 471: ...s are pronounced correctly Examples of Entering Math Problems When you enter math problems they must be spaced correctly for DECtalk speech and your device to pronounce them correctly For example 5 3...

Page 472: ...the following manner for them to be spoken correctly 6 Aug 1990 or 20 Nov 1995 These dates are spoken as August 6 1990 and November 20 1995 Example of Entering a Phone Number Phone numbers must be en...

Page 473: ...e words especially nouns such as names of people or places correctly To teach the correct pronunciation of any word you must enter it phonetically using a specific tag This tag is shown below pron sym...

Page 474: ...Spelling Enter any phonetic word with this tag pron sym phonetic text aa father 1 f aa dh ax r ae cat k ae t ah cut k ah t ao dog d ao g aw foul f aw l ax ago ax 1 g ow ay bite b ay t b big b ih g ch...

Page 475: ...e Phonetic Spelling Enter any phonetic word with this tag pron sym phonetic text ih fill f ih l iy feel f iy l jh joy jh oy k cut k ah t l lid l ih d m mat m ae t n no n ow ng sing s ih ng ow go g ow...

Page 476: ...word with this tag pron sym phonetic text th thin th ih n uh book b uh k uw too t uw v vat v ae t w with w ih dh y yard y aa r d z zap z ae p zh pleasure 1 pleh zh ax r See the next page for a chart...

Page 477: ...1 l ow Hello Question mark Sentence ender h eh 1 l ow Hello _ Underscore Silence h eh 1 l ow _ h aw ao r y uw Hello How are you 1 Primary stress h eh 1 l ow 2 Secondary stress Ax 2 f r ih k ax n ay 1...

Page 478: ...xt i beat s1 b i t ih bit s1 b ih t eh bed s1 b eh d ae map s1 m ae p o go s1 g o q pot s1 p q t aa car s1 k aa ah but s1 b ah t ao bought s1 b ao t uh book B uh k u boot s1 b u t ax about ax s1 b a u...

Page 479: ...on sym phonetic text ao i or oi boy s1 b ao i or s1 b oi a i or ai buy s1 b a i or s1 b ai a uh or au down s1 d a uh n or s1 d au n p pan s1 p ae n t tan s1 t ae n k can s1 k ae n b boy s1 b ao ih d d...

Page 480: ...zone s1 z o uh n zh vision s1 v ih zh ax n h head s1 h eh d j you s1 j u w wit s1 w ih t r ride s1 r a ih d l let s1 l eh t m my s1 m a ih n no s1 n o uh ng song s1 s q ng t sh church s1 t sh er t sh...

Page 481: ...o _ Hello _ underscorequestion mark Sentence ender h eh s1 l o _ Hello _s underscore Silence h eh s1 l o _s h au aa r j u Hello How are you S1 or s1 Primary stress h eh s1 l o Hello S2 or s2 Secondary...

Page 482: ...etic text i beat s1 b i t ih bit s1 b ih t eh bed s1 b eh d ae map s1 m ae p o go s1 g o q pot s1 p q t aa car s1 k aa ah but s1 b ah t ao bought s1 b ao t uh book b uh k u boot s1 b u t ax about ax s...

Page 483: ...t e i or ei bait s1 b e i t or s1 b ei t ao i or oi boy s1 b ao I or s1 b oi a i or ai buy s1 b a i or s1 b ai a uh or au down s1 d a uh n or s1 d au n p pan s1 p ae n t tan s1 t ae n k can s1 k ae n...

Page 484: ...zone s1 z o uh n zh vision s1 v ih zh ax n h head s1 h eh d j you s1 j u w wit s1 w ih t r ride s1 r a ih d l let s1 l eh t m my s1 m a ih n no s1 n o uh ng song s1 s q ng t sh church s1 t sh er t sh...

Page 485: ...s1 l o uh _ Hello _ underscorequestion mark Sentence ender h eh s1 l o uh _ Hello _s underscore Silence h eh s1 l o uh _s h au _ aa r _ j u _ Hello How are you S1 or s1 Primary stress h eh s1 l o uh...

Page 486: ...you think they should be Cardinal Numbers Cardinal numbers up to 15 digits are pronounced as full numbers Numbers with more than 15 digits are pronounced digit by digit For example 2 345 789 is prono...

Page 487: ...ve eight six 011 44 1733 370 470 is pronounced zero one one forty four one seven three three three seven zero four seven zero Entering Math Problems For math problems to be pronounced correctly you mu...

Page 488: ...se four zero zero four Dates Depending on your country dates are read as month day year America or day month year Britain Australia Separate numbers with the date with slashes or hyphens Do not add sp...

Page 489: ...or Drive If it is followed by a capital letter it s pronounced Doctor If not it is pronounced Drive For example Dr Johnson s St is pronounced Doctor Johnson s Street St John s Dr is pronounced Saint...

Page 490: ...adphone connectors must fit into the Headphone Speaker jack on the side of the case To use auditory Prompts and external amplified speakers at the same time you must have a Y adapter to plug into the...

Page 491: ...it whenever you want to switch selection techniques In order to create a macro that includes part of a menu you have to do some homework first You need to know and write down or remember the keys that...

Page 492: ...vate the OK key To Create the Headpointing to Scanning Macro 1 In the Toolbox activate STORE CORE 2 Select the icon sequence you want to store the macro under for example you might use the pointing fi...

Page 493: ...f you are using Row Column scanning the top row of the display screen should be highlighted in red ready for you to scan If you want to return to using your headpointer that is if you want toggle betw...

Page 494: ...ed by an incorrect type Call PRC Service Department before replacing the batteries Warning Use only the battery charger that came with your device Other chargers may damage the batteries of your devic...

Page 495: ...at 6 Conserve Battery Energy For the Vantage The batteries will last 2 hours longer if backlighting is set at 1 instead of 6 This 2 hour difference will happen only when there is no activity on your...

Page 496: ...the display screen See Appendix B for more information If you activate a key or keys and your device makes a raspberry noise A Dynamic Activity is stored under the key s but it is hidden Open the DYN...

Page 497: ...MAINTENANCE MENU This will give you the true memory readings Never immerse your device in water Important Note Do not spray anything directly on the device This will loosen labels and corrode connecto...

Page 498: ...ce s What about Spills Rain Showers Accidental Immersion If you spill liquid or any runny substance on your device if you re caught in a rain shower or if the device is accidentally dropped in liquid...

Page 499: ...tus Area Set the Time and Date in the CLOCK MENU in the Toolbox To Set the Time and Date 1 Go to the Toolbox screen 2 Activate the CLOCK MENU 3 Use the arrow keys to set the correct date and time 4 Ti...

Page 500: ...m In order to accumulate language data to be analyzed Data Logging must be ON in the REVIEW VOCABULARY MENU Your device will then record all language activity data You should also set the CLOCK menu t...

Page 501: ...2 Open the REVIEW VOCABULARY MENU 3 In the Data Logging option select USB Disk or SD Card whichever you are using 4 Select Save Data Log 5 When the log is saved remove the USB device or SD card from y...

Page 502: ...24 SEM put 09 47 28 SEM please 09 47 39 SEM I 09 47 41 SEM eat 09 47 48 SEM I 09 47 49 SEM feel 09 47 58 ACT happy 09 48 15 SEM you 09 48 17 SEM feel 09 48 18 ACT happy 09 48 22 SEM I 09 48 23 SEM wa...

Page 503: ...n non language key activations the client makes PAG Page SEM Semantic Compaction Minspeak and Unity SPE Spelling WPR Word Prediction DWP Derivative from Word Prediction Any characters spaced more than...

Page 504: ...ndividual keys on a PC or Macintosh keyboard Use these names exactly as they are written when you are storing computer commands for the keyboard keys The esc command that begins each key name is creat...

Page 505: ...esc f1 esc f2 esc f3 esc f4 esc f5 esc f6 esc f7 esc f8 esc f9 esc f10 esc f11 esc f12 esc home esc insert esc left esc pagedown esc pageup esc pause esc print esc right esc scroll esc tab esc up esc...

Page 506: ...al 506 IBM Keypad Keys esc kp0 esc kp1 esc kp2 esc kp3 esc kp4 esc kp5 esc kp6 esc kp7 esc kp8 esc kp9 esc kpdel esc kpdown esc kpend esc kpenter esc kpins esc kpleft esc kpminus esc kppgdn esc kpplus...

Page 507: ...esc f4 esc f5 esc f6 esc f7 esc f8 esc f9 esc f10 esc f11 esc f13 esc f14 esc f15 esc help esc home esc insert esc left esc pagedown esc pageup esc pause esc print esc return esc right esc scroll esc...

Page 508: ...sc kp0 esc kp1 esc kp2 esc kp3 esc kp4 esc kp5 esc kp6 esc kp7 esc kp8 esc kp9 esc kpclear esc kpdel esc kpdown esc kpend esc kpenter esc kpequal esc kphome esc kpins esc kpleft esc kpminus esc kppd e...

Page 509: ...button on 2 button mouse esc dblclick Double clicks mouse button on Mac and left button on PC mouse esc dblclick right Double clicks right button on 2 button mouse esc dblclick left Double clicks left...

Page 510: ...ese commands move the mouse cursor a specific distance on the screen The first number is the horizontal movement Horizontal plus numbers move the mouse to the right Horizontal minus numbers move the m...

Page 511: ...ove 0 5 Moves 5 pixels down esc move 0 5 Moves 5 pixels up esc move 10 10 Moves 10 pixels diagonally down and to the right esc move 10 10 Moves 10 pixels diagonally down and to the left esc move 10 10...

Page 512: ...creen the command always uses positive numbers Because GOTO commands always start in the upper left corner you need to use the esc moureset command as the first mouse command This puts the cursor in t...

Page 513: ...er to plug into your device and your joystick The schematic below shows you the adapter specifications You can also call the PRC Rehab Department and ask about the availability of Joystick adapters 33...

Page 514: ...use into the Vantage You can also plug in a computer keyboard but you need an adapter Call the PRC Rehab Department about the availability of keyboard adapters The adapter specifications are below 1 3...

Page 515: ...INDEX Vantage Vanguard II Manual 515 Index...

Page 516: ...516...

Page 517: ...143 Scan 83 Template 179 Temporary 169 Activity Row 23 About 143 161 Scanning 83 Adapters Headphone Speaker 490 Joystick 513 Keyboard 514 Alternate Keyboard 118 Appendix F RealSpeak Speech Tips 489 A...

Page 518: ...5 219 Change Icon 153 173 Change Key Color 153 Change Label 153 173 Change Overlay 51 53 67 Change Overlays 67 Change Recorded Message 173 Character Pacing 186 187 401 Character Word 287 424 Choose Ov...

Page 519: ...291 Dial Number 409 Dial Pad 409 Dictionary Speech 183 285 425 465 Word Prediction 127 135 40 435 Dictionary Menu Speech 279 85 Digitized Speech 145 147 144 51 Direct Selection 73 75 Disinfecting Your...

Page 520: ...Window 17 IR Advanced Settings Menu 399 402 IRR 61 Learning IR Window 31 Remote Control 355 Troubleshooting 399 402 497 Warning 325 Insert Tool 158 195 203 426 Joystick 69 81 83 111 Joystick Adapter 5...

Page 521: ...ion Dictionary 135 40 Minspeak 39 120 23 Modify Activity 173 Modify Page 227 Mounting Plate 31 Mouse 27 29 61 93 118 386 89 504 12 MP3 Files Importing 309 MP3 Player Menu 324 MP3 Player Tools 317 Musi...

Page 522: ...317 Play File 317 Play Playlist 317 Playlist Directory 318 Plurals 288 Power Off 17 32 35 Predictive Selection 113 Print Notebook 246 Printer Using 29 183 246 285 365 Prompts Auditory 235 37 490 QWERT...

Page 523: ...437 Speak All 247 276 432 452 Speak Date 432 Speak display 276 Speak Display 432 Speak Last Selection 276 432 Speak Notebook 239 247 433 Speak Sentence 276 433 Speak Time 433 Speak Word 276 433 Speak...

Page 524: ...ector 27 29 User Area 53 67 231 User Areas 53 Using Insert Tool 195 203 Using Key Coordinates 43 Vocabulary Saving 293 306 Vocabulary Selection 53 57 67 Voice Selecting 267 Volume 255 Beep 255 Device...

Reviews: