128-9364
22 of 28
22
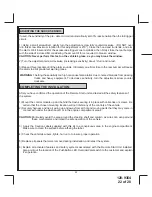
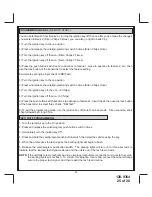
ADJUSTING THE SHOCK SENSOR:
If used, the sensitivity of the pre - detect circuit is automatically set 30% less sensitive than the full trigger
circuit.
1) Using a small screwdriver, gently turn the adjustment screw fully counterclockwise. (DO NOT over
turn this screw. Maximum rotation for this adjustment is 270°). Close the hood and trunk lids, and arm
the alarm. Wait 6 seconds for the accessories trigger zone to stabilize, then firmly strike the rear bumper
with the side of a closed fist considering the amount of force required to break a window.
CAUTION: Never perform this test on the vehicle’s glass, as you may break the window.
2) Turn the adjustment screw clockwise (increasing sensitivity) about ¼ turn and re-test.
3) Repeat this procedure until the alarm sounds. Ultimately, one firm strike to the rear bumper will cause
the alarm to emit pre-detect warning tones.
WARNING !
Setting the sensitivity too high can cause false alarms due to noise vibrations from passing
trucks and heavy equipment. To decrease sensitivity, turn the adjustment screw counter
clockwise.
COMPLETING THE INSTALLATION:
After you have confirmed the operation of the Remote Start unit and tested all the safety features of
the system:
1) Mount the control module up and behind the dash securing it in place with cable ties or screws. Be
certain that the chosen mounting location will not inhibit any of the controls of the vehicle.
2) Securely harness and tie all wiring up and away from all hot and moving parts that they may come in
contact with under the dash board or in the engine compartment areas.
CAUTION:
Particularly avoid the area around the steering shaft and column, as wires can wrap around
these mechanisms and impair the safe operation of the vehicle.
3) Apply the Caution Labels supplied with this kit to a conspicuous area in the engine compartment.
Make sure to clean the surface before affixing the label.
4) Check the vehicle's wipers, lights, horn, etc. to insure proper operation.
5) Replace all panels that were removed during installation, and retest the system.
6) Explain all activated features and safety systems associated with the Remote Start Unit installed.
Also point out the location of the PushButton LED Override/Valet switch to the customer and explain
it's operation.
Summary of Contents for APS-922E
Page 27: ...128 9364 27 of 28 27 NOTES ...


