Prestigio Aero 1214
31
ENG
BIOS Utilities
Overview
This chapter gives a brief introduction to the computer’s built-in software:
Diagnostics: The POST (Power-On Self Test)
Configuration: The PhoenixBIOS Setup Utility
If your computer has never been set up, or you are making important changes to the system (e.g. hard disk setup), then you should
review this chapter first and note the original settings found in the PhoenixBIOS Setup Utility. Even if you are a beginner, keep a
record of the settings you find and any changes you make. This information could be useful if your system ever needs servicing.
There is one general rule: Don’t make any changes unless you are sure of what you are doing. Many of the settings are required by
the system, and changing them could cause it to become unstable or worse. If you have any doubts, consult your service
representative.
BIOS Settings Warning
Incorrect settings can cause your system to malfunction. To correct mistakes, return to Setup and restore the
Setup Defaults with <F9>.
The Power-On Self Test (POST)
Each time you turn on the computer, the system takes a few seconds to conduct a POST, including a quick test of the on-board RAM
(memory). As the POST proceeds, the computer will tell you if there is anything wrong. If there is a problem that prevents the
system from booting, it will display a system summary and prompt you to run the PhoenixBIOS Setup Utility. If there are no
problems, the PhoenixBIOS Setup Utility prompt will disappear and the system will load the operating system. Once that starts, you
can’t get into the PhoenixBIOS Setup Utility without rebooting.
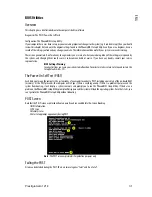
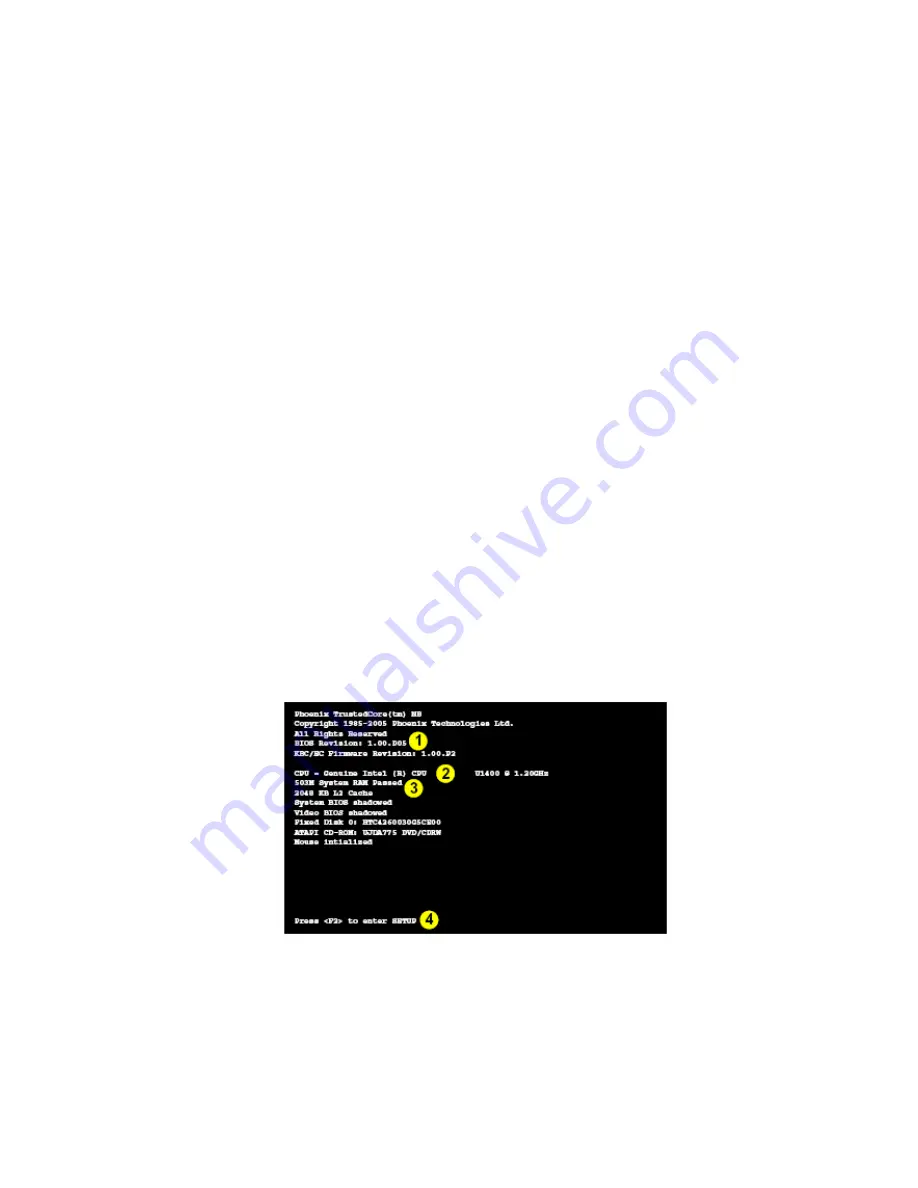
POST Screen
Note that the POST screen as pictured will not appear if you have enabled Intel On-Screen Branding.
1.BIOS information
2.CPU type
3.Memory status
4.Enter Setup prompt appears only during POST
Note:
The POST screen as pictured is for guideline purposes only.
Failing the POST
Errors can be detected during the POST. There are two categories, “fatal” and “non-fatal”.

