Prestigio Nobile 1440W
37
ENG
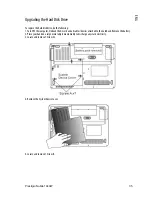
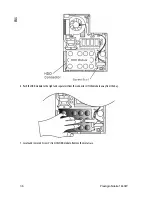
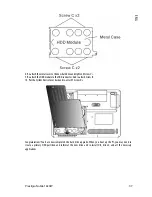
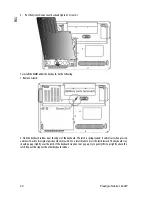
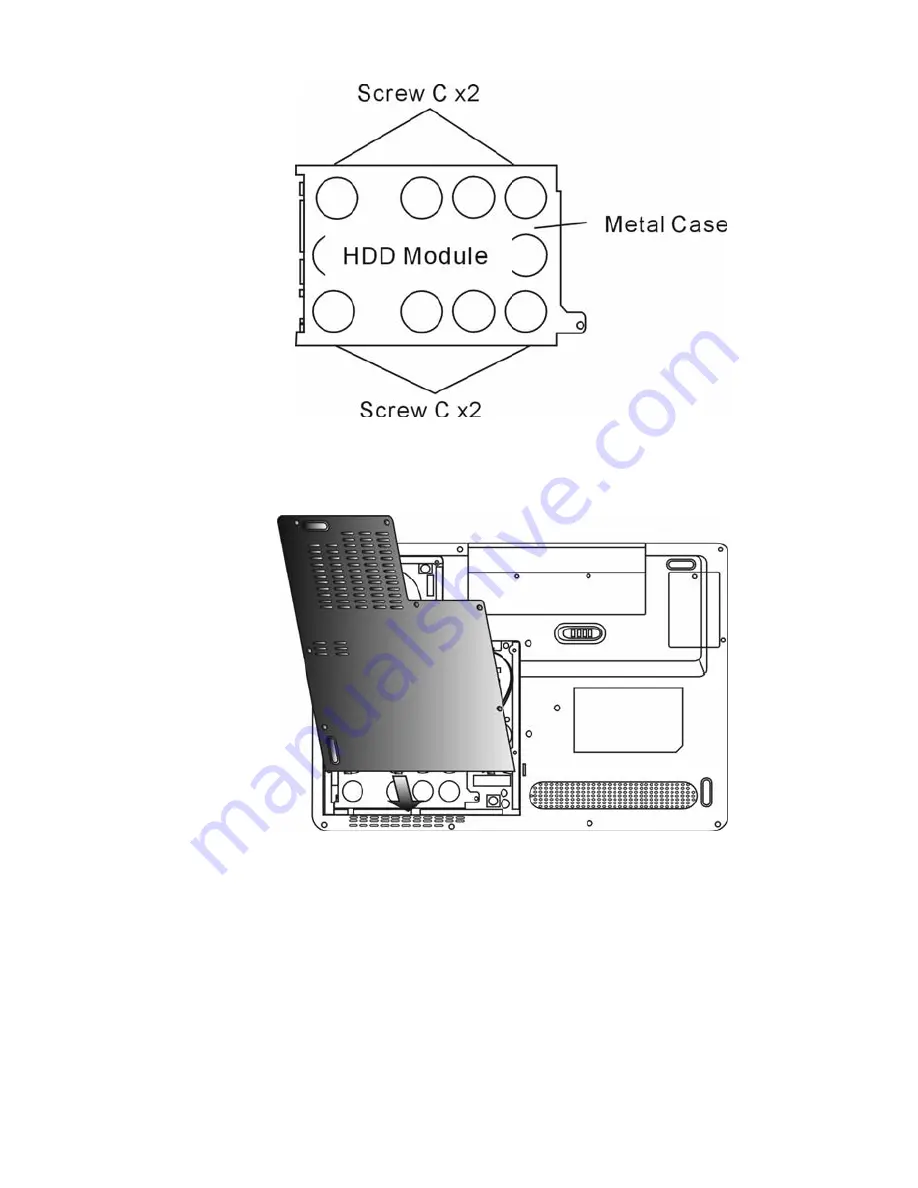
8. Re-attach the metal cover to the new hard drive and tighten 4 Screw C’s.
9. Re-attach the HDD module to the HDD connector. And re-attach Screw B.
10. Put the System Device Cover back and re-attach 7 Screw A’s.
Congratulations! You have now completed the hard drive upgrade. When you boot up the PC, you may need to
create a primary HDD partition and reformat the new drive and re-install O/S, drivers, and all the necessary
applications.
Summary of Contents for Nobile 1440W
Page 1: ...Nobile 1440W...
Page 65: ...6 Prestigio Nobile 1440W 1 2 Instant On WLAN 3 4 5...
Page 67: ...8 Prestigio Nobile 1440W 1 2...
Page 70: ...Prestigio Nobile 1440W 11 1 2...
Page 71: ...12 Prestigio Nobile 1440W 3 DDR 4 5 DVB T DVB T DVB T 1 DC out DC out DC in 2 3...
Page 72: ...Prestigio Nobile 1440W 13 WLAN...
Page 76: ...Prestigio Nobile 1440W 17 1 Fn F8 2 Fn F4 3 4 135...
Page 80: ...Prestigio Nobile 1440W 21 Instant On Instant On Windows F1 Instant On Instant On...
Page 86: ...Prestigio Nobile 1440W 27 BIOS POST F12 CD DVD Hard Drive Network USB Removable Disk...
Page 88: ...Prestigio Nobile 1440W 29 2 6 12 1 2 1 6 16 2 3 4 3 5 0 32 F 60 140F Fn F3 1 2...
Page 89: ...30 Prestigio Nobile 1440W 1 2...
Page 91: ...32 Prestigio Nobile 1440W Always on Max Battery Windows Windows...
Page 93: ...34 Prestigio Nobile 1440W When I close the lid of my portable computer Do nothing...
Page 96: ...Prestigio Nobile 1440W 37 DRAM wireless LAN mini Card DVB T 9 5 mm 2 5 Serial ATA IBM...
Page 97: ...38 Prestigio Nobile 1440W 1 2 3 7 A 4 5 B...
Page 98: ...Prestigio Nobile 1440W 39 6 7 4 C...
Page 99: ...40 Prestigio Nobile 1440W 8 4 C 9 B 10 7 A...
Page 101: ...42 Prestigio Nobile 1440W 5 30 6 30 7 8 7...
Page 102: ...Prestigio Nobile 1440W 43 DIMM 1 D 2...
Page 103: ...44 Prestigio Nobile 1440W 3 DDR DIMM...
Page 104: ...Prestigio Nobile 1440W 45 4 DDR 5 DIMM 30 6 30 7...


