Eng -
4
You can use any wall mount arms manufactured
by an office furniture manufacturer. You should
take into account the following conditions.
• They have to comply with VESA Mount
Interface 75mm standard.
• They have to able to sustain the weight of the
LCD TV.
• They have to be fixed to a position adjustable
by hand.
• They have to be adjustable.
• The distance between the screw holes for fixing
the arms has to be 75mm. Additionally, refer to
the installation manual supplied with the arms
for installation.
• Arm installation procedures Install the arms
following the procedures given below.
1.Remove all cables connected to the LCD TV.
2.Lay the LCD TV face down on a flat surface
with a cushion or some type of soft material
to protect the screen.
3.Using a screwdriver, remove the screws fixing
the stand.
4.Install the steel frame of the arms, insert the
attached screws into the screw holes of the
LCD TV, and then fasten the screws using a
screwdriver.
• Attach the arm to the fixed board first.
• Do not use the handle screws for fixing the
stand and the handle screws to fix the arms.
Use only the screws attached for the arms (M4 x
10 screws with a diameter of 4 mm, and a
length of 10 mm). If you use the stand screws to
fix the arms, the LCD TV may be fall and get
damaged, because the arms are not fixed
completely. To reattach the removed stand, use
the stand screws.
• Attach the arms completely.
If the LCD TV becomes detached from the arms,
it may cause injury or damage the product.
If the LCD TV is somehow detached
accidentally, unplug the power cable from the
wall outlet, and contact your service center.
Damage may cause fire or electric shock.
Using ARM on the Outer Wall
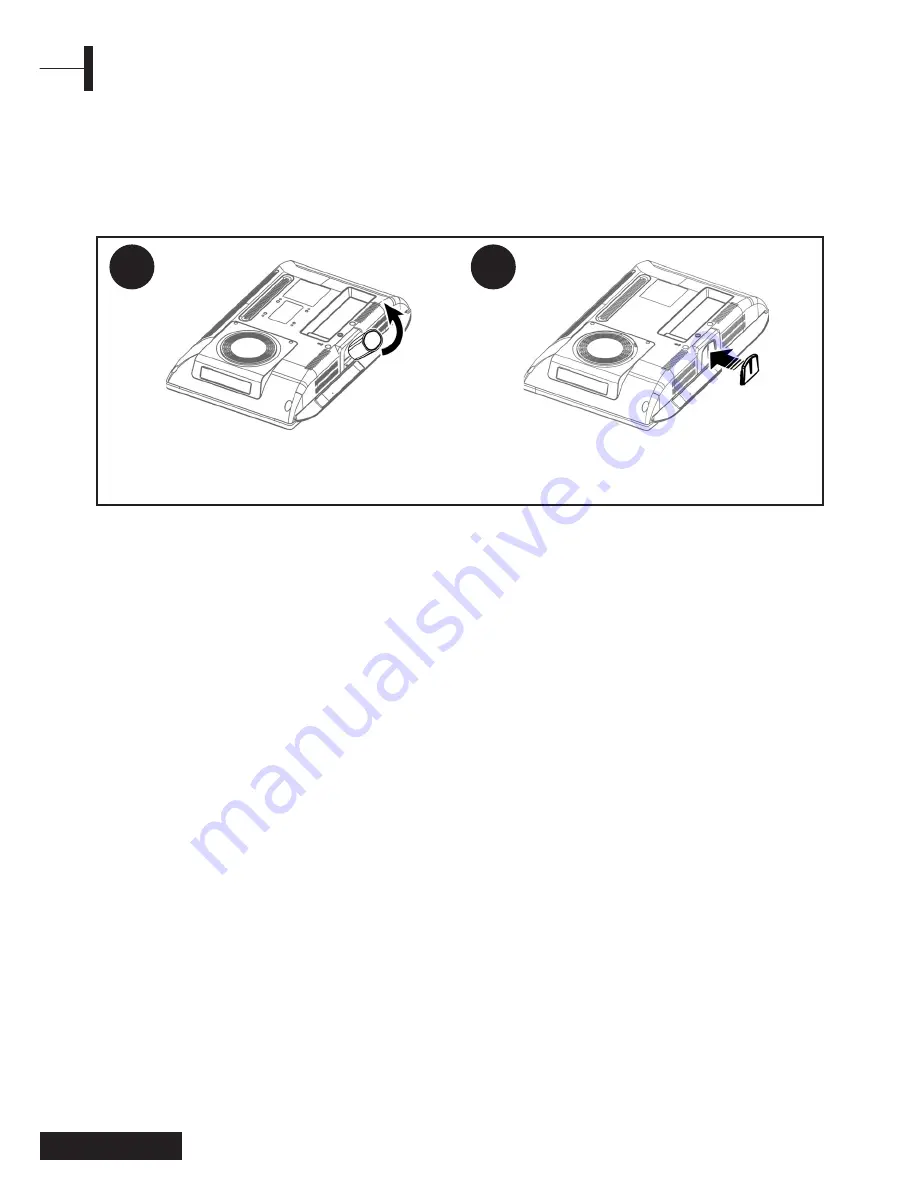
NOTE - Before installing TV wall mount, detach the stand from the TV.
• Place the TV face down on a soft cloth or cushion on a table.
• Install the stand neck cover following the picture below.
• By loosening the screw, take the stand apart.
• Then, separate it from the TV by pulling the
Stand-Neck.
• Following
t
his picture, install the enclosed Neck-
Cover.
Installing the Stand neck-Cover
1
2
Summary of Contents for P7190
Page 53: ...51 Eng English Note ...

