OTHER FEATURES
5-51
PA1628 H3-41, H3-45 Operator’s Manual
WHEELCHAIR LIFT REMOVAL FOR
STORING OR MAINTENANCE PURPOSES
1.
Disconnect connector located at
compartment ceiling.
2.
Remove 4 fixing bolts located inside
compartment, on each side of platform.
3.
Grasp the platform and pull firmly,
sustaining a constant pull so that the
platform slides onto the rails until the
carriage come in contact with the stops.
4.
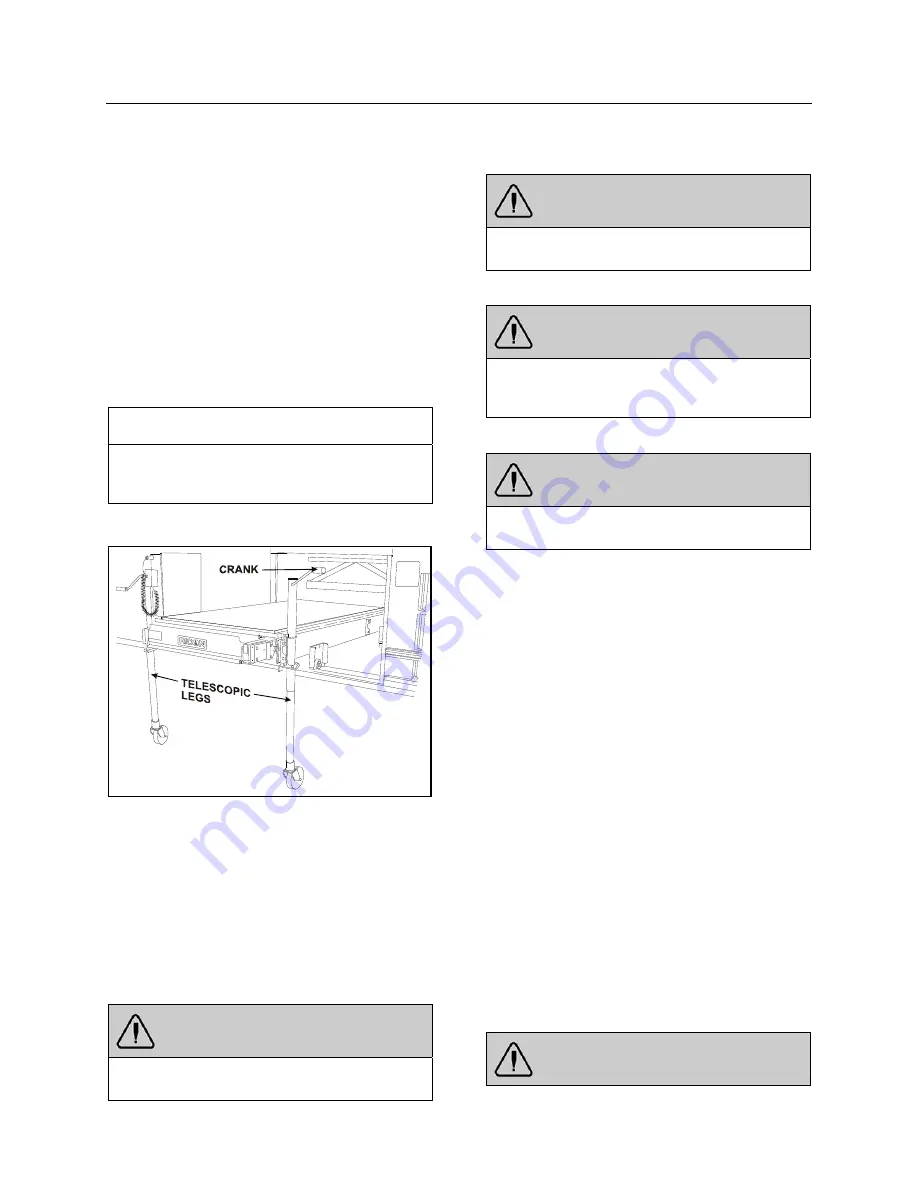
Secure the first two telescopic legs onto
the platform.
NOTE
There are two telescopic legs for each
platform side. The proper side is indicated
onto the telescopic leg.
5.
Turn telescopic leg crank to raise the
carriage to be able to clear the stops.
INSTALLATION OF TELESCOPIC LEGS
23333
6.
Pull the platform until the rear carriage hit
against the stops.
7.
Secure the two rear telescopic legs onto
the platform then turn telescopic leg
crank to be able to clear the stops.
8.
Remove platform completely.
9.
Lower the platform to minimum height
using the telescopic leg cranks before
moving it.
WARNING
For better stability, keep the platform at
minimum height when moving.
WARNING
Never deploy the platform from enclosure
while standing on the telescopic legs.
WARNING
Telescopic legs were designed to support
and move the platform only, do not use as
a work table.
WARNING
Before moving platform, make sure that
floor is level and free of obstacles.
WHEELCHAIR LIFT INSTALLATION
1.
Raise the platform to proper level.
2.
Insert the platform so that the rear
carriage clears the stops.
3.
Turn telescopic leg crank until the carriage
comes in contact with the rails.
4.
Remove the two rear telescopic legs from
the platform.
5.
Insert the platform until the front carriage
clears the stops.
6.
Lower the front of the platform.
7.
Remove the two front telescopic legs
from the platform.
8.
Push firmly and make sure that the
platform manual release shafts have
turned to lock the platform.
9.
Secure the 4 fixing bolts located inside
compartment, on each side of platform.
Apply a torque of 60 lbf-ft.
10.
Reconnect connector located at
compartment ceiling.
WARNING
Summary of Contents for H 2018 Series
Page 1: ...COACH MANUFACTURER OPERATOR S MANUAL H SERIES COACHES PA1628 January 2018 ...
Page 8: ......
Page 10: ......
Page 14: ......
Page 30: ......
Page 114: ......
Page 217: ...TECHNICAL INFORMATION 9 5 PA1628 H3 41 H3 45 Operator s Manual H3 45 OVERALL DIMENSIONS 18525 ...
Page 232: ......
Page 236: ......
Page 256: ......


